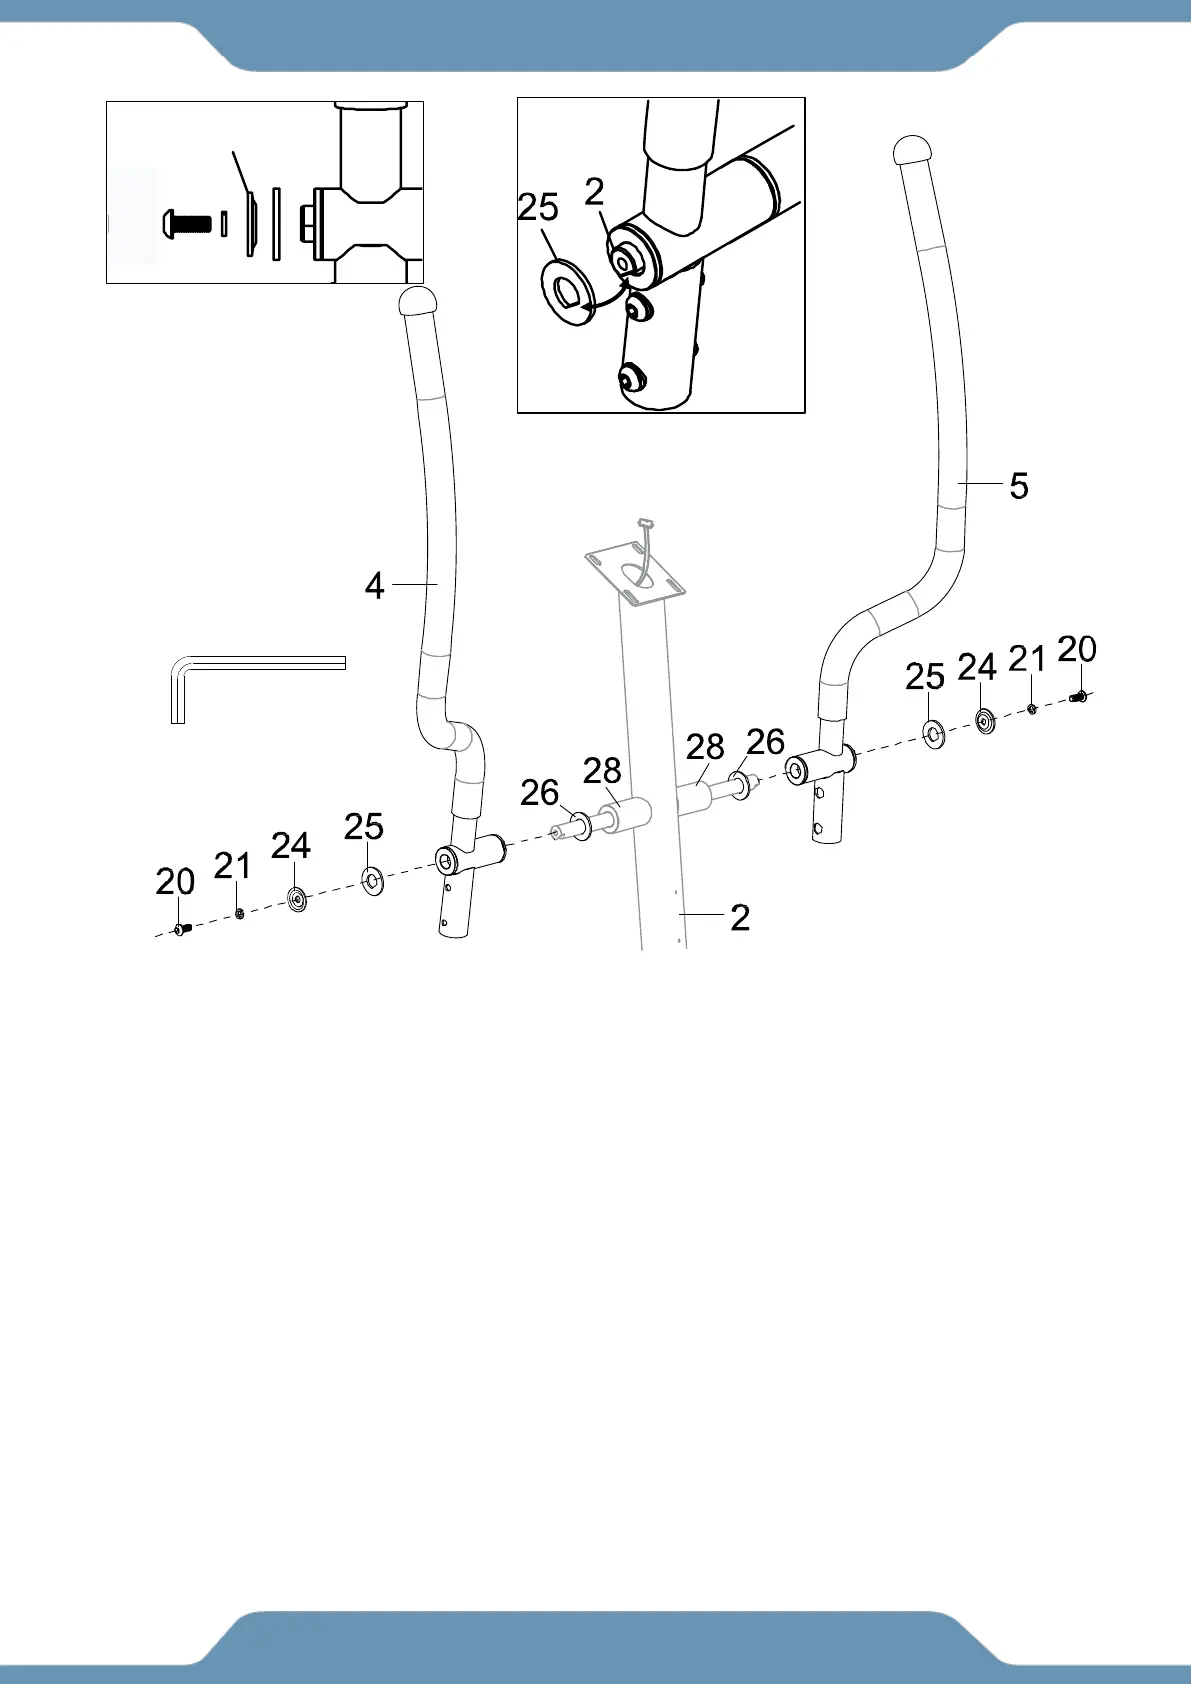
14
STEP 4
Note: The parts are marked with an “R” for right side and “L” for left side.
4a. Removing The Hardware From The Front Post –Use the 6mm Allen Wrench to remove the
two D Washers (25), two Dished Washers (24), two Spring Washers (21) and two Hex Bolts (20)
from the Front Post (2).
4b. Installing the Left Handrail – Keep the Bushing (28) and Wave Washer (26) in place
and slide the Left Handrail (4) onto the left side of the Front Post (2). Insert one D Washer
(25), one Dished Washer (24), one Spring Washer (21) and one Hex Bolt (20) that were
previously removed. Tighten the hardware by using the 6mm Allen Wrench until firm and
secure.
NOTE: The D Washer (25) should be installed as shown in Fig. B so it fits with the D shaped
shaft on the Front Post (2).
NOTE: The Dished Washer (24) should be installed as showing in Fig. C with the open side of
the dish facing away from the Front Post (2).
4c. Installing the Right Handrail – Repeat the same assembly steps for installing the Right
Handrail (5) onto the Front Post (2).