Maintenance
Checktomakesurebrakeisadjustedproperly.This
proceduremustbefollowedaftertherst100hours
orwhenabrakecomponenthasbeenremovedor
replaced.
1.Drivethemachineontoalevelsurface.
2.Disengagethebladecontrolswitch(PTO),move
themotioncontrolleverstotheneutrallocked
positionandengagetheparkingbrake(leverisin
the“up”position).
3.Stoptheengine,waitforallmovingpartstostop,
andremovethekey.
4.Raisethebackofthemachineupandsupportthe
machinewithjackstands.
CAUTION
Raisingthemowerdeckforserviceor
maintenancerelyingsolelyonmechanical
orhydraulicjackscouldbedangerous.The
mechanicalorhydraulicjacksmaynotbe
enoughsupportormaymalfunctionallowing
theunittofall,whichcouldcauseinjury.
DoNotrelysolelyonmechanicalorhydraulic
jacksforsupport.Useadequatejackstands
orequivalentsupport.
5.Removethereartiresfromthemachine.
6.Removeanydebrisfromthebrakearea.
7.Rotatethedrivewheelreleasehandletothe
“released”position.RefertotheDriveWheel
ReleaseValvessectioninOperation.
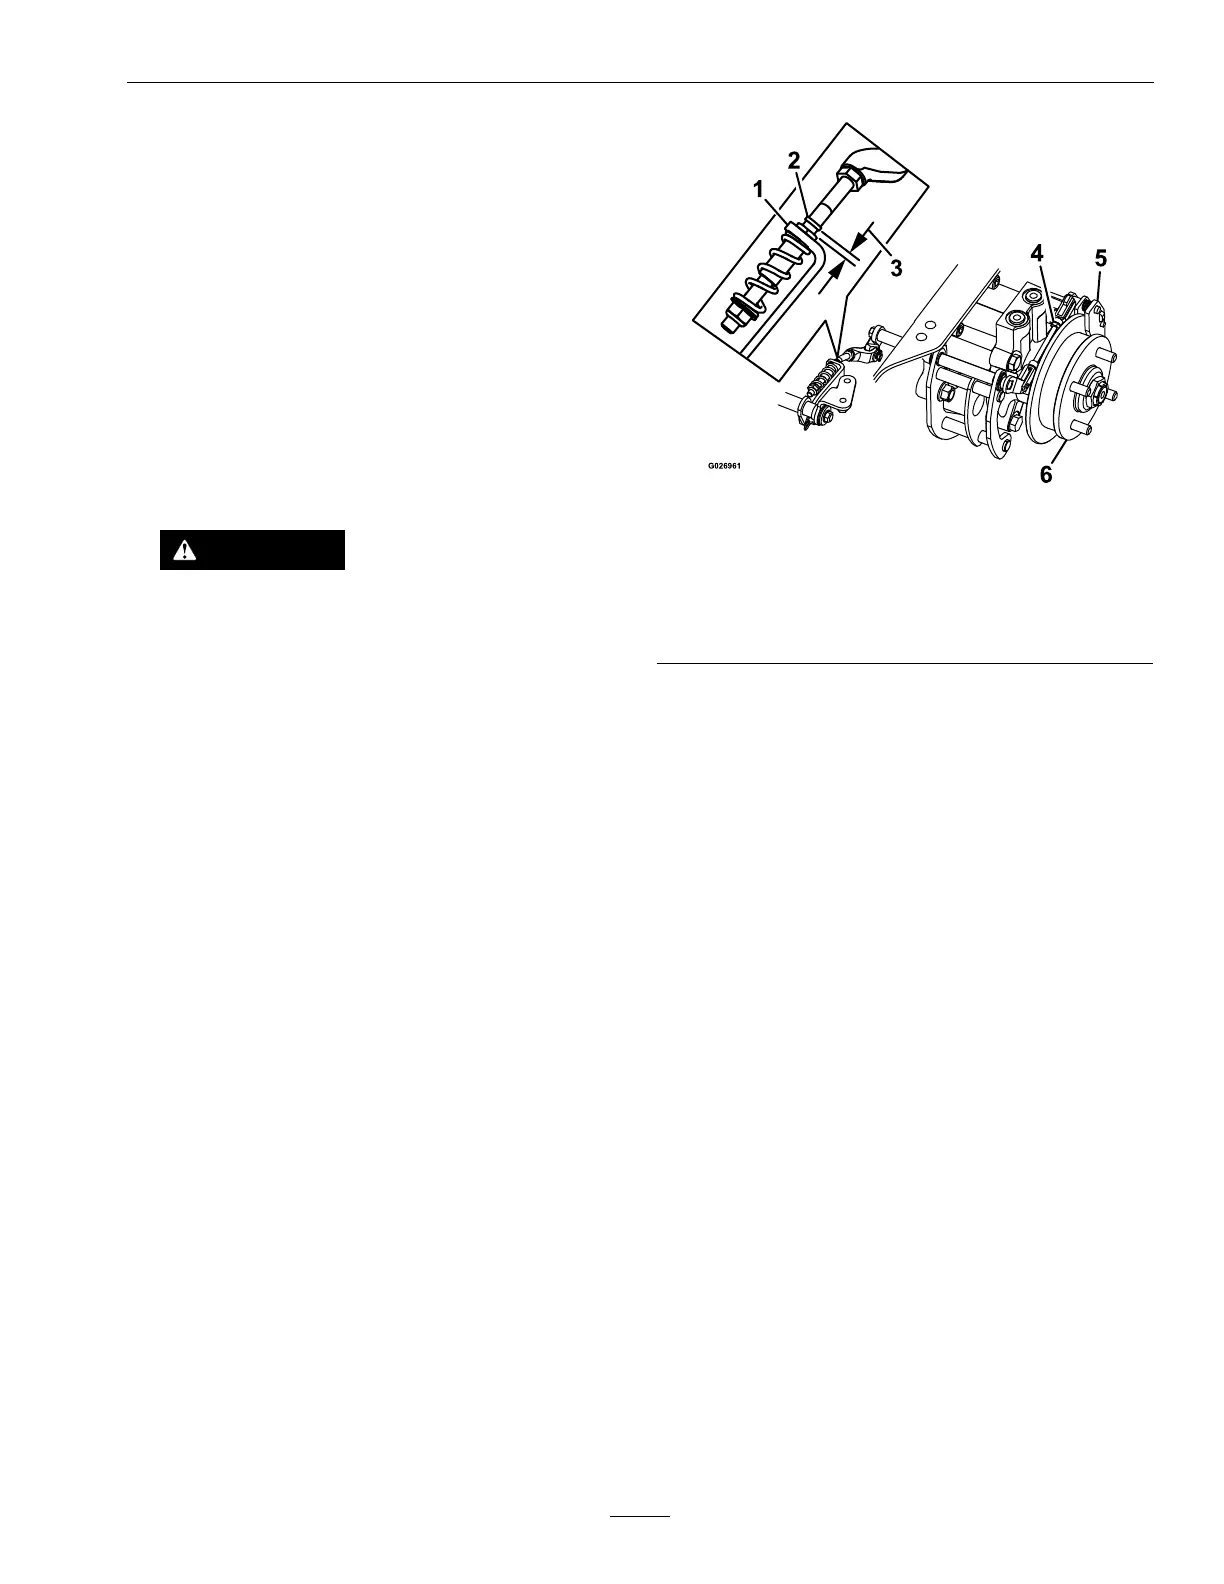
8.Checktoseeifthereisavisiblegapbetweenthe
L-bracketandthelinkagestop(seeFigure42).
Figure42
LeftSideShown
1.L-bracket4.Rearlinkageassembly
2.Linkagestop
5.Caliper
3.Gap
6.Wheelhub
9.Disengagetheparkbrake,thelevershouldbein
thedownposition.Turnthewheelhubbyhand
inbothdirectionsrelativetothecaliper;thewheel
hubshouldmovefreelybetweenthecaliper.
10.Ifagapisneededorthewheelhubdoesnot
movefreely:
A.Disengagetheparkbrake.
B.Disconnectandne-tunetherearlinkage
assembly:
•Shortenthelinktocreateagap.
•Lengthenthelinktoallowwheelhub
movement.
C.Reconnecttherearlinkageassembly.
11.Engagetheparkingbrakeandcheckthegap.
12.Repeatsteps9through12untilavisiblegapis
achievedandthewheelhubrotatesfreely.Repeat
forthebrakeontherightside.
13.Rotatethedrivewheelreleasehandletothe
“operating”position.RefertotheDriveWheel
ReleaseValvessectioninOperation.
14.Installthereartiresandtorquelugnutsto85-105
ft-lb(115-142N-m).
15.Removejackstands.
53