38
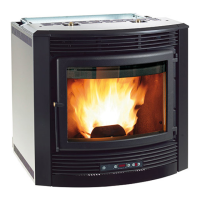
To light the stove, press buttons 3 and 5 at the same time and hold for three seconds (Fig. 21);
the stove automatically enters the lighting stage. This is followed by the start-up phase, which
allows the stove to develop and settle the flame.
When the lighting stage is complete, the stove goes into normal operation. The heat setting can
be adjusted using the buttons 5 and 4, and the room temperature setting can be adjusted using
buttons 2 and 3.
To switch off the stove, press buttons 3 and 5 at the same time and hold for three seconds.
Display D1 will show the message “Off”.
The remote control operates with an MN21 12V battery (the kind used for gate openers).
13. ROOM THERMOSTAT
13.1 Digital thermostat
The stove can control the room temperature by means of a digital thermostat whose function is to
lower the heating power to the minimum when a pre-set temperature is reached.
1. When the stove has been started and has entered normal operating mode, a number
(e.g. 21°C ) appears on display D1 indicating the room temperature.
2. The thermostat can be set using button 2 or 3. A message appears on the display which
alternates the word “Set” with the temperature set each time one of the buttons is
pressed. Pressing 2 decreases the value and pressing 3 increases it.
3. Wait until the message “Set” disappears from the display.
4. Use buttons 4 and 5 to adjust the heat setting as desired.
When the stove reaches the set temperature, it automatically goes to the minimum operating
condition and LED 1 on display D1 goes off.
If you wish to exclude the digital thermostat, use button 3 to set the temperature to the maximum
until “HOT” appears on display D1.
The same functions can be obtained by remote control.
13.2 Mechanical thermostat (optional)
N.B.: Installation must be carried out by an authorized technician.
A thermostat can be placed in a room adjacent to the one in which the stove is installed. Just
connect a mechanical thermostat (like those used for boilers) following the procedure described
below. (We recommend positioning the optional thermostat at a height of 1.50 m above floor
level.)
13.2.1 Installing a mechanical thermostat (optional)
N.B.: Installation must be carried out by an authorized technician.
1. Switch off the appliance using the master switch on the back of the stove.
2. Disconnect the plug from the power outlet.
3. Referring to the electrical wiring diagram, connect the two thermostat wires to the
respective terminals on the back side of the stove, one red and one black.
13.2.2 Mechanical thermostat operation
1. Light the stove using button 1.
2.
Set the desired heating power using buttons 4 and 5.
3. Bring the room temperature to minimum using button 2; the display will show “Low”.