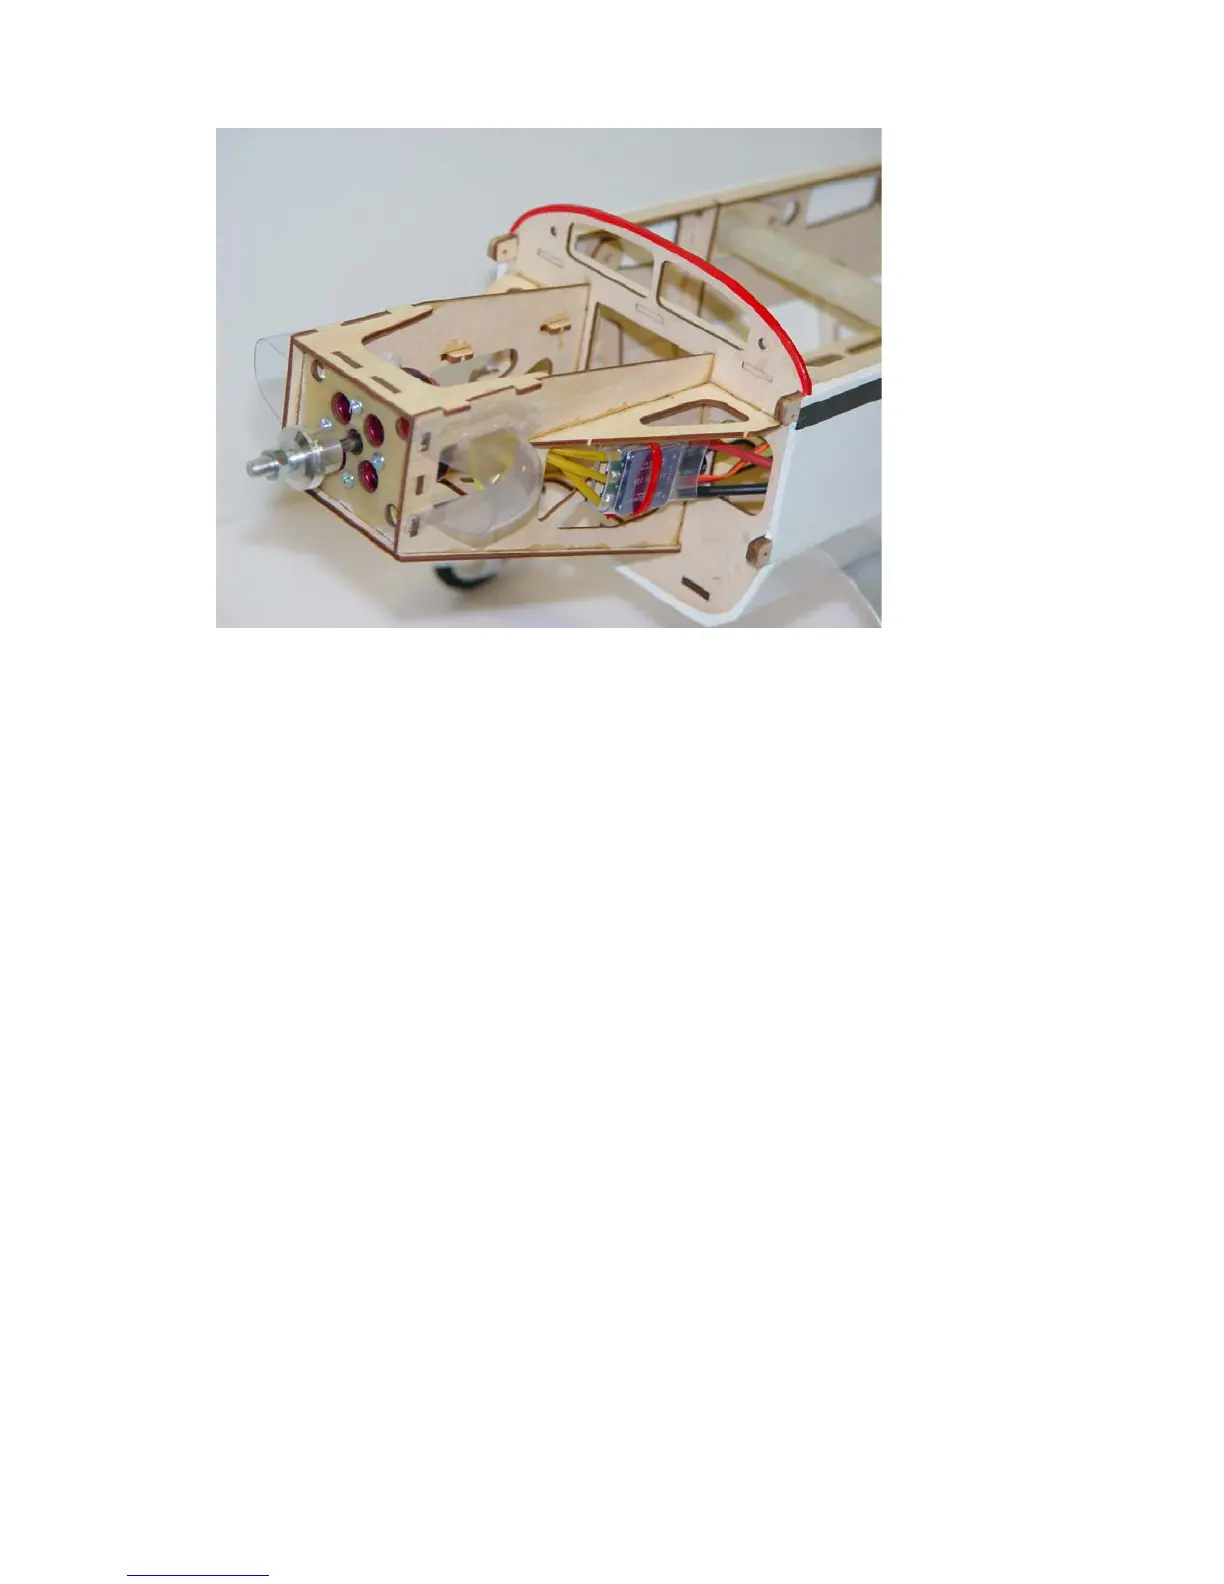
6. Position the canopy/hatch in place and slide the cowl over the first former. Use
your spinner (a 2” spinner is the proper size) on the prop shaft to make sure the
cowl is aligned properly. View the cowl from the side and top view to insure it is
positioned properly. When satisfied, secure the cowl in place with a few pieces of
masking tape. Use a small drill bit to drill through the cowl and into the 4
mounting tabs. Secure the cowl with 4 small wood screws included in the
hardware package. I highly recommend that you soak the cowl mounting tabs
with thin CA before drilling.
7. Locate the horizontal stabilizer. Viewing the bottom of the stabilizer, use a #11
blade to remove the covering from the two notches at the leading edge of the
stabilizer. Also remove the covering from the slot for the horizontal stabilizer in
the fuselage. Slide the stabilizer into place and measure from several angles to
insure that it is square to the fuselage and wing. Sand or shim the slot as needed
to insure proper alignment. Use a fine felt tipped marker to make some reference
marks and remove the stabilizer from the plane. Use a hobby knife to remove the
covering from the stab where it will attach to the fuselage to insure a wood to
wood bond. Be very careful not to score the wood which could potentially
weaken the stabilizer. DO NOT GLUE THE STABILIZER IN PLACE YET!!!!
Locate the elevator halves and the carbon fiber joiner tube. Place the elevator
halves on a flat surface and tack glue the carbon tube in place. Check the
alignment, then mix up some 30 minute epoxy and form a fillet between the
carbon tube and elevator halves. This joint is crucial so take your time here.
8