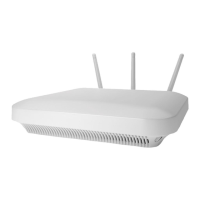
Hardware Installation
AP-8533 Access Point Installation Guide 12
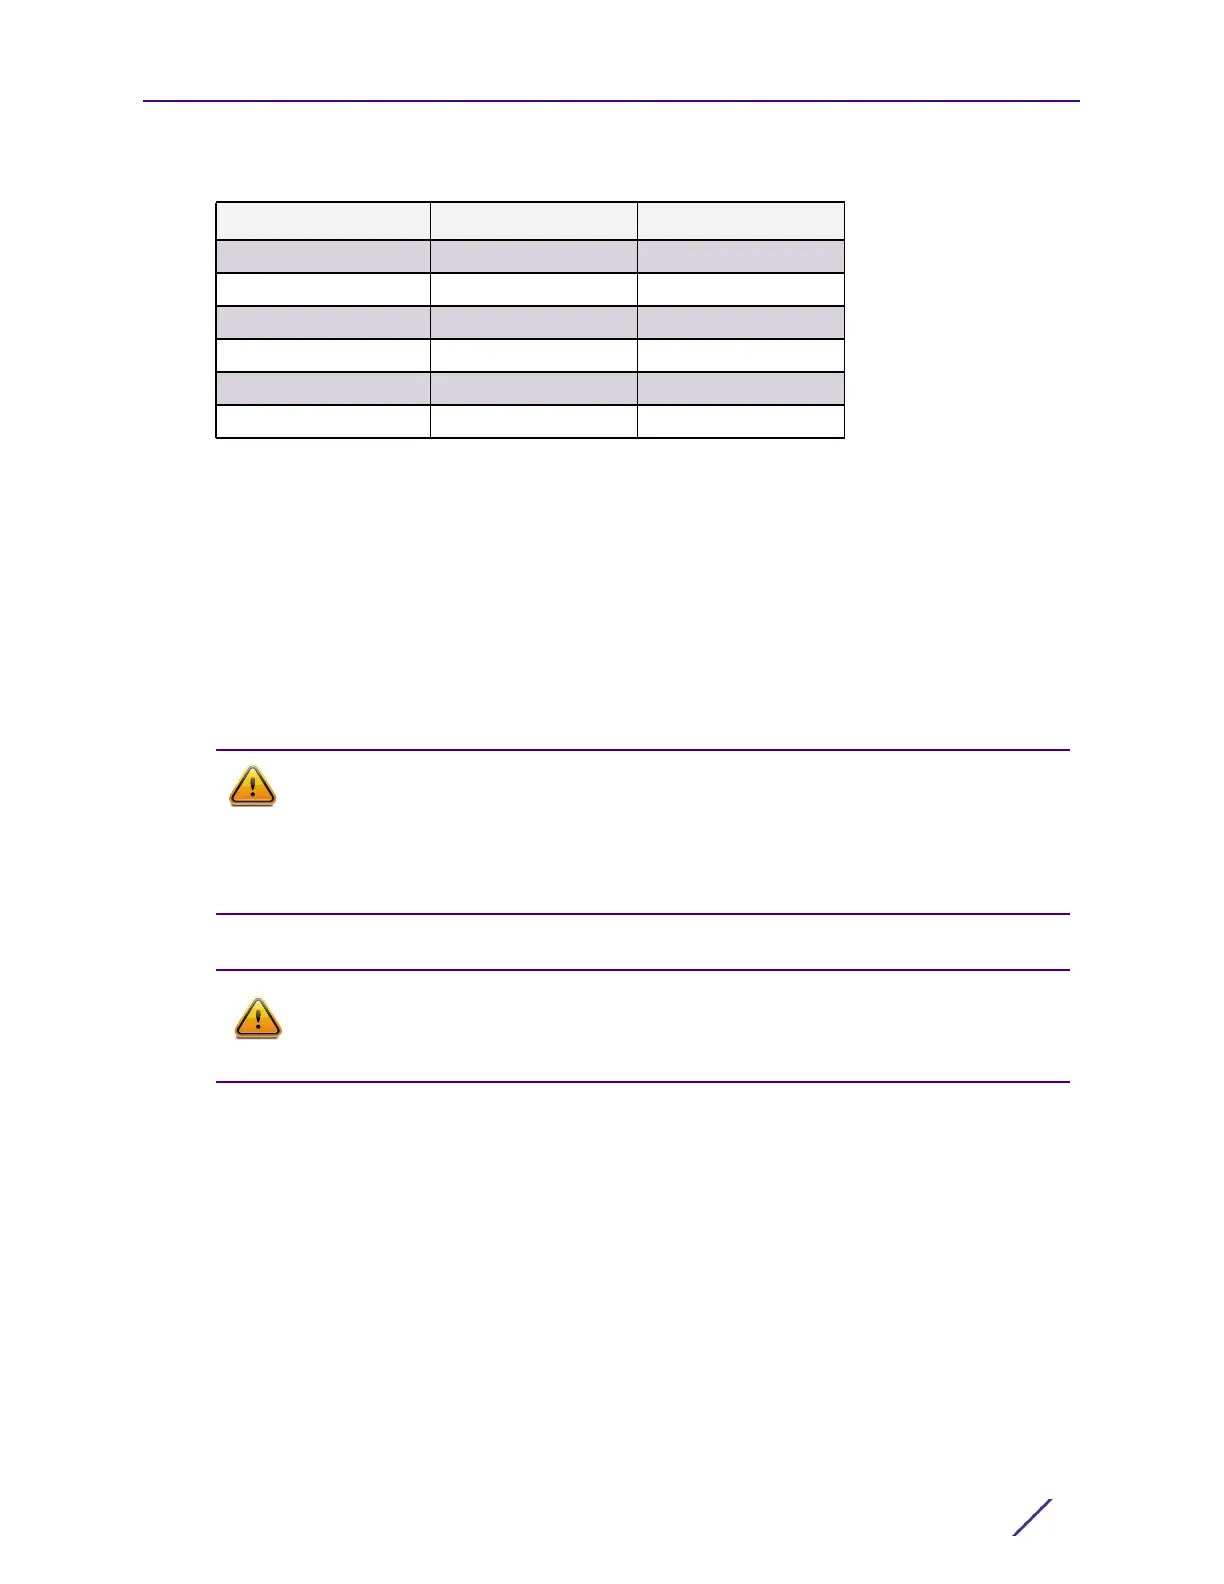
Table 1: AP-8533 Power Management
The Power Injector can be installed free standing, on an even horizontal surface or wall
mounted using the Power Injector's wall mounting key holes.
The following guidelines should be adhered to before cabling the Power Injector to an
Ethernet source and an Access Point:
• Do not block or cover airflow to the Power Injector.
• Keep the Power Injector away from excessive heat, humidity, vibration and dust.
• The Power Injector isn’t a repeater, and does not amplify the Ethernet signal. For optimal
performance, ensure the Power Injector is placed as close as possible to the data port.
To install the Power Injector to an Ethernet data source and an Access Point:
1 Connect the Power Injector to an AC outlet (110VAC to 220VAC).
2 Connect an RJ-45 Ethernet cable between the Power Injector Data & Power Out
connector and the Access Point’s GE1/POE port.
3 Connect an RJ-45 Ethernet cable between the network data supply (host) and the
Power Injector Data In connector.
Ensure the cable length from the Ethernet source (host) to the Power Injector and
Access Point does not exceed 100 meters (333 ft).
The Power Injector has no On/Off power switch. The Injector receives power and is
ready for device connection and operation as soon as AC power is applied. Refer to the
Installation Guide shipped with the Power Injector for a description of the device’s LEDs.
AP-8533 3af 3at
Radio 1 3x3 4x4
Radio 2 2x4 4x4
Radio 3 1x1 3x3
BLE ON ON
GE1 ON ON
GE2 ON ON
CAUTION
To avoid problematic performance and restarts, disable POE from a wired
switch port connected to an Access Point if mid-span power sourcing
equipment (PSE) is used between the two, regardless of the manufacturer of
the switch.
CAUTION
Ensure AC power is supplied to the Power Injector using an AC cable with an
appropriate ground connection approved for the country of operation.

 Loading...