7
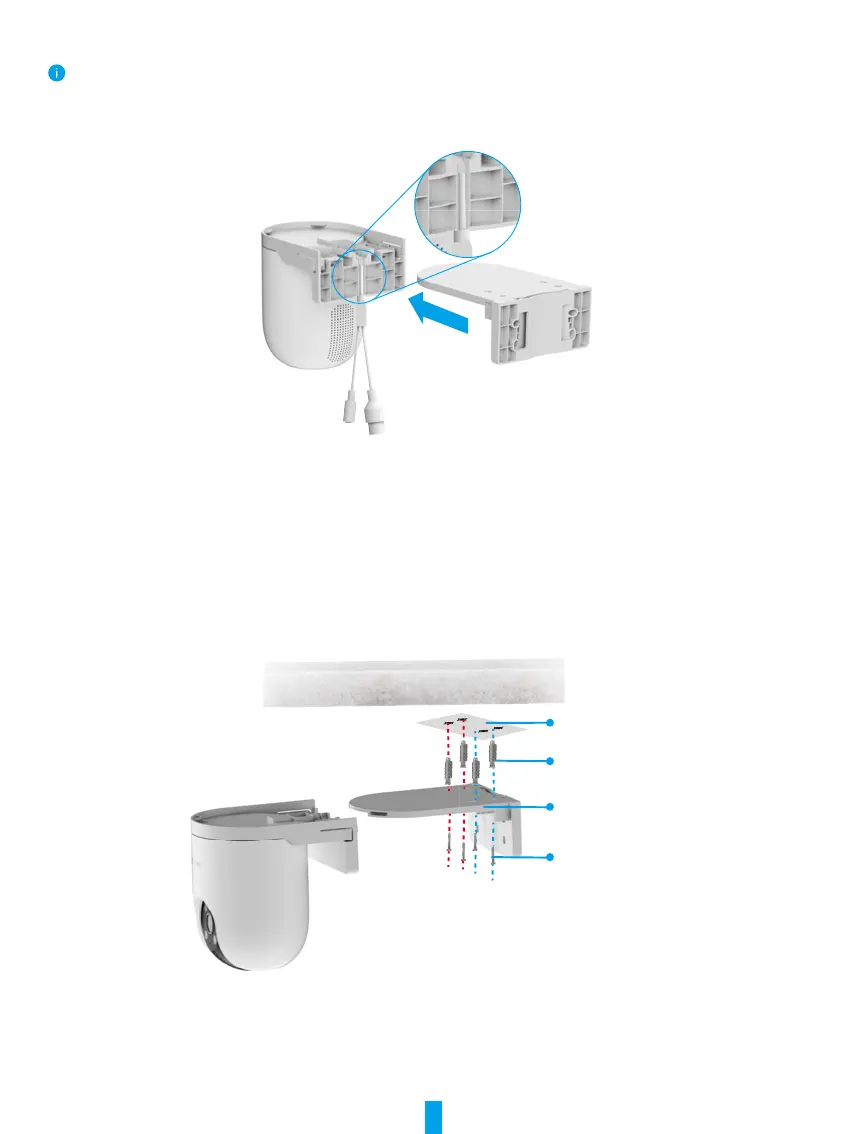
Bracket Assembly
Push the mounting bracket into the mounting slot on the top of the camera and clamp it into the place.
During installation process, please hang the cable clamp at the limit position of the camera to avoid affecting the subsequent installation
of the camera and the mounting bracket.
Ceiling/Wall Mount
1.Removetheprotectivelmfromthelens.
2.Stickthedrillingtemplateontoacleanandatsurface.
3. (For cement wall only) Drill screw holes according to the template, and insert anchors.
4.Usescrews(PA4x25)toxthemountingbracketontheinstallationsurface.
5. Push the camera onto the mounting bracket.
Drilling
Template
Screw
Anchor
Mounting
Bracket
Fig. 1 Ceiling Mount
 Loading...