8
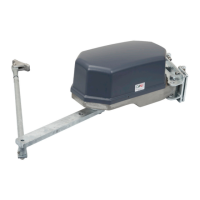
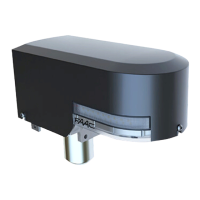
FAAC MODEL 950 BM Door Operator
4. START-UP
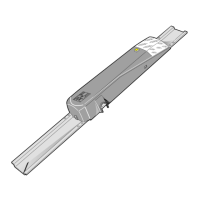
1) Make the electrical connections to the 950 I/O electronic control
unit as described in paragraph 6, and connect the mains power
supplytothespecicterminal(g.1-ref.10)ensuringtocrimpthe
earthwiretothelug(g.1-ref.12)screwedtothesupportprole
(g.1-ref.2).Thentightentheterminal(g.1-ref.13)
To gain access to the control unit, pass the cables through the
specialconduit(g.1-ref.1)orbreaktheknockoutareasonthe
casingsides(g.4-ref.6).
IMPORTANT: When mounting the sliding arm or for opening angles
greater than 90°, turn microswitch no. 2 to ON before connecting
power to the system.
2) Close the door.
3) Power up the operator.
4) Check that the green LEDs LD1 and LD3 on the board 950MPS
light up.
5) Check that the status signalling LEDs on the board 950I/O are
in the default status shown in Table 7 .
NOTE: The default status of the LEDs with the door closed at rest is
shown in bold type.
Table 7: Operation of the status signalling LEDs for 950 I/O board
LED ON OFF
LD1 Accessories power present Accessories power absent
LD2 Card Reader active Card Reader inactive
LD3 Internal sensor active Internal sensor inactive
LD4 External sensor active External sensor inactive
LD5 Emergency inactive Emergency active
LD6 STOP safety device inactive STOP safety device active
LD7 CL safety device inactive CL safety device active
LD8 Key active Key inactive
LD9 Fire-alarm active Fire-alarm active
6) Run a SET-UP cycle as indicated in paragraph 4.1.
4.1. SET UP PROCESS
Once the system is powered up, hold down SW1 button for at least
5 sec., until the LD2 red LED on the 950MPS board lights up. The
LEDwillstartashingtoindicatethatSETUPprocessisinprogress.
During this process the following parameters are set:
- measuringthemassofthedoor;
- determiningthetravelstoppositions;
The door opens at low speed, then closes half way before switching
back to opening.
Subsequent closure is performed by the return spring.
The process may be inhibited in any of the following conditions:
- function selector switch in the 2 (MANUAL/NIGHT) position or KP-
CONTROLLER programming unit in MANUAL or NIGHT position.
- incorrect connection of the accessories (electric lock, control/safety
devices);
- incorrect positioning of the programming unit microswitches.
NOTE: To repeat the initialisation procedure hold down the SW1 button
for more than 5 seconds.
Check that door opens and closes correctly by sending an opening
command to one of the following inputs: Internal Sensor, External
Sensor or Key command. Set the trimmers (par.5.2) and program the
microswitches (par.5.4) according requirements.
5. 950 MPS ELECTRONIC CONTROL UNIT (Fig. 8)
5.1 SETTING THE TRIMMERS
Theprogramming unitfeatures trimmers(g.8) which regulate the
following parameters:
Trimmer TR1 to set the opening speed.
Setting from 4 to 10 seconds.
Trimmer TR2 to set the closing speed.
Setting from 4 to 10 seconds.
Trimmer TR3 to set the pause time (AUTOMATIC logic).
Setting from 0 to 30 seconds.
5.2 SIGNALLING LEDs
LD1 Led = Green LED - electric motor power supply.
LD2 Led = Red LED - indicates SET-UP/Alarm.
LD3 Led = Green LED - 5V power supply.
950MPS ELECTRONIC CONTROL UNIT LAYOUT AND DESCRIPTION
MICROSWITCHES RS-232 CONNECTOR
ADJUSTING TRIMMER
SIGNALLING LED
MOTOR CONNEC-
TOR
40VDC CONNEC-
TOR
Fig. 8

 Loading...