20
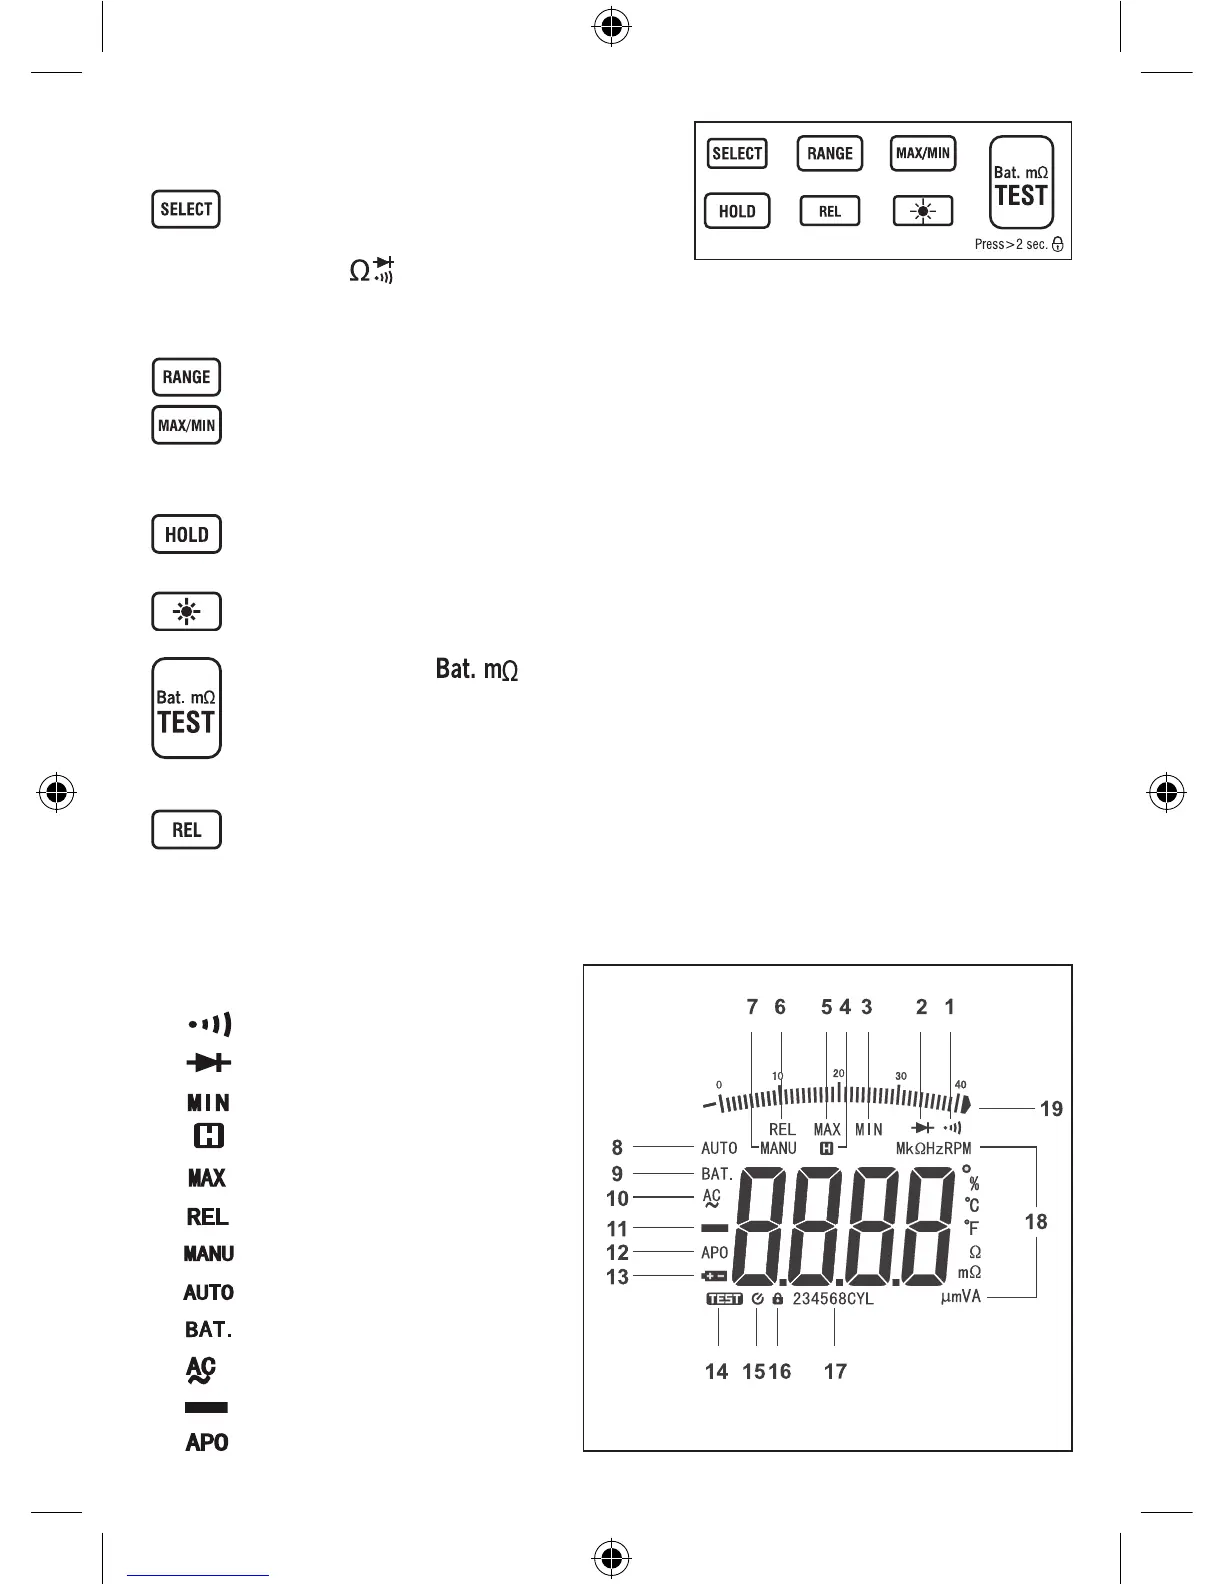
Button Instruction
The meter’s buttons are shown in Figure 3 and described in Table 3.
In voltage or current measurements, you can press this button to
select ac or dc function.
When the rotary switch is in position, you can press this button to
select resistance, diode or continuity measurement.
InRPMordwellanglemeasurements,youcanpressthisbuttontoselectcylindernumberoftheengine.
Changes the meter from autorange mode (default) to manual range mode. Press and hold to return to autorange mode.
Pressthebutton,thedisplayshowsthesymbol«MAX»andthemaximumreading.Pressthebuttonagain,thedisplayshows
thesymbol«MIN»andtheminimumreading.Pressthebuttononcemore,thedisplayshowstheflickering«MAX»and«MIN»alongwith
thepresentreading.Pressandholddownformorethan1secondtoexittheMAXMINmode,thedisplayshowsthepresentreading.
Presstofreezethepresentreading,themeterstaysinDataHoldmode.Pressagaintoreleasethedisplay.InMIN,MAXor
REL mode, this button functions normally. In Data Hold mode, the «REL» and «MAX/MIN» buttons are disabled.
Turns the backlight on and off. The backlight goes off automatically about 1 minute later.
When the rotary switch is in position, you can press this button (named «TEST» button hereafter) to start
or stop measuring vehicle’s battery internal resistance. Pressing this button momentarily to start the measurement causes the
meter to output a test signal for about 60 seconds to measure the vehicle’s battery internal resistance. Pressing and holding
this button for more than 2 seconds to start the measurement causes the meter to output a continuous test signal to measure
the battery internal resistance, the measurement is locked and doesn’t stop until you press this button again.
Press momentarily to enter the Relative mode and store the present reading as a reference for subsequent measurements,
«REL»appearsonthedisplay,thedisplayreadszero.Pressthisbuttonagain,«REL»flickers,andthedisplayshowsthereference.Press
and hold down this button for more than 1 second to exit the Relative mode.
LCD Display
Continuity test is selected.
Diode test is selected.
Minimumreadingisbeingdisplayed.
Data Hold is enabled.
Maximumreadingisbeingdisplayed.
Relative mode is active.
Manualrangemodeisselected.
Autorange mode is selected
The rotary switch is in range position.
AC
Negative sign
Automatic power-off is enabled.
1
2
3
4
5
6
7
8
9
10
11
12