3.6 Press P1, P2 or P3 button to select the require length of the wash (90”, 120’’ or
180” respectively). The appropriate LED (4,6 & 8 on Figure 10) will light up.
3.7 When the cycle has finished, the LED will go off. The door can be opened and
the basket removed. Another basket of crockery can be inserted and button P1, P2 or
P3 pressed for another wash cycle to start. Never place a basket of washed dishes on
top of the machine; water could drip from the basket and damage the machine’s
electrical components.
3.8 The glasswasher drains automatically in each cycle. At the end of each day or
service, or as required, the glasswasher should be completely drained. See details
below:
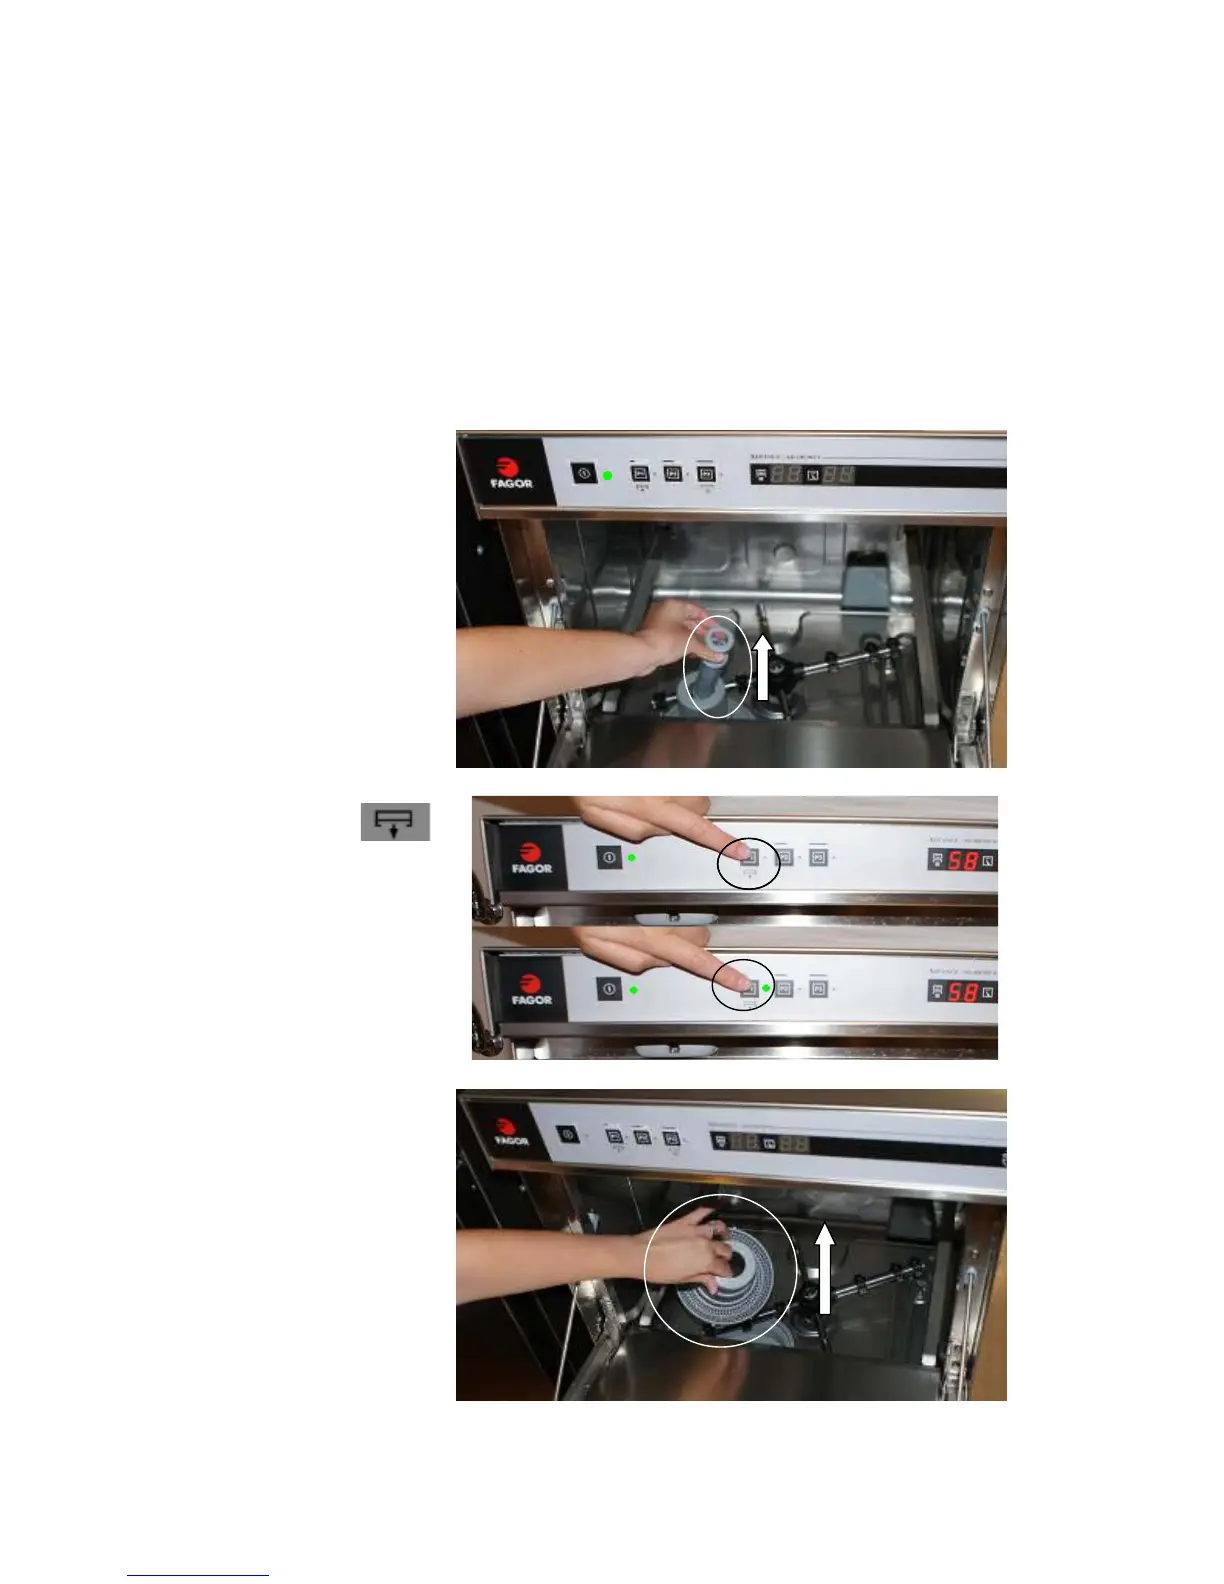
Make sure the machine is
turned on.
1- Remove the upstand
(drain plug) by pulling it up
from inside the filter (See
photo and ‘A’ in Fig. 5).
2- Leave the door open and
press the button P1
for 5 seconds until the
green light flashes.
3- You will hear the pump
start to work and see the
drain out. When the pump
stops making a noise and
the water is drained out,
remove the suction filter (
‘F’ on Fig. 5) by turning it
anti-clockwise and pulling
out. Use soapy water to
clean the filter, ensuring
that all particles are
removed.
4- Replace suction filter and drainplug in machine. The machine is now ready to be
re-used or turned off, as appropriate.
 Loading...