Do you have a question about the Fagor AD-21BDD and is the answer not in the manual?
Ensures the machine works properly by adjusting the supplied threaded bolts (legs) to level it.
Connects the machine to a hot water supply, specifying temperature and pressure requirements.
Step-by-step guide on how to drain the glasswasher completely for service or end-of-day.
Checks for machine power, including plug connection and voltage coincidence.
Checking arm rotation, nozzle blockages, and detergent/rinse aid levels for washing issues.
Details the configuration of DIP switches for the AD 21 BDD model and their impact on cycle times.
Explains how faults are diagnosed using impulse trains from the ON/OFF LED.
Details specific error codes for tank drainage, boiler heating, and tank heating issues.
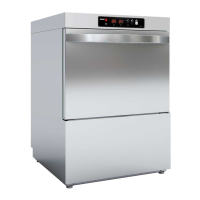
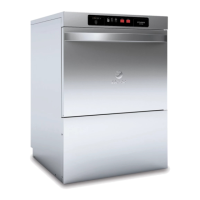
This document provides the instruction manual for the Fagor AD-21BDD glasswasher, a commercial appliance designed for efficient and hygienic washing of crockery, glassware, and cutlery. The machine is equipped with a drain pump and a detergent dispenser, streamlining the dishwashing process in professional settings.
The Fagor AD-21BDD glasswasher is engineered to automate the cleaning and sanitizing of various kitchenware. Its primary function is to wash items using a combination of hot water, detergent, and rinse aid, followed by a high-temperature rinse to ensure hygiene. The integrated drain pump facilitates automatic water evacuation after each cycle, while the detergent dispenser ensures precise and consistent application of cleaning agents. The machine operates through a series of programmed cycles, allowing users to select the appropriate wash duration based on the soil level of the items. A thermostop feature guarantees a minimum rinse temperature, crucial for effective sanitization. The machine is designed for continuous operation, allowing for quick turnaround of clean items.
Operating the Fagor AD-21BDD involves a straightforward process, beginning with proper setup and preparation. Before initial use, the machine must be leveled using its adjustable threaded bolts to ensure stable operation. Connection to a hot water supply (between 50°C and 60°C) is essential for optimal performance, and a pressure limiting valve should be installed if the water pressure exceeds 70 PSI. The drain hose must be correctly fixed with a siphon pipe to prevent odors, and its maximum height should be observed to ensure proper drainage. Electrical connections must be made according to the provided diagrams, and a general switch with a minimum contact distance of 3mm should be fitted. Earthing the machine is a critical safety requirement. For areas with water hardness above 10°F, a water softener is recommended to prevent scale buildup and maintain machine efficiency. A stopcock should also be fitted below the machine's water intake for easy control.
Once installed, the machine is ready for daily operation. The clear hose from the detergent dispenser should be placed into a bottle of liquid, non-foaming detergent, ensuring the filter is fully submerged and the pipe is not kinked. Similarly, the blue hose for the rinse aid dispenser should be placed into a bottle of rinse aid, with its filter fully submerged and the pipe free of kinks.
Before loading, crockery should be prepared by removing large food particles. Glassware should be washed first, and plates should be loaded without stacking. Cups and glasses should be placed upside down. Cutlery should be washed in the yellow cutlery baskets, with handles at the bottom, and each basket should contain a mix of spoons, forks, and knives for optimal cleaning. The cutlery holders should be placed into one of the baskets.
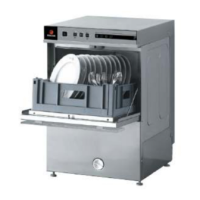
To start a wash cycle, a basket of dirty dishes or cutlery is loaded, and the door is closed. The machine is turned on by pressing the switch button (1 on Figure 10). A pilot light (2) will illuminate, indicating that the boiler and wash tank are filling with water and heating up. The machine is ready for use when the rinse temperature (thermometer 9) reaches 85-90°C and the wash temperature (thermometer 10) reaches 55-60°C. The thermostop ensures that the minimum rinse temperature of 85°C is always met.
Users can select one of three wash cycle lengths: 90 seconds, 120 seconds, or 180 seconds, by pressing the P1, P2, or P3 buttons, respectively. The corresponding LED (4, 6, or 8 on Figure 10) will light up to indicate the selected cycle. Once a cycle is complete, the LED will turn off, and the door can be opened to remove the clean basket. Another basket can then be inserted, and a new cycle started. It is important never to place a basket of washed dishes on top of the machine to prevent water from dripping onto electrical components.
The glasswasher automatically drains in each cycle. At the end of each day or service, or as needed, a complete drain procedure should be performed. This involves ensuring the machine is turned on, then removing the upstand (drain plug) from inside the filter by pulling it up. With the door open, the P1 button is pressed for 5 seconds until a green light flashes. The drain pump will activate, and water will drain out. Once the pump stops, the suction filter ('F' on Figure 5) is removed by turning it anti-clockwise and pulling it out. The filter should be cleaned with soapy water to remove all particles. After cleaning, the suction filter and drain plug are replaced.
Regular maintenance is crucial for the longevity and efficient operation of the Fagor AD-21BDD glasswasher. Daily checks include ensuring sufficient levels of detergent and rinse aid in their respective containers and confirming that the filters on the ends of the pipes are fully submerged. It is also important to check the pipes leading from the containers for any kinks that could impede flow.
Every day, the suction filter ('F' on Figure 5) must be cleaned. This involves removing the anti-overflow device (drain plug) from the middle of the suction filter, then turning the filter anti-clockwise and lifting it up. The filter should be cleaned with soapy water; abrasive detergents should not be used. Additionally, water jets should never be used to clean the outside of the machine.
Users should regularly check that all parts are securely fixed, paying particular attention to the screws on the wash and rinse arms, ensuring they have not worked loose. If the machine is not going to be used for an extended period, its surfaces should be covered with a coating of petroleum jelly to protect them.
In case of operational issues, a troubleshooting guide is provided before contacting technical service. If the machine has no power, users should check if it is plugged in and if the voltage matches the machine's requirements. Any damaged power cord should be replaced by the manufacturer or qualified personnel. If water connection or start-up takes too long, the water supply temperature and drain plug insertion should be verified. For improper rinsing or washing, users should check that the arms rotate correctly and that the nozzles are not blocked. The rinse arm can be removed by unscrewing the thumb screw in the central support with a coin, washed with soapy water, and then repositioned and tightened. Finally, if washing or rinsing is still improper, the levels of rinse aid and detergent should be checked, and supply pipes should be inspected for kinks or air bubbles.
The manual also includes information for technicians regarding DIP switch configurations for cycle times and an error diagnosis system. Faults are indicated by impulse trains from the ON/OFF LED, with different numbers of impulses corresponding to specific errors: one impulse for an open door, two for a tank fill error, three for a tank drainage error, four for a boiler heating error, and five for a tank heating error. This diagnostic system aids in quickly identifying and resolving issues.
| Type | Built-In |
|---|---|
| Place Settings | 12 |
| Energy Star Qualified | Yes |
| Noise Level | 49 dB |
| Half Load Option | Yes |
| Decibel Rating | 49 dB |
| Programs | Eco, Intensive, Normal, Rapid |
| Dimensions (H x W x D) | 820 x 598 x 550 mm |