4
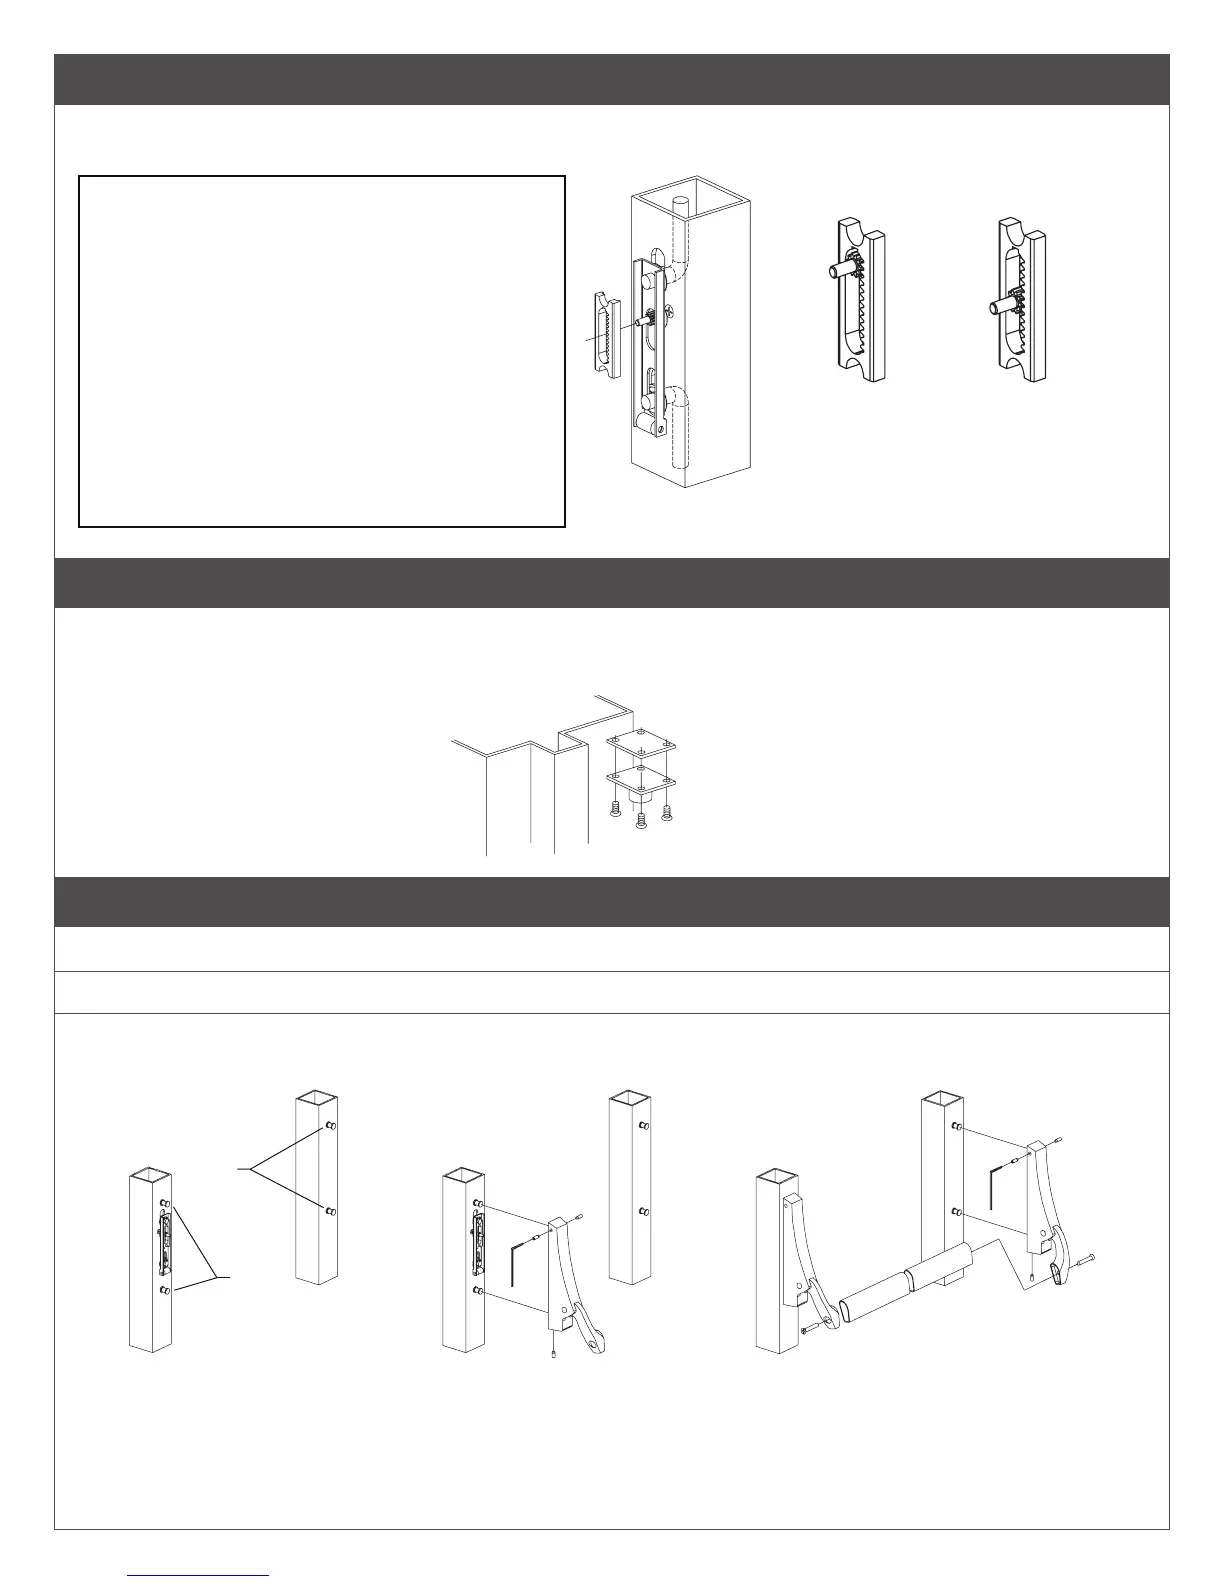
4 Install retractor.
Install retractor over pinion cam (Figure 4-1). Position retractor as shown in Figure 4-2 for holdback (HB) or night latch (NL)
function.
Figure 4-1
Install retractor with teeth to
right as shown for both RHR and
LHR doors; this makes all keys
function in the same direction
Night latch (NL)Hold-back (HB)
Figure 4-2
Hold-back (HB): Turning key one
complete rotation retracts latch bolt. If
key is removed in this position, latch
bolt stays retracted. Returning key to
original position before removing allows
latch bolt to extend.
Night latch (NL) : Turning key as far as it
will go retracts latch bolt. Key must be
returned to original position to be
removed, leaving the door locked.
5 Install top strike.
Install top strike with four #8-32 x 1/4” at head Phillips undercut screws. The top strike is fabricated off center to permit pin
adjustment by rotating the strike 90°. Use strike shims (supplied with strike) as needed to adjust the projection of the strike
pin.
Strike
Shim
6 Install housing mounting studs, housings, and crossbar.
6a Install four housing mounting studs (Figure 6-1).
6b Install lock stile housing over mounting studs and secure with set screws (Figure 6-2). Test operation.
6c Install crossbar and hinge stile housing (Figure 6-3). Secure housing with set screws. Secure crossbar with
two 1/4-20 x 1” Taptite screws.
Figure 6-1
Figure 6-2
Figure 6-3
Studs
Studs