15
Section 2: Setup
2.1 Initial Setup
1. Plug the Power Cord into the rear of the Falex 400.
2. Plug the power cord (120V, 60Hz, 220V, 50/60Hz)
into an appropriate outlet. Electrical source must have
a good ground or an isolated power withground.
3. Connect the keyboard to one of the USB ports on the
back of the machine.
4. If the machine was shipped with a printer, the user
interface is already configured for the printer. If the
machine was not shipped with a printer and a printer
is to be configured, refer to section 5.0 for printer
configuration details.
5. Turn the unit on (by the rocker switch on the front of
the unit) and allow to warm up for 15 minutes prior to
use.
6. The Falex 400 is shipped with a charcoal filter
located in the beaker stand. Remove the shipping
filter by sliding the filter out of the opening on the left
side of the beaker stand and replace with a new filter.
It is recommended that this filter be replaced every 2
weeks to 1 month depending on usage. See section
6.1 for charcoal filter replacement instructions.
2.2 Sample Area And Fuel Preparation
Setup will take approximately 20 min.
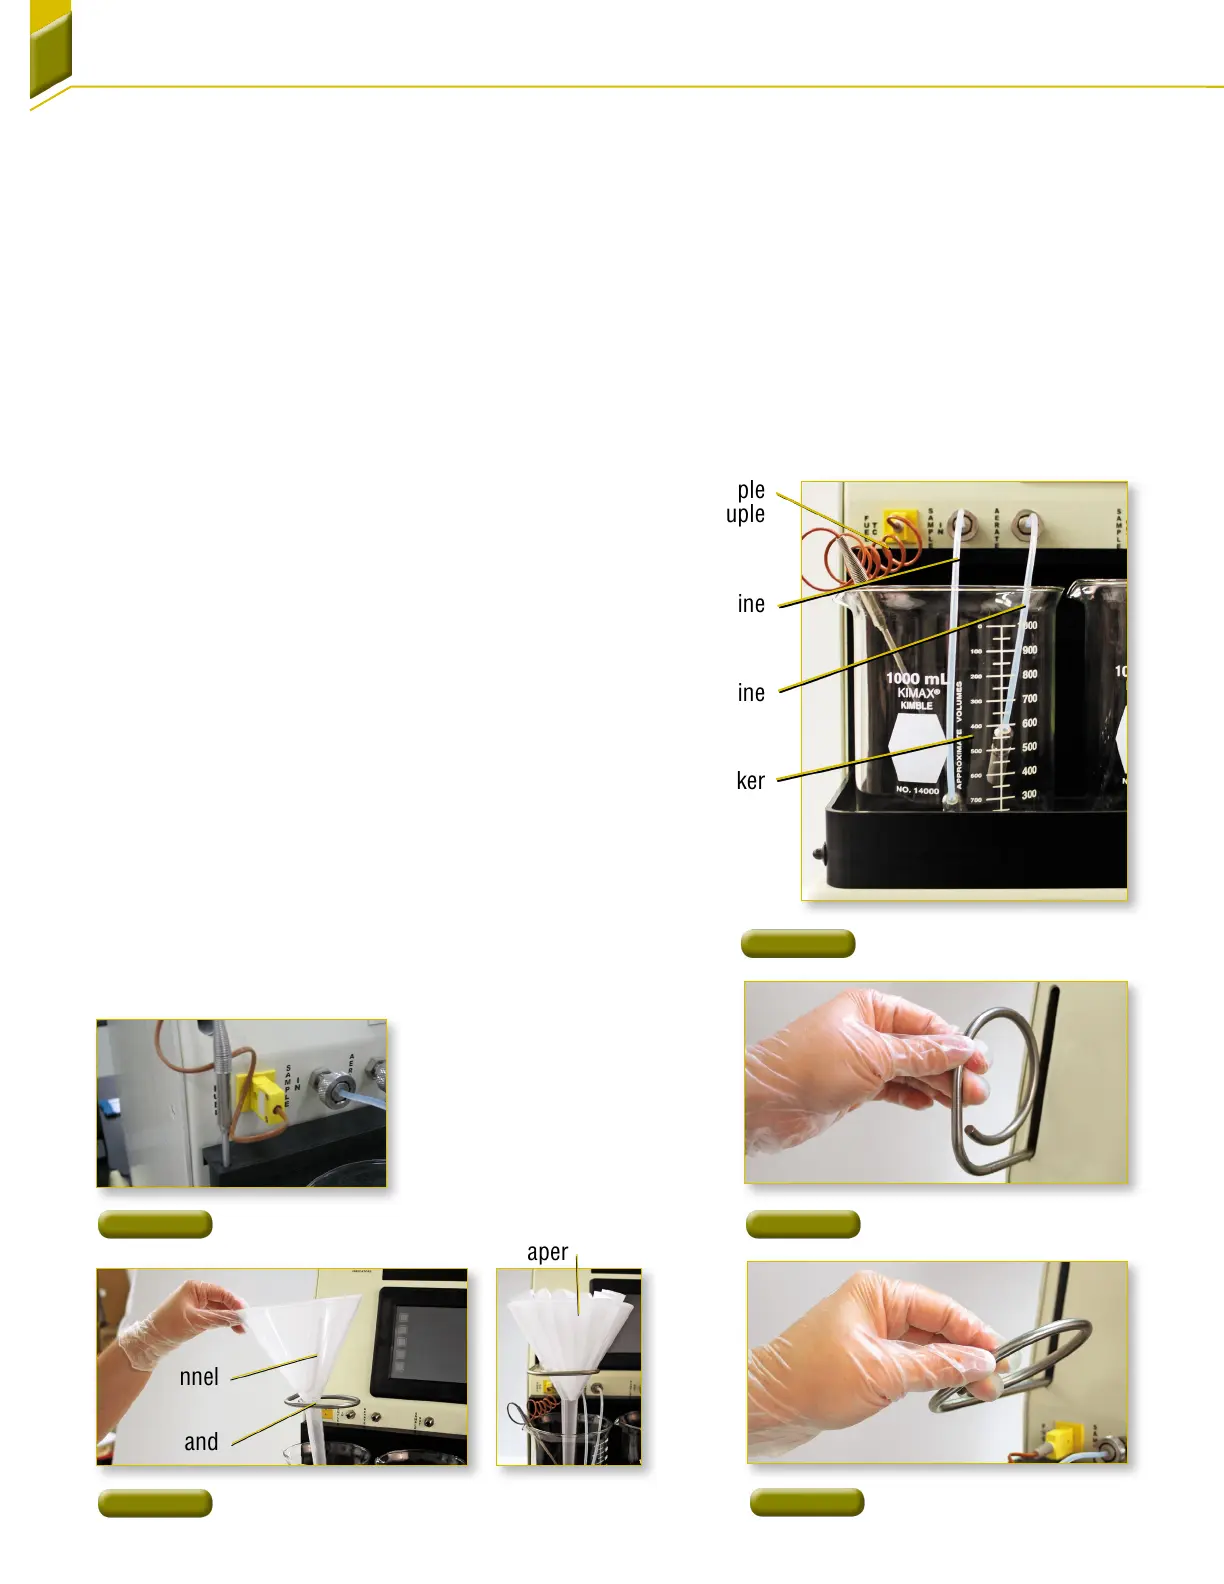
1. Place a clean, empty glass beaker in the sample-
in position at the left of the sample container area.
Connect the aeration line and the sample-in line to
the appropriate fittings on the front panel [Figure9].
Fittings should be finger tight. Place the aeration and
sample-in lines into the glass beaker, letting end of
sample-in line rest on bottom of beaker. Plug in the
sample thermocouple and place the thermocouple
into the glass beaker.
NOTE: The sample thermocouple can be stored in the hole
at the left of the beaker area when not inuse
[Figure10].
2. Grasp the ring stand assembly and pull from the
housing
[Figure11a]. After the ring stand assembly is
fully extended from the housing, rotate to the right to
lock into position
[Figure11b].
3. Place the funnel into the ring stand and place a
clean filter paper into the funnel
[Figure12].
Glass Beaker
Aeration Line
Sample-In Line
Sample
Thermocouple
Figure 11a
Ring Stand Assembly
Figure 11b
Ring Stand Assembly
Figure 10
Thermocouple Storage
Funnel
Filter Paper
Ring Stand
Figure 9
Sample-In Beaker Area
Figure 12
Funnel/Filter Setup