20
Section 2: Setup
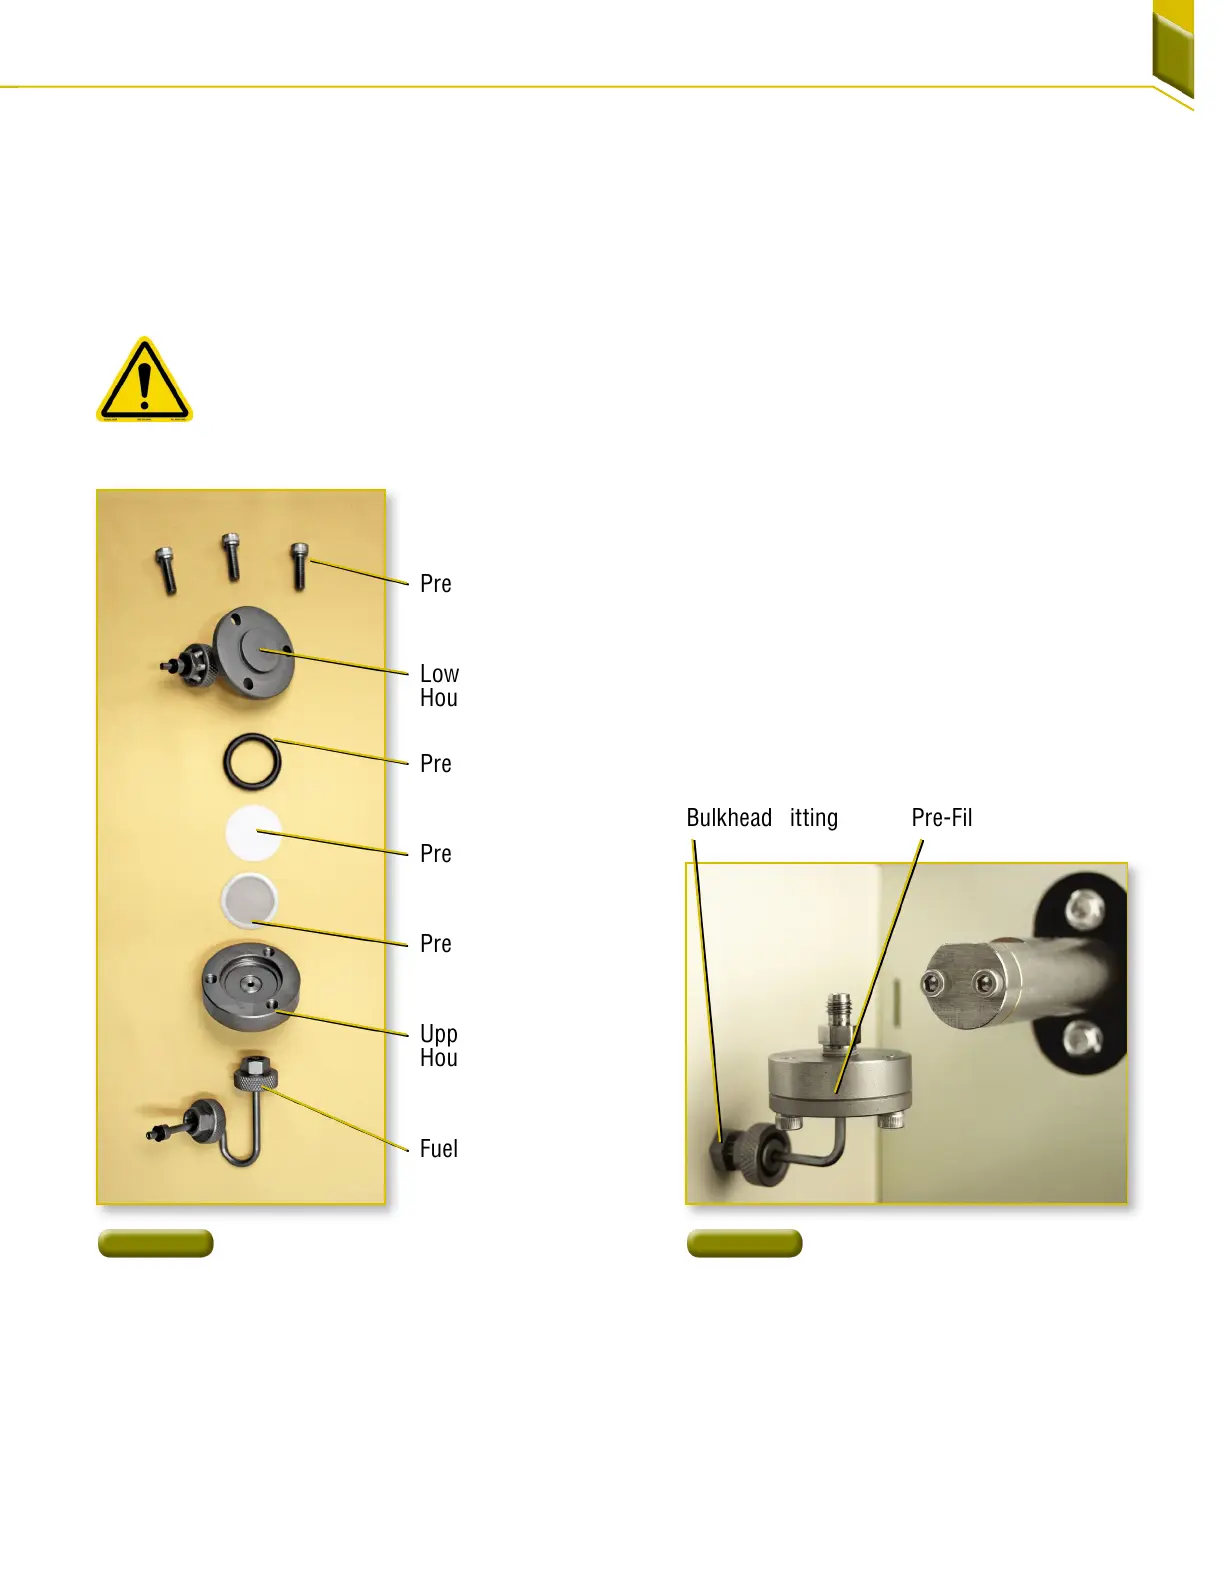
16. Begin assembling the pre-filter by placing the
pre-filter O-ring on the lower housing [Figure23].
17. Place the pre-filter screen into the upper housing
[Figure23].
18. Using clean tweezers, remove a new pre-filter filter
paper from the protective case and place onto the
pre-filter screen.
NOTE: There are two blue paper spacers
between each pre-filter filter paper. Do not
use blue spacer paper. Use only the white
pre-filter element. Use of the blue spacer
paper will cause the test to fail.
19. Place the lower housing onto the upper housing.
Line up the screw holes on the upper and lower
housings and insert the screws through the lower
housing into the upper housings [Figure23]. Finger
tighten the screws with the hexagon wrench.
20. Inspect the O-ring on the end of the pre-filter
assembly. Replace the O-ring if missing or
damaged.
21. Connect the pre-filter assembly to the pre-filter
bulkhead fitting and finger tighten [Figure24].
Pre-Filter Assembly
Pre-Filter
Bulkhead Fitting
Figure 23
Pre-Filter Components
Figure 24
Attaching the Pre-Filter
Assembly
Lower Pre-Filter
Housing
Upper Pre-Filter
Housing
Fuel Input Line
Pre-Filter O-ring
Pre-Filter Paper Filter
Pre-Filter Screws
Pre-Filter Metal Screen