EasyManua.ls Logo

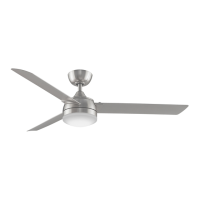
Fanimation SLINGER LP8147SLBN User Manual

Fanimation SLINGER LP8147SLBN
40 pages
To Next Page IconTo Next Page
Page #1 background imageLoading...
Page #1 background image
For best and quickest service please provide date code. You can find the date code on the carton,
hand-held remote (inside of the battery compartment), receiver or top of fan housing.
ATTACH YOUR RECEIPT HERE AND REGISTER YOUR FAN AT FANIMATION.COM
READ AND SAVE THESE INSTRUCTIONS
SLINGER v2 CEILING FAN
Español p. 21
MODEL# LP8147SLBN ITEM #0581598
MODEL# LP8147SLBL ITEM #0795392
Questions, problems, missing parts? Before returning to your retailer, call our customer
service department at 1-888-567-2055, 8 a.m.-5 p.m., EST, Monday-Friday.
Date Code
Purchase Date Net Weight 32.55 lbs (14.76 kg)
Questions and Answers:

Fanimation SLINGER LP8147SLBN Specifications

General IconGeneral
Model NumberLP8147SLBN
CategoryFan
TypeCeiling Fan
FinishBrushed Nickel
Blade Span52 inches
MotorAC Motor
Control TypeRemote Control
Motor Speed3 Speed
Mounting TypeDownrod Mount
MaterialMetal
Light Kit IncludedNo
Reversible MotorYes
Indoor/OutdoorIndoor
StyleModern

Summary

Important Safety Instructions

General Safety Precautions

Follow essential safety instructions for installation, cleaning, and operation to prevent injury.

Electrical and Installation Safety

Grounding and Wiring Procedures

Ensure proper electrical grounding and follow all wiring codes for safe installation.

Mounting and Clearance Requirements

Mount fan securely, ensuring blades are at least 7 feet from the floor.

Remote Control Battery Safety

Handle lithium button batteries carefully; keep away from children due to burn hazard.

FCC Compliance Information

Device complies with FCC Rules, limits for Class B digital devices.

Limited Lifetime Warranty

Motor Warranty Details

Covers defects in motor materials or workmanship for the original purchaser's lifetime.

Parts and Light Kit Warranty

Covers defects in other fan parts for three years and light kit for five years.

Warranty Exclusions and Limitations

Excludes damage from improper installation, misuse, or environmental factors.

Disclaimers and Legal Rights

Disclaims implied warranties and limits liability for incidental or consequential damages.

Assembly Tools and Materials

Required Tools for Fan Assembly

Lists essential tools required for fan assembly, not included with the product.

Included Parts and Hardware

Details all parts and hardware included in the package for fan assembly.

Unpacking and Part Verification

Step-by-Step Unpacking Guide

Follow a step-by-step check-off process to ensure all parts are present.

Ceiling Fan Energy Efficiency Tips

Optimizing Fan Performance

General advice on maximizing fan efficiency and reducing energy consumption.

Choosing the Best Mounting Location

Guidance on selecting the optimal location for fan installation for best airflow.

Year-Round Fan Usage

Instructions for summer (cooling) and winter (heating) fan operation for efficiency.

Electrical and Structural Requirements

Electrical Supply Specifications

Specifies required voltage, amperage, and circuit type for fan operation.

Outlet Box Mounting Configurations

Details requirements for fan-rated outlet boxes and mounting configurations.

Low-Profile and Deep-Profile Box Use

Describes low-profile and deep-profile outlet box mounting methods.

Installation Mounting and Brace Requirements

Brace Use for Hanger Installation

Details brace use for mounting the fan hanger spanning between joists.

Critical Installation Warnings

Outlet Box Support and Power Safety

Mount fan to approved outlet box; ensure power is off and wiring is safe.

Variable Controller Incompatibility

Do not use variable wall controllers or dimmers; they can damage the remote unit.

Ceiling Fan Assembly Guide

Preparing the Downrod Assembly

Remove and retain hanger ball and pin from downrod for later reinstallation.

Wiring the Downrod and Motor

Loosen set screws, route fan wires through the downrod, and connect to motor.

Securing the Downrod to Motor

Thread downrod into motor, align clevis pin, and secure with hairpin clip and set screws.

Routing Wires Through Canopy Components

Route wires through motor coupling cover, canopy screw cover, and ceiling canopy.

Ceiling Fan Assembly Continued

Reinstalling Hanger Ball and Securing Set Screw

Reinstall hanger ball, route wires, align pin, and tighten set screw to prevent wobble.

Preparing Lead Wires for Connection

Cut excess lead wire and strip insulation from the ends of each lead wire.

Adjusting Hanger Bracket Screws

Remove one shoulder screw from hanger bracket and loosen the second.

How to Hang Your Ceiling Fan

Power Off and Clearance Safety

Ensure electricity is off and maintain 7 ft blade clearance from floor before hanging.

Attaching the Hanger Bracket

Securely attach the hanger bracket to the outlet box using provided screws.

Seating the Hanger Ball Assembly

Carefully lift fan and seat hanger ball into bracket, aligning groove with tab.

Ceiling Fan Wiring Instructions

Setting Remote Code

Set dip switches on receiver and remote to match for proper operation.

Wiring Safety Precautions

Ensure electricity is turned off at the main fuse box before starting wiring.

Installing the Receiver Unit

Position the receiver unit into the hanger bracket before making wire connections.

Ceiling Fan Wiring Connections

Connecting Wires with Connectors

Connect wires using connectors as shown in diagram, ensuring tight connections.

Organizing Wires in Outlet Box

Arrange and push wires into outlet box, separating grounded and ungrounded conductors.

Blade Installation Before Remote Programming

Blades must be installed before programming the remote control.

Canopy Housing Installation

Assembling the Ceiling Canopy

Assemble canopy by aligning key slot over shoulder screw and tightening screws.

Securing the Canopy Screw Cover

Attach and tighten the canopy screw cover over the shoulder screws.

Ceiling Fan Blade Assembly

Attaching Blades to Blade Holders

Lay out blade holders, position blades, and secure with serrated head screws.

Securing Blade Holders to Motor Hub

Attach blade holders to the motor assembly hub using 1/4"-20 screws.

Light Kit and Steel Cap Assembly

Assembling the Light Plate

Attach the light plate assembly to the motor assembly adaptor plate.

Assembling the Light Kit

Attach the light kit assembly to the light plate assembly using screws.

Connecting LED Assembly (Option A)

Connect 2-pin connectors from LED assembly to motor assembly connectors.

Installing Steel Cap (Option B)

Twist the steel cap clockwise onto the light kit assembly if not using the light kit.

Securing the Glass Cover

Twist the glass onto the light kit clockwise until it snaps into place.

Operating Your Ceiling Fan

Dimmer Switch Warning

Do not use full range dimmer switches as they can damage the fan.

Restoring Electrical Power

Turn electricity back on at the main fuse box after installation.

Installing Remote Control Batteries

Install two 3V batteries in the remote transmitter and follow code setting process.

Ceiling Fan Remote Control Operation

Remote Code Synchronization

Slide dip switches on remote and receiver to match for proper code setting.

Understanding Remote Functions

Details functions of the remote control, including fan speed, light, timer, and special modes.

Reversing Fan Direction

Use the reverse button while the fan is running to change direction for summer/winter.

Remote Control Installation

Mounting the Wall Holder

Attach the wall holder for the remote control using the provided screws.

Fan Maintenance and Cleaning

Routine Fan Cleaning Procedures

Clean fan using a soft brush or lint-free cloth; avoid abrasive cleaners.

Blade Holder Screw Maintenance

Periodically check and tighten blade holder screws to the motor hub.

Ceiling Fan Blade Cleaning Tips

Dust blades periodically with a feather duster; avoid water or harsh rags.

Ceiling Fan Troubleshooting Guide

Fan Fails to Start Troubleshooting

Check fuses, power connections, and remote battery for fan start issues.

Resolving Noisy Fan Operation

Verify blade attachment, screw tightness, wire connector security, and motor noise.

Addressing Excessive Fan Wobble

Check downrod set screws, blade holder screws, seating, and hanger bracket security.

Improving Insufficient Air Movement

Consider a longer downrod or check for proper fan speed and blade balance.

Fan Parts Identification

List of Fan Components and Part Numbers

Lists all fan components with their corresponding reference numbers and part numbers.

Ordering Replacement Fan Parts

Provides information needed to order replacement parts, including part number and model number.

Fan Exploded View Illustration

Diagram of Fan Components and Assembly

Visual representation of all fan parts and their assembly order.

Related product manuals