Check the tightening torque of the fixing rods of the crane. (Fig. 37)
Tightening torque for the rods M 33x2 = 1200 Nm
Clean the oil filter placed in the oil tank of the crane and if any, on the pump
section and pressure hoses.
If the hydraulic circuit of the crane is connected to a tipper a remote oil tank
may be fitted, in this case the filter will be found in this tank.
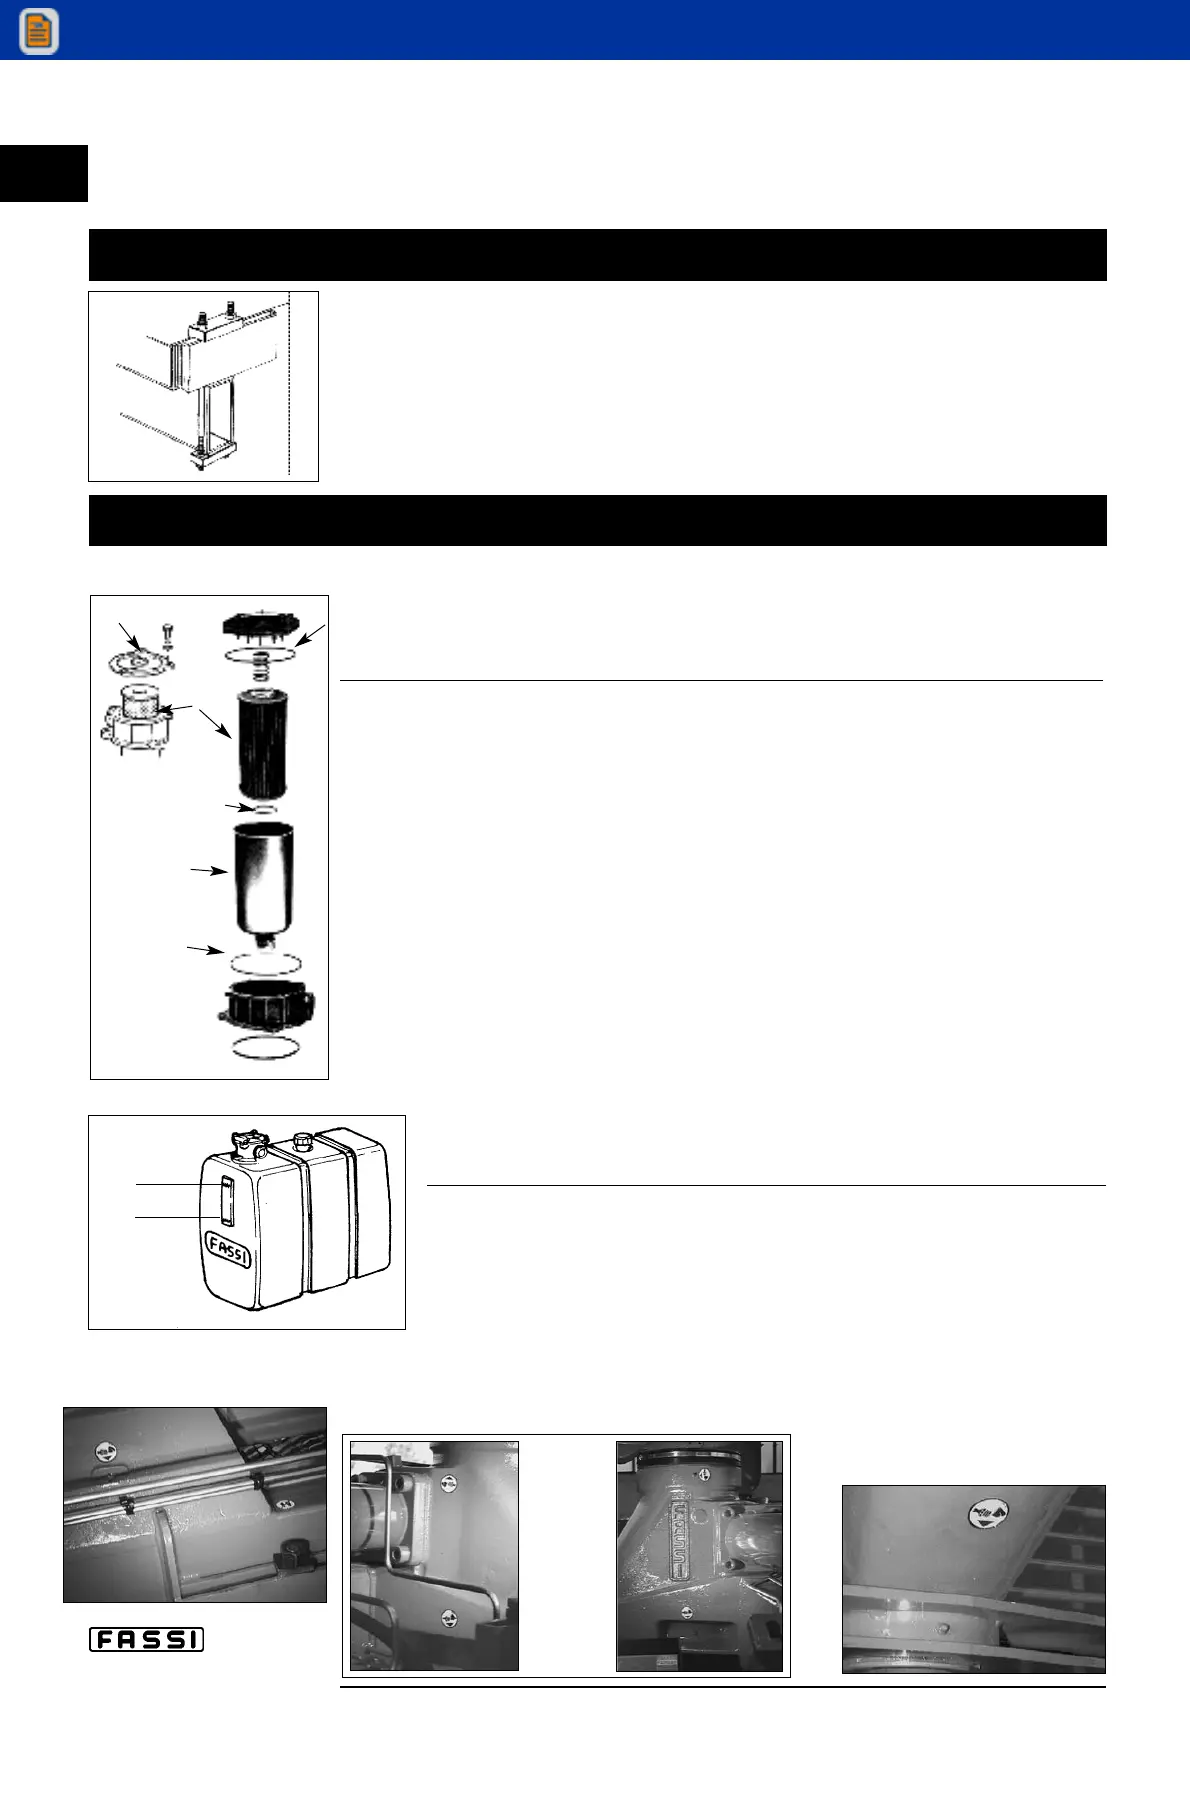
Cleaning of the filter on the tank (oil return from the distributor) fig. 38
— Remove the filter cover, pos. 1, by unscrewing the three security bolts.
Remove the spring and extract the filter cartridge pos. 2: during this operation
take care that no contaminated material passes into the tank.
— Clean the cartridge by flushing with a non flammable and non toxic solvent.
Thoroughly dry the filter inside and out with compressed air.
— Remove the filter holder from the filter body pos. 3 (a hose is attached to
its base); clean and reassemble checking the sealing ‘O’ rings pos. 4-5
(internal seal between cartridge and holder and external seal between hol-
der and body).
— Re-assemble the filter cartridge into its holder, re-assemble the spring and
the filter cover pos. 6 (check the sealing of the ‘O’ ring under the filter cover).
— Re-fit the three security bolts.
— Check for leaks when the pump is activated.
Check the oil level in the tank with the crane in the folded position and with
the outriggers (crane and supplementary) fully re-entered. The oil level must
not exceed the maximum or be lower than the minimum. (Fig. 39).
Top up using hydraulic oil with the same characteristics as those
indicated in the table on page 37.
Periodically grease the points indicated on the crane (fig. 40) (and on
the hydraulic jib, when fitted, fig. 41a) paying particular attention to the
points not easily detected.
- Fig. 42 shows the guide shoe lubricator for the column rotation.
- Fig. 43-43a show the lubricators of the column symmetrically
positioned on the column support.
- Fig. 44 shows the lubricator of the pendulum beam.
c XII
MAINTENANCE
INSTRUCTIONS
F 240
32
After the first 40 hours use
fig. 37
After every working week
1
2
4
3
5
6
fig. 38
MAX
MIN
fig. 39
fig. 42
fig. 44
fig. 43a
fig. 43