- 12 -
A01 V1/99 S1
A01-3)
Arbeitstechniken
Achtung!
Die Hände niemals über der Hobel-
welle auf das Werkstück legen
A01-3.1) Abrichthobeln
Gesamte Hobelbreite mit der Schutz-
schiene S abdecken und nur geringfü-
gig höher stellen als die Dicke des
Werkstückes.
Siehe Abb. 15
Bei einer Werkstücksdicke größer als
75mm die Schutzschiene nur bis an
das Werkstück heranstellen und am
Abrichttisch aufliegen lassen.
Siehe Abb. 15A
Das Brett beidhändig unter der
Schutzbrücke hindurchschieben.
Sobald das Brett weit genug in den
abnehmenden Abrichttisch hineinragt
die linke Hand darauflegen und
gleichmäßig über die Hobelwelle
schieben.
Das Brett über die Schutzbrücke in
Ausgangsposition bringen.
Siehe Abb. 16 / 16A
Es ist darauf zu achten, die Hände
geschlossen und mit anliegendem Dau-
men auf das Werkstück zu legen.
Abb 15 Abb 15A
Abb 16 Abb 16A
S
S
A01-3)
Working techniques
Attention!
Never place your hands on the work-
piece over the planer arbor.
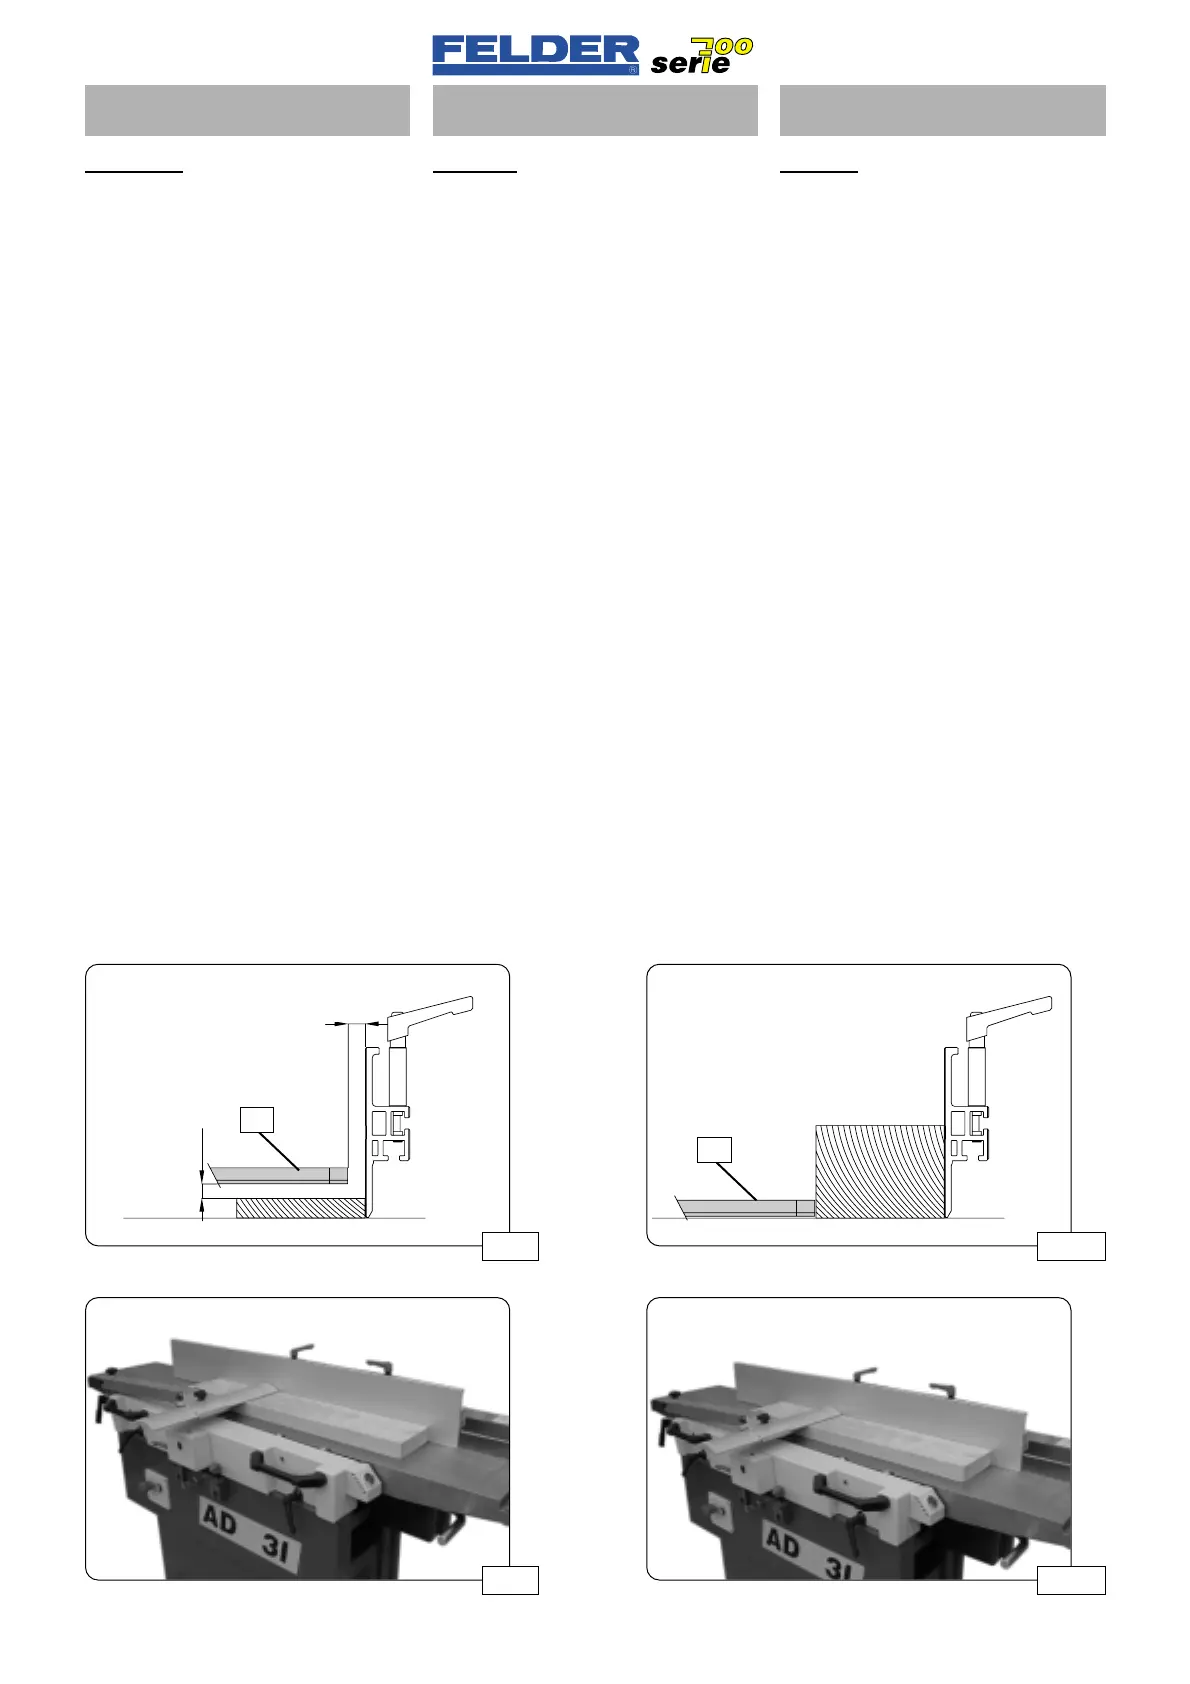
A01-3.1) Surface planing
Cover the entire planer with the pro-
tective rail S and set it only slightly
higher than the thickness of the work-
piece.
See fig. 15.
At a workpiece thickness of 75 mm or
greater, move the protective rail up to
the workpiece and let it rest on the joi-
ner table.
See fig. 15A
Push the board under the bridge
guard with both hands.
As soon as the board extends far
enough into the receiving joiner table,
place your left hand onto it and push
it over the planer arbor evenly.
Place the board into its initial position
over the bridge guard.
See fig. 16 / 16A
Ensure that your hands are placed on
the workpiece in a closed position
with the thumbs against the closed
hands.
A01-3)
Tecniche di lavoro
Attenzione!
Non posare mai le mani sul pezzo
attraverso l’albero pialla
A01-3.1) Piallatura a filo
Coprire tutta la larghezza della pialla
con la guida di protezione S e alzarla
leggermente rispetto allo spessore del
pezzo.
Vedere fig. 15
Con un pezzo spesso più di 75 mm
avanzare la barra di protezione e
farla appoggiare sul piano di lavoro.
Vedere fig. 15A
Spostare l’albero con le due mani
sotto il ponte di protezione.
Non appena l’albero sporga abba-
stanza dentro il piano di lavoro per
prelievo, posare la mano sinistra e
spostarlo contemporaneamente
sull’albero della pialla.
Portare l’albero in posizione di par-
tenza attraverso il ponte di prote-
zione.
Vedere figg. 16 / 16A
Fare attenzione a posare sul pezzo le
mani chiuse e i pollici vicini.
 Loading...

