A01-3.7)
Drilling with /without depth
stop
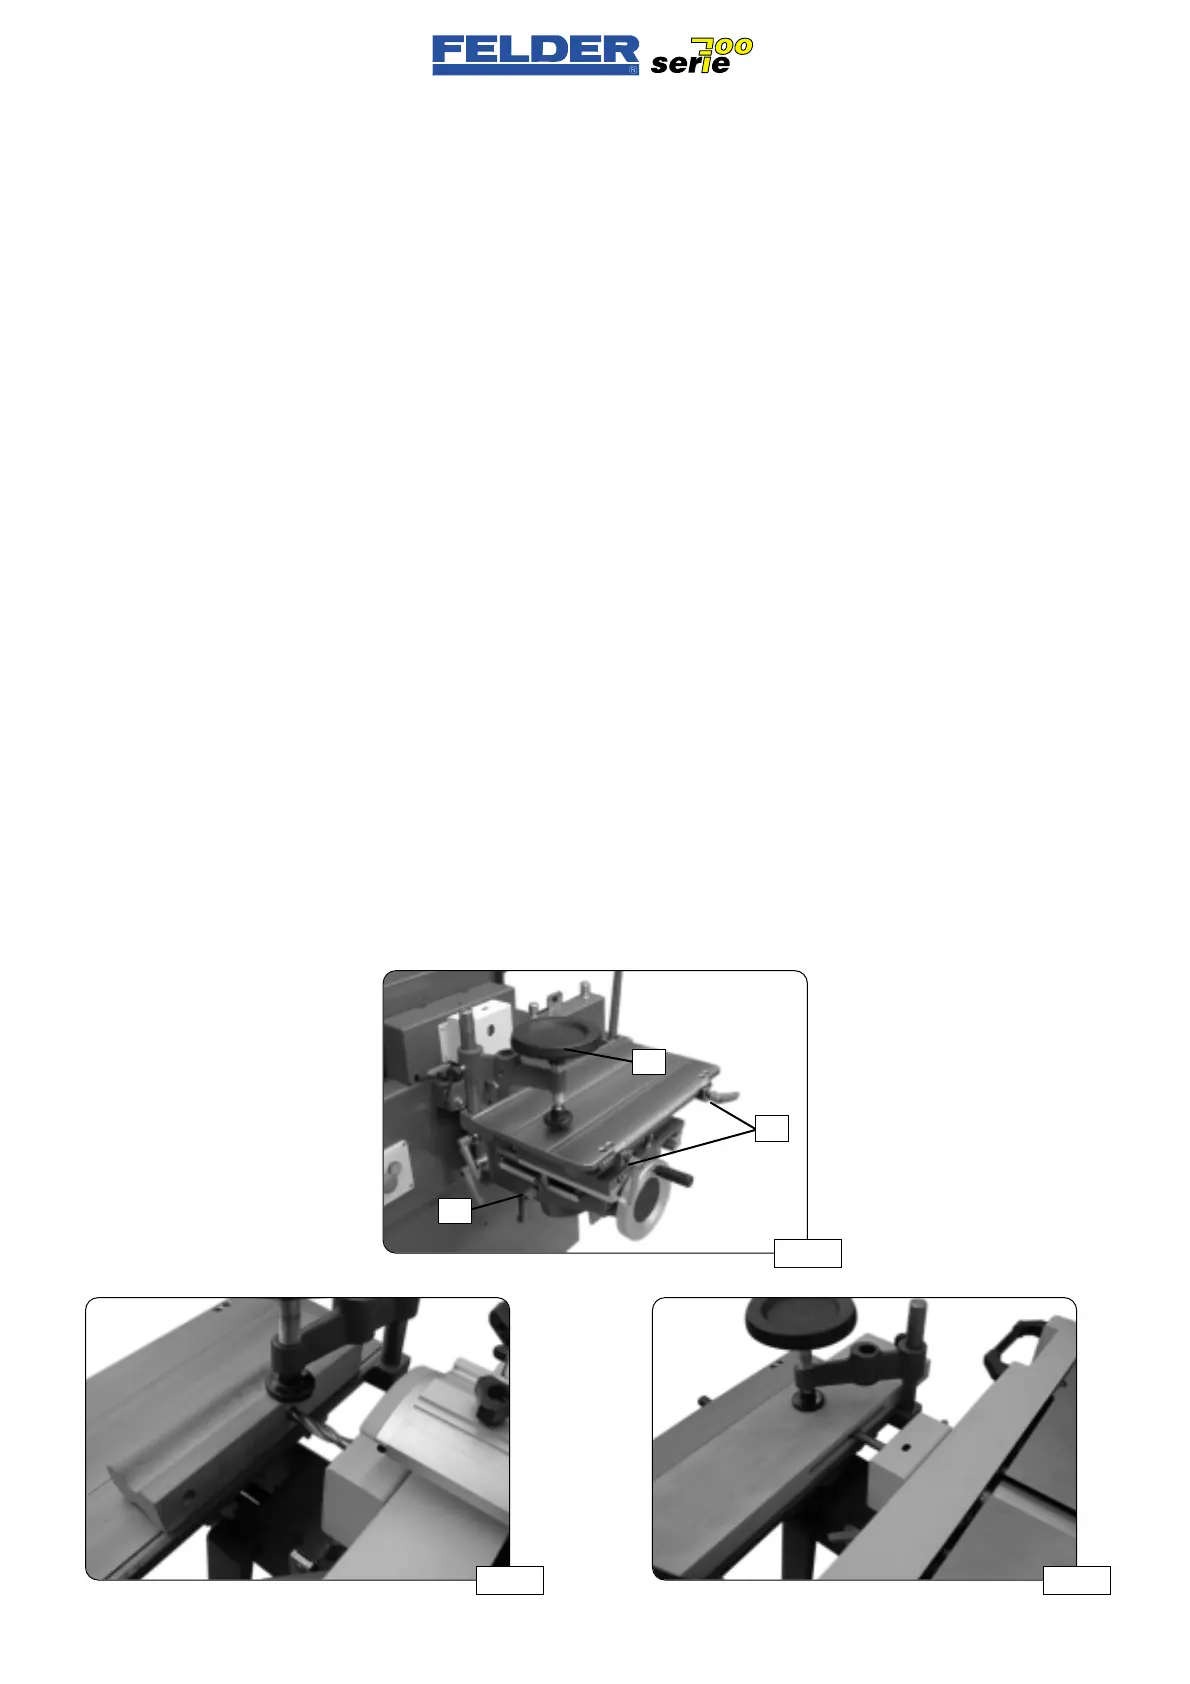
See fig. 25 / 26A
- Clamp the drilling table in the cen-
tral position (longitudinal stops L)
- Place the workpiece against the stop
edge and clamp with the rotating
hold-down D
- Set the drilling depth if required
(depth stop T)
- Start the planer arbor, steady the
workpiece with your left hand and
drill hole
A01-3.8)
Drilling a slot
See fig. 25 / 26B
- Place the workpiece against the stop
edge and clamp with the rotating
hold-down D
- Set the drilling depth if required
(depth stop T)
- Set the drilling length if required
(length limit L)
- Start the planer arbor, steady the
workpiece with your left hand
- Drill several millimeters into the
workpiece with the slotter and tra-
verse the defined route
- Repeat the process until the slot is
finished.
A01-3.7)
Foratura con / senza limita-
zione di foratura
Vedere figg. 24 / 26A
- Bloccare il banco di foratura in
posizione centrale (guidapezzi lon-
gitudinali L)
- Posare il pezzo sul bordo del guida
e bloccarlo con il pressalegno gire-
vole D
- Regolare la profondità di foratura (se
voluta) (limitazione di profondità T)
- Avviare l’albero della pialla, tenere
anche con la mano sinistra il pezzo
ed eseguire il foro
A01-3.8)
Foratura di un’asola
Vedere figg. 25 / 26B
- Posare il pezzo sul bordo del guida
e bloccarlo con il pressalegno gire-
vole D
- Regolare la profondità di foratura (se
voluta) (limitazione di profondità T)
- Regolare la lunghezza di foratura
(limitazione lunghezza L)
- Avviare l’albero della pialla, tenere
anche con la mano sinistra il pezzo
- Con il trapano per asole forare il
pezzo di alcuni millimetri e percor-
rere il tratto limitato
- Ripetere l’operazione finché l’asola
non sia finita.
- 16 -
A01 V1/99 S1
A01-3.7)
Bohren mit / ohne Tiefenbe-
grenzung
Siehe Abb. 25 / 26A
- Bohrtisch in der Mittelstellung klem-
men (Länganschläge L)
- Werkstück an der Anschlagkante
anlegen und mit Drehniederhalter D
klemmen
- Bohrtiefe (falls gewünscht) einstellen
(Tiefenbegrenzung T)
- Hobelwelle starten, Werkstück mit
linker Hand zusätzlich festhalten
und Loch bohren
A01-3.8)
Bohren eines Langloches
Siehe Abb. 25 / 26B
- Werkstück an der Anschlagkante
anlegen und mit Drehniederhalter D
klemmen
- Bohrtiefe (falls gewünscht) einstellen
(Tiefenbegrenzung T)
- Bohrlänge einstellen (Längenbegren-
zung L)
- Hobelwelle starten, Werkstück mit
linker Hand zusätzlich festhalten
- Mit dem Langlochbohrer einige Mil-
limeter tief in das Werkstück bohren
und begrenzten Weg abfahren
- Vorgang wiederholen bis Langloch
fertiggestellt ist.
Abb 26A Abb 26B
Abb 25
D
L
T
 Loading...

