Page 5
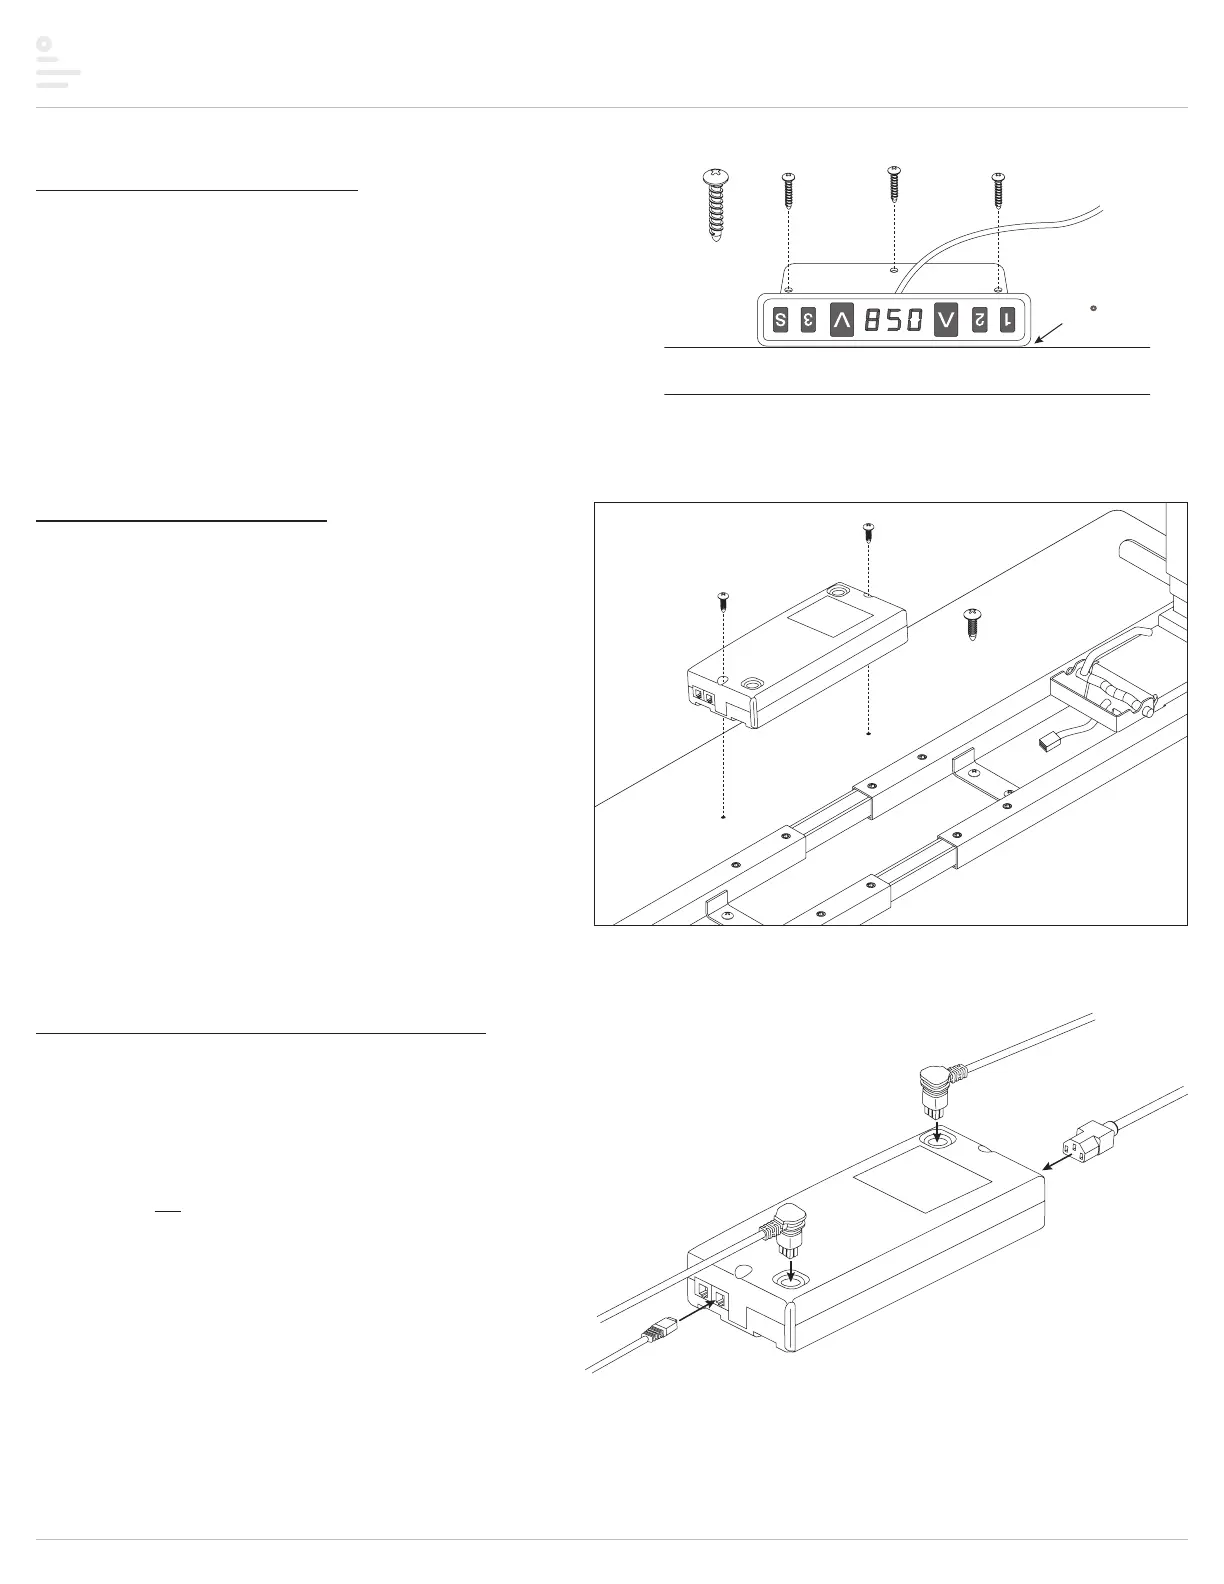
Step #5: attach digital keypad
• Attach the digital keypad using the three M3x20 #1 Phillips round head screws.
• Install the keypad in the “expanded” position. Pull the keypad away from the
mounting bracket to expand it.
• Position the digital keypad on the left or right side of the table, according to user
preference.
• Align the top of the keypad with the edge of the table so that the controls will be
easily accessible in the expanded position.
— To prevent accidental damage when not in use, the keypad may be pushed in,
under the table.
Step #6: attach control unit
• Position the control unit near the back of the table or between the
cross channels.
• Be sure that the cable from the keypad can reach the control unit and
the motor cables can extend from the control unit to both motors.
• Attach the control unit using the two M5x15 #2 Phillips round head screws.
Step #7: make cable and cord connections
• Connect the cable from the digital keypad to one of the end ports on the control unit, as shown.
• Connect the motor cables to the ports on top of the control unit and to the short cable from
each table leg.
• Connect the power cord to the control unit.
• Plug the power cord into an AC outlet. Be sure the cord can reach the outlet when
the table is raised to its highest position.
CAUTION: Do not operate the table until after initializing the
system. See the following step.
TriumphLX Assembly
digital
keypad
M3x20 #1 Phillips
round head (3)
align with
edge of table
when expanded
M5x15 #2 Phillips
round head
control
unit
keypad
motor
cable
motor
cable
power cord