5
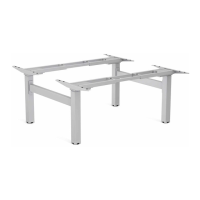
Rear
Front
ACCESSORY INSTALLATION
STEP 1B - Only required if table is not 60” (1524mm) wide
Adjust the cross channels to their final lengths
• Use the 5mm Allen key to loosen the (8) set screws on the inward side of the
cross channels.
• Expand or contract the cross channels until flush with both ends of the desk.
Free cables as necessary to allow the frame to adjust.
• Once properly adjusted, use the 5mm Allen key to re-tighten the set screws
(8 total).
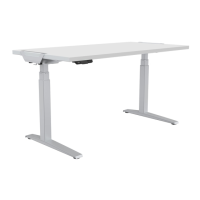
STEP 2
Adjust the position of the frame before attaching it to the table
• Check that the top supports on each side are flush with both ends of the desk.
• The rear cross channel will be 5.75” (146mm) for 24” (610mm) Depth Tops
and 8.75” (222mm) for 30” (762mm) Depth Tops from the rear of the table.
STEP 3
Attach base to the table
• Use the M5 Phillips round head screws (10 total required) and a Phillips
screwdriver/power drill.
• The screws fit through guides in the top of the supports and cross channel.
• Using two people, flip the Base and Table upright.
• Attach clamp covers to each side. Start by placing the smaller piece on the inside
of the clamp bracket. Align the larger piece and apply pressure to secure.
STEP 1
Cable Management
• Position the cable tray in the center of the table towards the rear.
• Attach the cable tray using (4) M5 Phillips round head screws. The open end
should face the rear.
• Use the additional provided cable management as needed.
• Cables must not interfere with table operation.
• Cables must not interfere with the user.
24" Depth Top: 5.75"
30" Depth Top: 8.75"
Front
Rear