6 ferrismowers.com
8
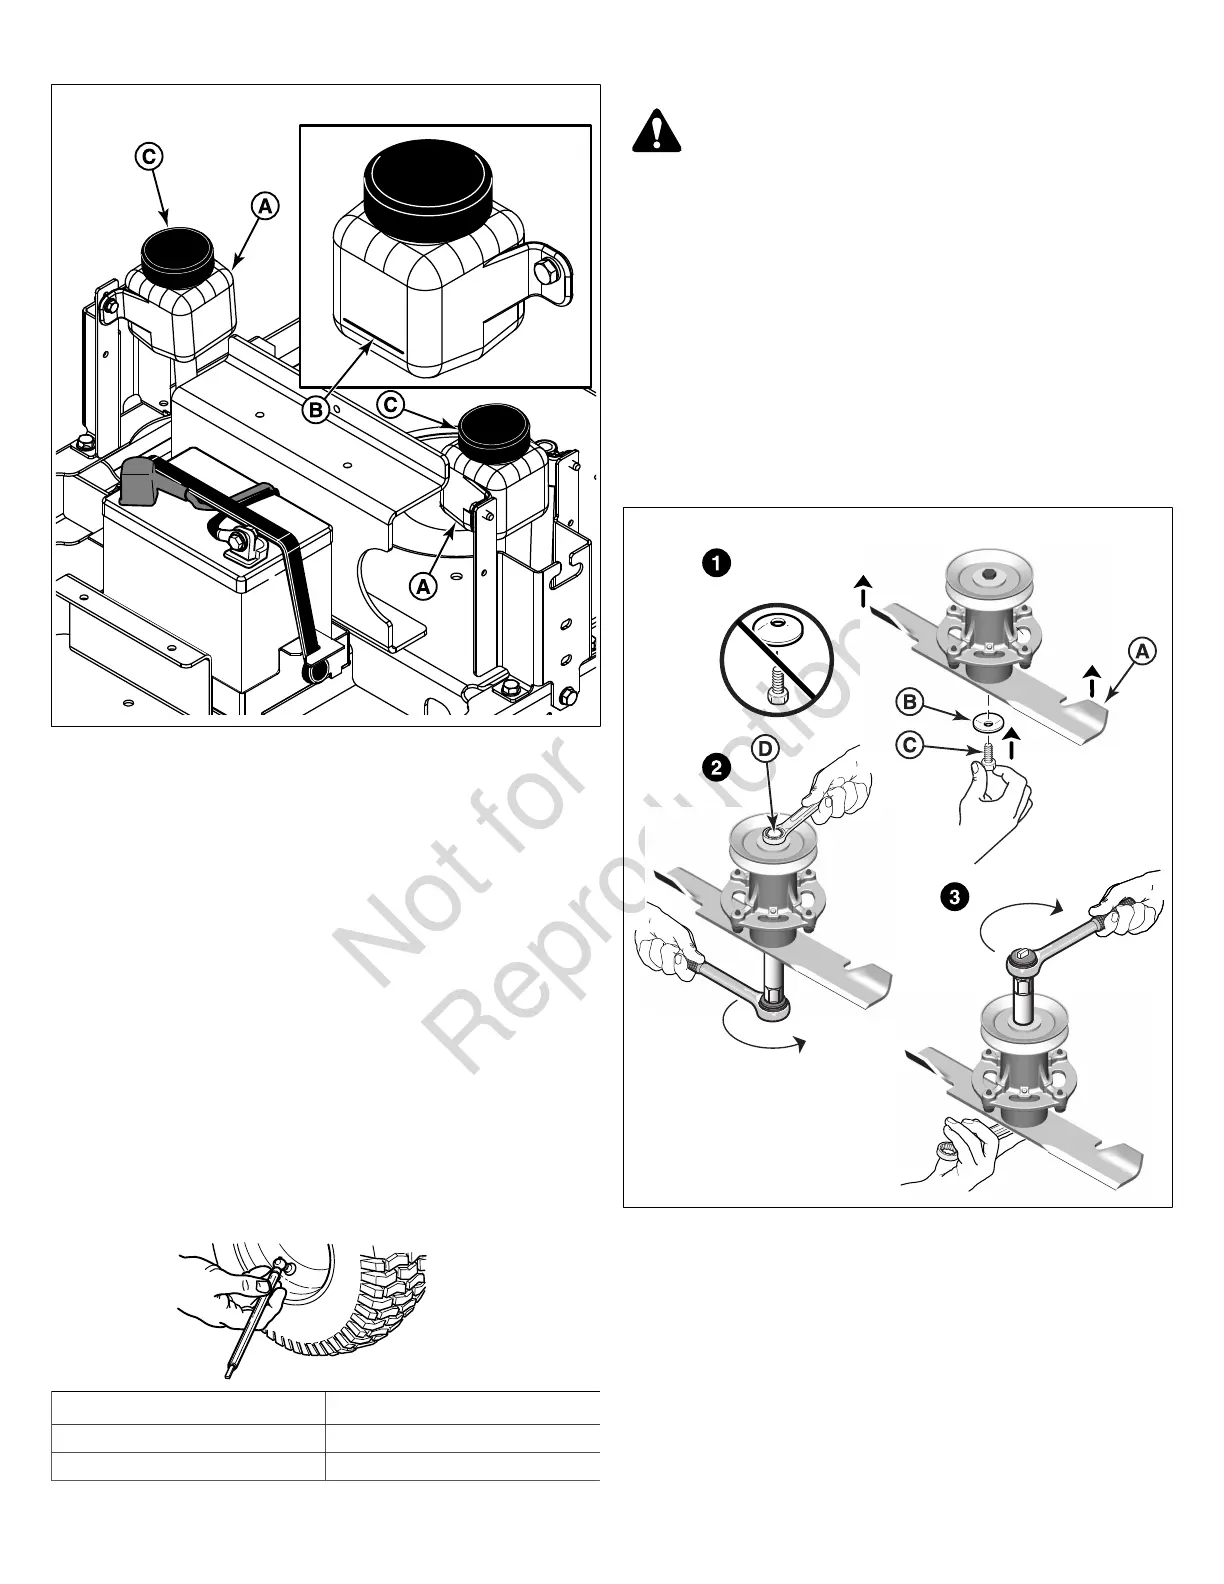
2. Check the oil level when the unit is cold. The oil should be
up to the "FULL COLD" mark (B). If the oil is below this
level, proceed to step #3.
3. Before removing the tank caps (C), make sure the area
around the tank cap and fill neck of the tank is free of
dust, dirt, or other debris. Remove the tank cap.
4. Add oil up to the "FULL COLD" mark.
5. Reinstall the tank caps.
6. After adding oil to the tanks, it may be necessary to purge
air from the hydraulic system. If the unit is not driving
properly, see your dealer.
Check Tire Pressures
Tire pressure should be checked periodically, and maintained
at the levels shown in the chart. Note that these pressures
may differ slightly from the "Max Inflation" stamped on the
side-wall of the tires. The pressures shown in the chart
provide proper traction and extend tire life.
Tire Pressure
Front 22 psi (1,52 bar)
Rear 12 psi (0,83 bar)
Check Blade Bolt and Pulley Bolt Torque
WARNING
Avoid injury! Mower blades are sharp.
• Mower blades are sharp. For your personal safety, do
NOT handle mower blades with bare hands.
• Careless or improper handling of blades may result in
serious injury.
• Blade mounting bolts must each be installed with a
washer and then securely tightened. Torque blade
mounting bolt to 50 - 60 ft. lbs. (68 - 81 Nm).
1. Lock the mower deck in it's highest cutting position.
2. Check to make sure that the blades are installed with
the airlifts (A, Figure 9) pointing up towards the deck as
showing in Figure 9.
9
3. Check that the blade in fully seated on the spindle shaft
and that a washer (B) is installed between the blade and
the mounting bolt (C).
4. Check that each blade mounting bolt is torqued to 50 -
60 ft. lbs. (68 - 81 Nm) while holding onto the appropriate
pulley bolt (D) with a wrench.
5. Check that each pulley bolt is torqued to 50 - 60 ft. lbs.
(68 - 81 Nm) while holding onto the appropriate blade
mounting bolt with a wrench.
 Loading...