32
www.ferrisindustries.com
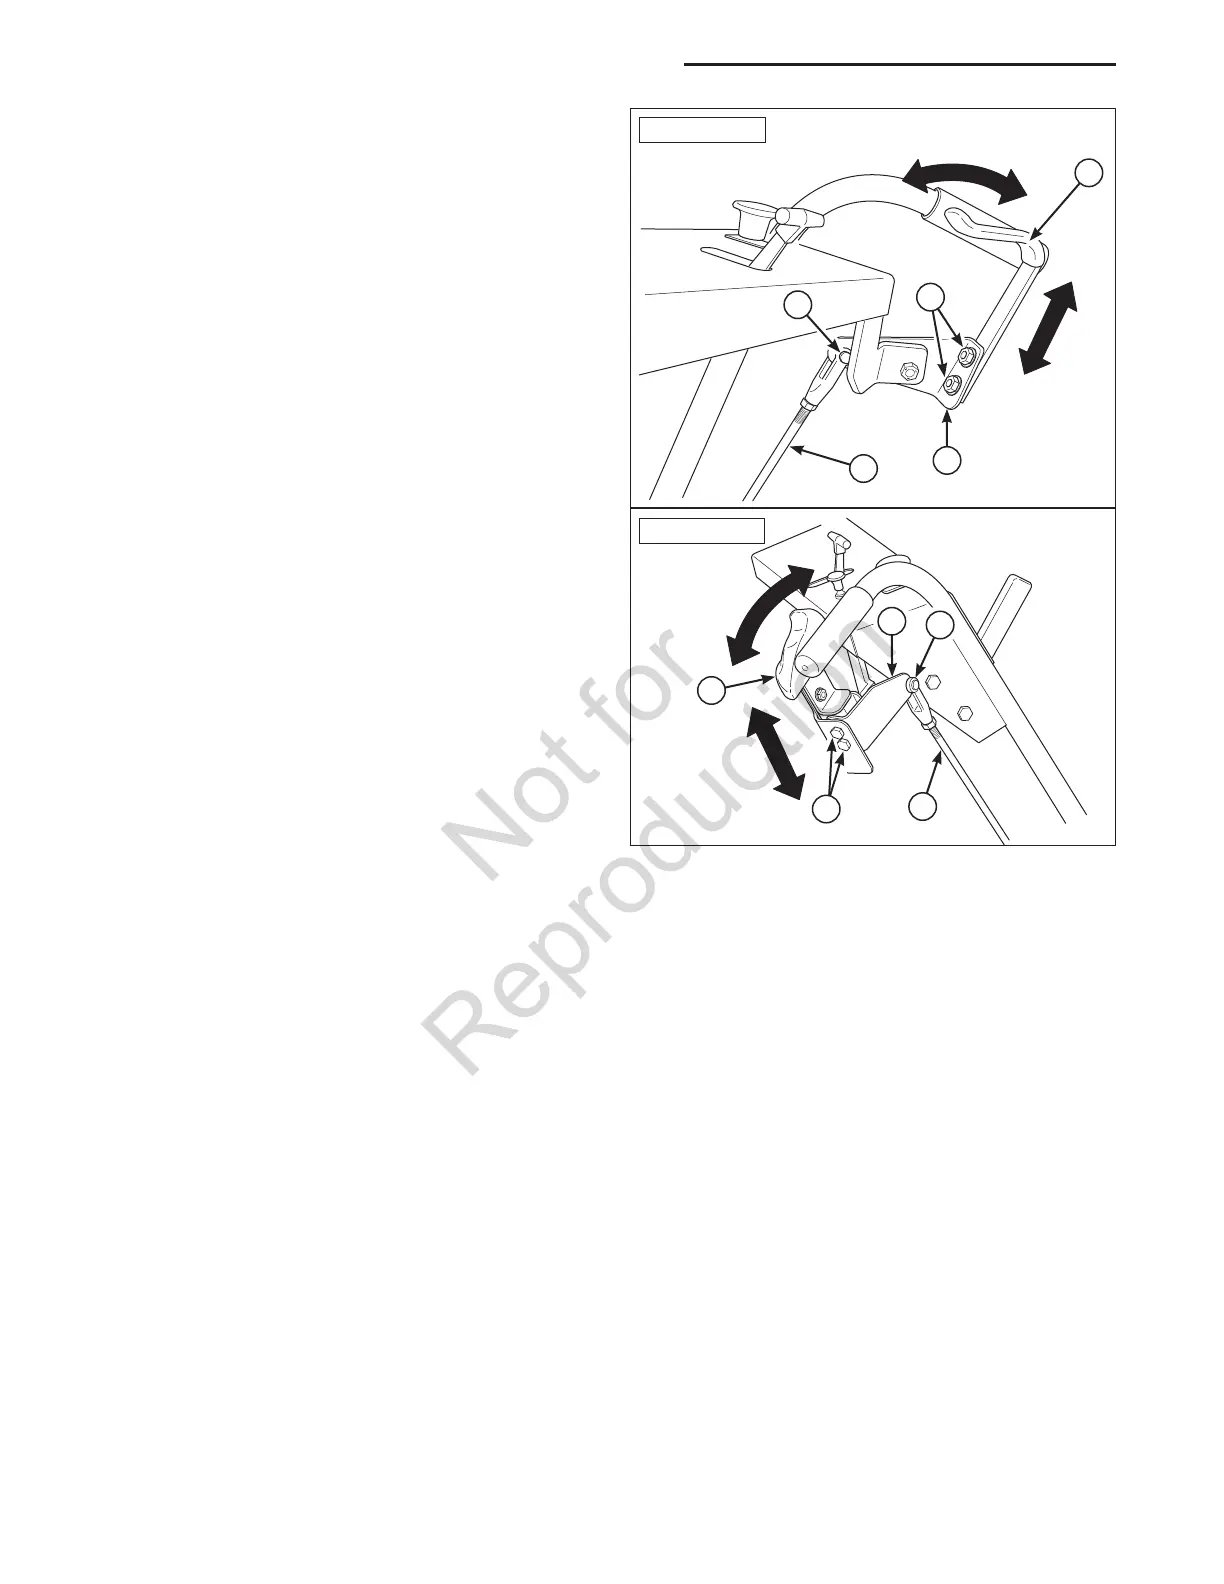
Troubleshooting, Adjustment & Repair
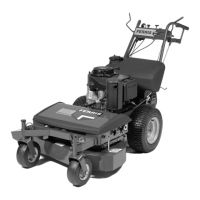
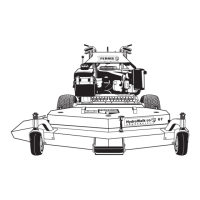
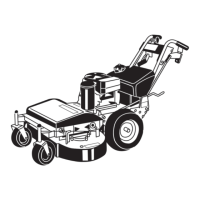
GROUND SPEED CONTROL LEVER
LOCATION ADJUSTMENT
The control levers can be adjusted in two ways to
provide a comfortable working range when operating
the machine at the average mowing speed.
Adjust both the lever height and lever position at the
same time to obtain the most comfortable working
position
Adjusting the Lever Height:
1. Loosen the lever fastener (B, Figure 27) to adjust
the lever height. Make sure the levers are parallel
with the handle bars in both forward and reverse
without contacting the handle bars.
Adjusting the Lever Position:
1. Remove the hairpin and clevis pin (D) that fasten
the control rod (E) to the lever pivot (C).
2. Loosen the jam nut and adjust the position of
the clevis on the rod. By shortening the rod
(turning the clevis clockwise), it will move the lever
forward. By lengthening the rod (turning the clevis
counter-clockwise), it will move the lever rearward.
Adjust until the desired lever position is obtained
and tighten the jam nuts.
3. Reinstall the clevis on the lever pivot and secure
with the clevis pin and hairpin.
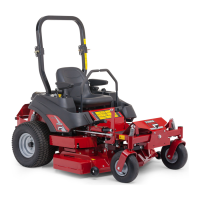
Figure 27. Ground Speed Control Lever
Adjustment
A. Control Lever
B. Lever Fastener
C. Lever Pivot
D. Clevis Pin & Hairpin
E. Control Rod
E
C
A
B
Manual Start
Electric Start
E
A
D
D
B
C
 Loading...