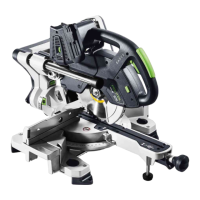
If, despite the table extension being
extended as far as possible, the work
piece protrudes over the table, the
workpiece must be supported by oth
er means.
7.6 Workpiece stop
Adjusting the stop ruler
For mitre cuts, you must adjust the stop rul
ers [11.1] so that they do not impede the func
tionality of the pendulum guard or come into
contact with the saw blade.
► Open the clamping lever [11.2].
► Move the stop ruler until the shortest dis
tance to the saw blade when working is a
maximum of 4.5 mm.
► Close the clamping lever again.
Removing the stop ruler
A stop ruler may need to be removed for some
mitre cuts, since it may otherwise collide with
the saw unit.
► Insert the screw [11.3] into the threaded
hole and tighten it as far as possible (down
wards).
► You will then be able to pull out the stop
ruler sideways.
► Loosen the screw again by three rotations
once you have reinserted the stop ruler.
Auxiliary stop
To increase the stop area, you can install an
auxiliary stop made of wood [12.2] in the
holes [12.1] in each of the two stop rulers. This
allows you to set up larger workpieces more
securely.
In doing this, be aware of the following:
– The screws you use to secure the auxiliary
stops must not protrude from the surface.
– The auxiliary stops must only be used for 0°
cuts.
– The auxiliary stops must not impede the
functionality of the guards.
7.7 Horizontal mitre angle
The horizontal mitre angle can be continuously
adjusted between 50° (left side) and 60° (right
side). In addition, there are snap-in positions
for common mitre angles.
The arrow of the indicator [13.2] points to the
set horizontal mitre angle. The two markings on
the right and left of the indicator arrow enable
precise setting of half-degree angles. For this
to work, both of these markings must line up
with the degree dashes on the scale.
Standard horizontal mitre angles
The following mitre angles have snap-in posi
tions:
Left: 0°, 15°, 22.5°, 30°, 45°
Right: 0°, 15°, 22.5°, 30°, 45, 60°
► Move the machine into the working position.
► Pull the clamping lever [13.5] upwards.
► Press the notch lever [13.4] downwards.
► Rotate the saw table until you get to the mi
tre angle you want.
► Release the notch lever. You must feel the
notch lever engage.
► Press the clamping lever downwards.
Optional horizontal mitre angles
► Move the machine into the working position.
► Pull the clamping lever [13.5] upwards.
► Press the notch lever [13.4] downwards.
► Rotate the saw table until you get to the mi
tre angle you want.
► Press the clamping lever downwards.
► Release the notch lever.
7.8 Vertical mitre angle
► Move the machine into the working position.
► Open the clamping lever [14.1].
► Turn the selector switch [14.2] to the ad
justment range you would like (0°–45°,
+/-45° or +/-47°).
► Swivel the saw unit until the indicator [14.3]
points to the mitre angle you would like. KS
120 REB only: You can fine-tune the setting
of the vertical mitre angle using the rotary
handle for precision adjustment [14.4].
► Close the clamping lever[14.1] again.
7.9 Special cutting position
Besides the usual position for cutting or trim
ming boards/panels, the machine has a special
cutting position for trimming slats with heights
of up to 120 mm.
► Pull the saw unit forwards.
► Swivel the lever [15.3] downwards.
► Push the saw unit back until the metal
bracket [15.1] hooks into the rear opening
of the saw unit.
► In this position, you can now trim slats of up
to 120 mm in height at the stop. The pull
function and the vertical swivel function of
the mitre saw are deactivated, however.
► To bring the machine back into its standard
position, press the release lever [15.2] and
pull the saw unit forwards. This will unhook
the metal bracket [15.1] and the lev
er [15.3] will swivel back.
English
26

 Loading...


