7 Settings
WARNING
Risk of injury, electric shock
► Always disconnect the mains plug from the
socket before performing any work on the
machine.
KS 120 REB only: Replace the adhesive warning
label [3.1] for the laser with the label in your
language that is enclosed with the tool.
7.1 Selecting the saw blade
Festool saw blades are identified by a coloured
ring. The colour of the ring represents the ma
terial for which the saw blade is suited.
Colour Material Symbol
Yellow Wood
Red Laminated wooden pan
els
Green Eternit fibre cement
panels
Blue Aluminium, plastic
7.2 Tool replacement
WARNING
Risk of injury
► Observe the following instructions:
– Disconnect the mains plug from the socket
before changing tools.
– Only use the spindle stop [7.2] when the
saw blade is at a standstill.
– The saw blade becomes very hot during op
eration; do not touch it before it has cooled
down.
– Wear protective gloves due to the risk of in
jury from sharp blades while changing
tools.
Removing the saw blade
► Move the machine into the working position.
► Press the spindle stop [7.2] and turn it
clockwise by 90°.
► Fully loosen the screw [7.8] using the hex
key [7.9] (left-hand thread).
► Press the on/off switch [7.3] and open the
lock of the pendulum guard.
► Fully open the pendulum guard [7.4].
► Remove the clamping flange [7.7] and the
saw blade.
Fitting the saw blade
► Clean all parts before installing them (saw
blade, flange, screw).
► Place the saw blade on the tool spin
dle [7.5].
WARNING
Risk of injury
► Make sure that the rotational directions
of the saw blade [7.6] and the ma
chine [7.1] correspond to each other.
► Secure the saw blade with the flange [7.7]
and the screw [7.8].
► Firmly tighten the screw [7.8] (left-hand
thread).
► Press the spindle stop [7.2] and turn it anti-
clockwise by 90°.
7.3 Workpiece clamp
Fitting the workpiece clamp
► Fit the workpiece clamp [8.1] into one of the
two holes [8.2]. The clamping unit must
point towards the rear.
► Twist the workpiece clamp so that the
clamping unit faces forward.
7.4 Dust extraction
WARNING
Health hazard posed by dust
► Always work with an extractor.
► Comply with national regulations.
► Wear a dust mask.
A Festool dust extractor with an extractor hose
diameter of 36 mm or 27 mm (36 mm recom
mended due to the reduced risk of clogging)
can be connected to the extractor connec
tor [9.1].
The flexible chip deflector [9.2] improves the
collection of dust and chips. Therefore, never
work without a fitted chip deflector.
The chip deflector is clamped in position on the
guard with the clamp [10.1]. For this, the
hooks [10.2] of the clamp must lock into the re
cesses [10.3] of the guard.
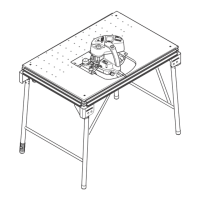
7.5 Adjusting the table extension
► Open the knob [1.9].
► Pull out the table extension [1.8] far enough
that the workpiece is laid out fully.
► Close the rotary knob.
English
25
 Loading...