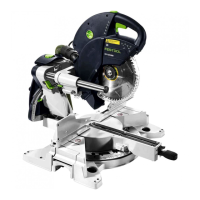
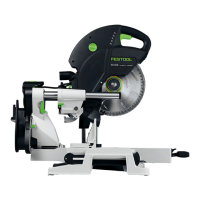
8 Working with the power tool
WARNING
Flying tool parts/workpiece parts
Risk of injury
► Wear protective goggles.
► Ensure that no other persons are close to
the machine while it is being used.
► Always clamp workpieces tightly.
► The clamps must be fully laid out.
WARNING
The pendulum guard does not close
Risk of injury
► Stop the sawing process.
► Unplug the mains cable and remove waste.
In the event of damage, remove the pendu
lum guard.
Working safely
When working on the machine, observe
all of the safety notes that are listed at
the start and the following rules:
– Correct working position:
– At the front on the side of the operator;
– Head-on to the saw;
– Beside the line of cut.
– During operation, always hold the power
tool tightly by the handle [1-1] in your op
erating hand. Always keep your free hand
outside of the hazardous area.
– Only guide the power tool towards the
workpiece when it is switched on.
– Adjust the feed speed in order to prevent
the machine from overloading and to pre
vent the plastic from melting if you are cut
ting plastics.
– Ensure that the star handle [2-9] and the
rotary knob [2-6] have been tightened.
– Do not work on the power tool if its elec
tronics are defective as this may lead to ex
cessive speeds. Defective electronics mean
that there is no smooth start-up and the
speed regulation fails.
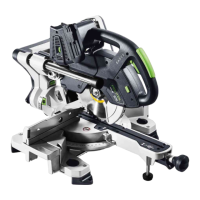
8.1 Clamping the workpiece
Warning! Note the workpiece's proper
ties:
Risk of injury
Securely in place – Place the workpieces on the
stop ruler. Do not process any workpieces that
have not been securely clamped.
Size – do not process workpieces that are too
small. In the interests of safety, the cut piece
remaining should be at least 30 mm long.
Small workpieces may be pulled backwards by
the saw blade and into the gap between the saw
blade and the stop ruler.
Correct support – Observe the maximum work
piece dimensions. Always use and secure ex
tensions to the workpiece support. Otherwise,
the workpiece may be subjected to internal
stresses, which may lead to sudden deforma
tions. If required, observe the information for
workpiece dimensions (see section )
7.4 .
Proceed as follows to clamp the workpiece [7]
► Push the saw unit downwards until it rea
ches the limit stop.
► Pull the lever for the transport locking de
vice [7-1].
► Slowly guide the saw unit upwards.
► Place the workpiece so that it is flush with
the stop ruler [7-3].
► Use the fastening clamp [7-2] to secure the
workpiece in place.
► Check that the workpiece is securely in
place.
8.2 Observe the workpiece dimensions
Maximum workpiece dimensions without
extension using accessory parts
Mitre/inclination
angle, to scale
Height x width x length
0°/0° 60 x 305 x 720 mm
45°/0° 60 x 215 x 720 mm
0°/45° right 20 x 305 x 720 mm
0°/45° left 40 x 305 x 720 mm
45°/45° right 20 x 215 x 720 mm
45°/45° left 40 x 215 x 720 mm
Maximum workpiece dimensions when
installing together with UG-KS60 and KA-KS60
The maximum height and width of the work
piece do not change if accessory parts are in
stalled. The contact surface when installing the
English
27
 Loading...