8
Commissioning
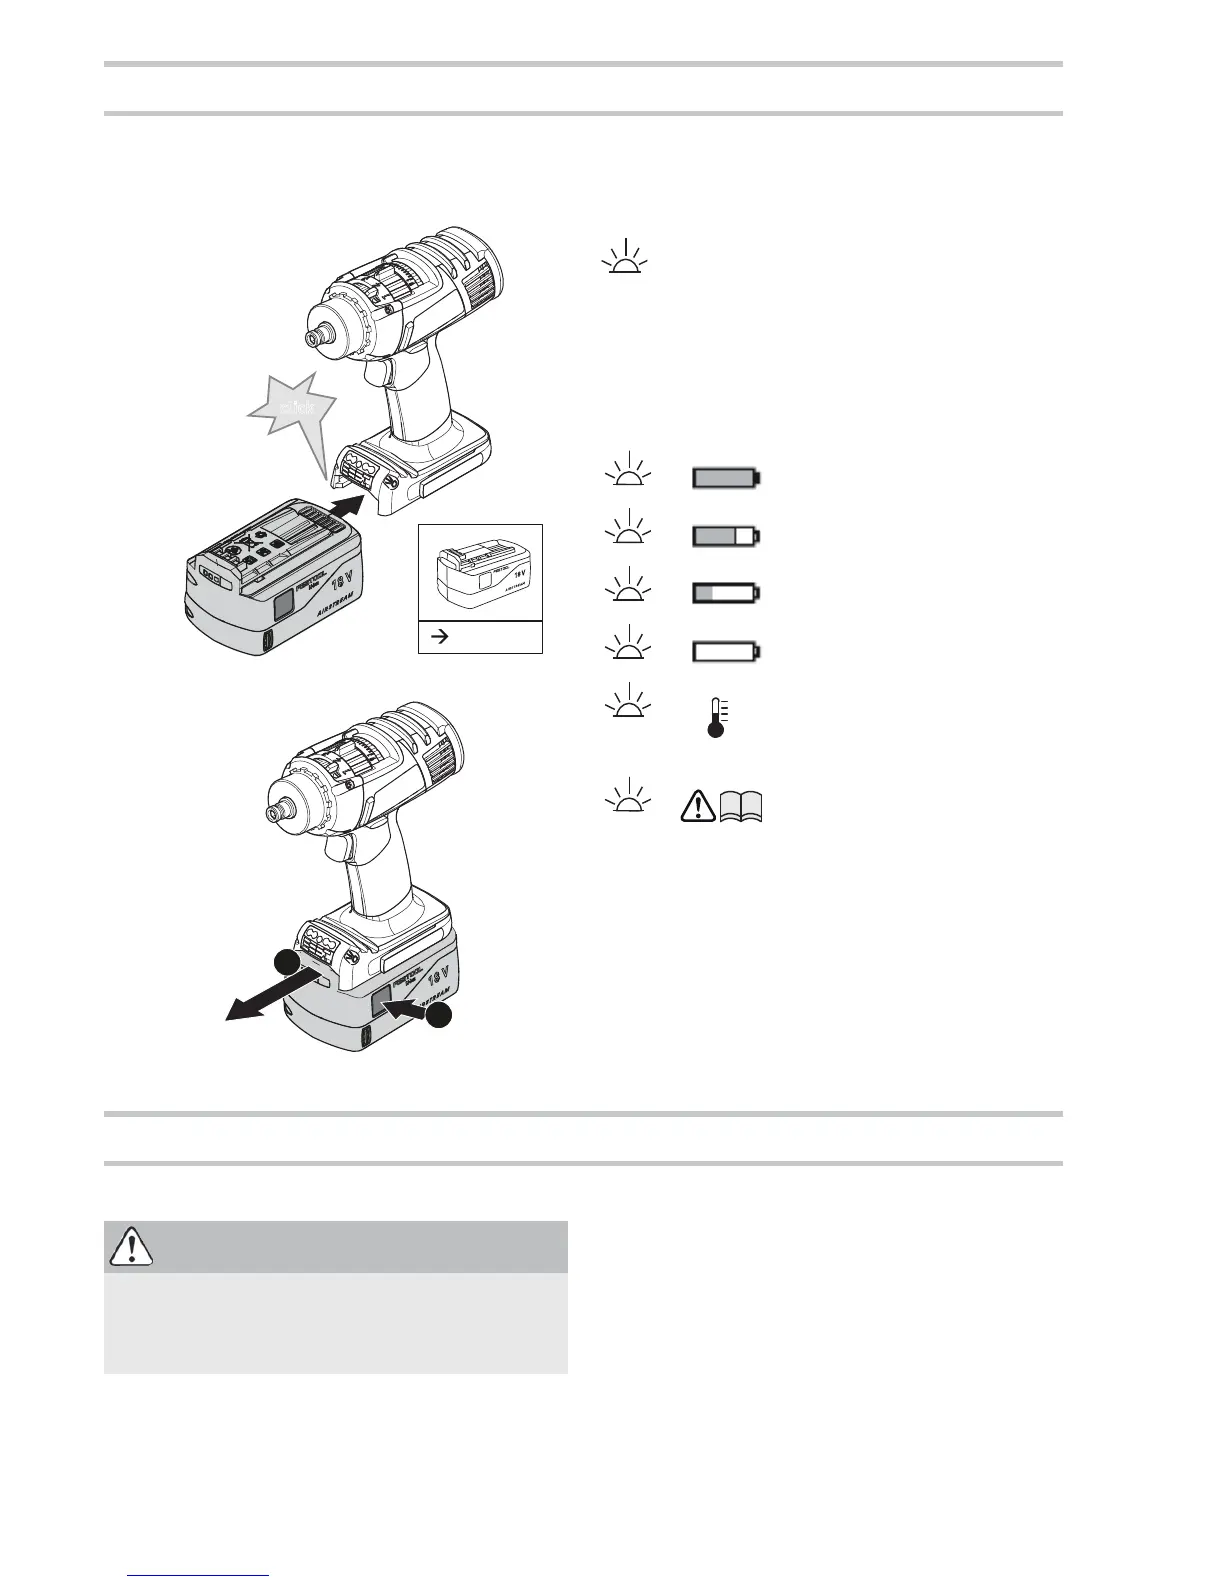
Consider the pictures on the fold-out page.
Changing the battery pack
L
Battery pack is ready for use immediately upon
delivery and can be charged at any time.
Light and battery capacity indicator
The LED on the lamp
[1-2]
is both a light and
a battery capacity indicator
.
X
Press the LED light switch
[1-1]
:
1x ... LED, working area illumination
2x ... capacity indicator, indicates the charging
state of the battery pack (not with NiCd and
NiMH battery packs)
Settings
Consider the pictures on the fold-out page.
Changing direction of rotation
[1-9]
• Switch to the left = clockwise rotation
• Switch to the right = counterclockwise rotation
Changing gear
You can change gear using the gear switch
[1-7]
.
Adjusting the torque[1-8]
Fastening
Select the correct torque setting:
Position 1 = low torque
Position 12 = high torque
2
Inserting battery pack
click
BP/C 18
1
2
LED green – lit continuously:
charged > 60 %
LED green – flashing slowly:
charged 30 % – 60 %
LED green – flashing quickly:
charged 0 % – 30 %
LED yellow – lit continuously:
battery is empty
LED red – lit continuously:
bat-
tery temperature is outside the
permitted range.
LED red – flashing:
indicates a
general fault, e.g. incomplete
contact, short circuit, battery
pack faulty, etc.
CAUTION
Risk of injury
X
Always switch off the power tool before adjusting
settings!

 Loading...