9.9 Dust extraction
WARNING
Hazardous dust
Damage to the respiratory passage
► Always work with an extractor.
► Comply with national regulations.
► Wear a dust mask.
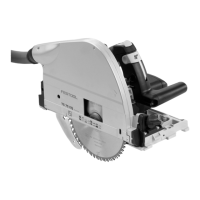
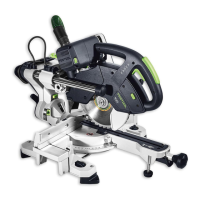
The TKS 80 EBS has two vacuum connections
with bayonet coupling:
An upper vacuum connection [10-1] with a di
ameter of 27 mm and a lower vacuum connec
tion [10-4] with a diameter of 36 mm.
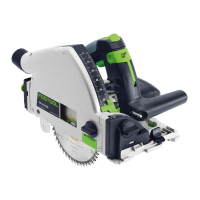
► To guide the upper extractor hose, attach
the extractor hose holder [10-2] to one of
the V profiles.
The extractor set [10-3] joins both vacuum con
nections to enable a Festool mobile dust ex
tractor with an adapter of 50 mm in diameter to
be connected.
9.10 Saw blade cover
Opening the saw blade cover
► Loosen the screw [11-1] and remove both
keys.
► Release the rotary knob [11-2].
► Open the top [11-3] with a spanner for the
spindle flange [11-5] or with a suitable
screwdriver.
► Open the saw blade cover [11-4].
Closing the saw blade cover
► Insert the saw blade cover [11-4].
► Close the top [11-3] with a spanner for the
spindle flange [11-5].
► Insert both open-ended spanners and tight
en the screw [11-1].
► Tighten the rotary knob [11-2].
9.11 Changing the saw blade
CAUTION
Risk of injury from hot and sharp tool
► Do not use any blunt or faulty tools.
► Wear protective gloves.
The sawing efficiency and quality of the cut
essentially depend on the condition and
the tooth shape of the saw blade. For this
reason, only saw blades that are sharp and
suitable for the material being worked on
must be used.
Removing the saw blade
► Open the saw blade cover (see section
9.10 ).
► Remove the table insert (see section 9.6 )
► Set the maximum cutting height (see sec
tion 9.3 ).
► Use the two spanners [12-1] to loosen the
saw blade [12-2] from the tool spin
dle [12-3].
► Remove the spindle nut [12-5] and spindle
flange [12-4] from the tool spindle [12-3].
► Remove the saw blade [12-2] from the tool
spindle [12-3].
A new or different saw blade can be fitted.
WARNING
Risk of accidents due to loose rotating saw
blade
► The direction of rotation of the saw blade
and saw must match (see the direction of
the arrow).
► The writing on the saw blade must be visi
ble.
► Tighten the spindle flange [12-4] and spin
dle nut [12-5] to a tightening torque of
≥ 25 Nm.
Fitting the saw blade
► Place a new or different saw blade [12-6]
on the tool spindle [12-3].
► Attach the spindle flange [12-4] to the tool
spindle [12-3] and tighten the spindle
nut [12-5] with the two spanners [12-1].
The saw blade and cartridge must not
touch.
► Fit the table insert (see section 9.6 ).
► Close the saw blade cover (see section
9.10 ).
9.12 Changing the cartridge
Removing the cartridge
► Open the saw blade cover (see section
9.10 ).
► Set the mitre angle to 0° (see section 9.4 ).
►
Turn the cartridge locking device [13-1]
clockwise by one quarter of a rotation.
►
Remove the cartridge locking de
vice [13-1].
►
Remove the cartridge [13-3] from the
fastening pins [13-2].
Fitting the cartridge
► Remove the protective cap [13-4] from
the new cartridge.
English
38