Page 11
Technical Specifications
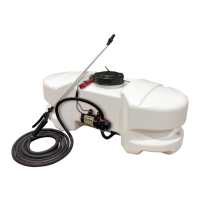
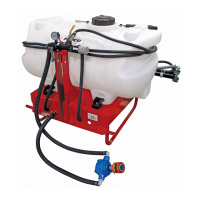
Mul-Lid Direcons
1. Open ll cap and place garden hose into tank. Fill tank to desired gallon marker,
if marker is above the boom of calibraon container, stop before water
reaches calibraon container. This is done to help chemical mix beer and keep
foaming of chemical to a minimum later.
2. Remove Mul-Lid and use calibraon container to measure the correct amount
of chemical for the water being used.
3. Pour chemical into tank and ghten Mul-Lid back onto tank. If desired amount
of water was added in step 1, you are done. Be sure to press rmly on ll cap to
seal with Mul-Lid. If desired amount of water was not met in step 1, proceed
to step 4.
4. Open ll cap and place garden hose into tank. Add water to the desired gallon
marker. Close ll cap, pressing rmly to seal cap to Mul-Lid.
NOTE: If water and chemical has not mixed properly, use the pressure adjustment
control on the manifold to recirculate the mixture through tank.
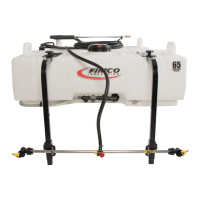
Properly secure the tank to your utility vehicle, using tie-down or ratchet straps (Not Included).
Tank straps may be installed through the handles to help prevent straps from slipping off tank if
too loose.
Handles can be used to lift the empty tank in and out of the box.
Stay within your utility vehicle’s weight limits. This unit when filled with water weighs approxi-
mately: 630 lbs. Consult the owner’s manual for your vehicle.
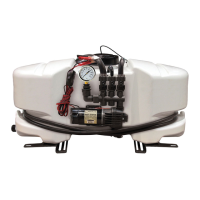
There is a shut-off valve on the intake line. It is at this location so you can shut
off the flow of solution to access your system’s filter screen for cleaning.
Checking/Cleaning the sprayer’s filter/screen:
Start your pump and before it shuts off, reach down and shut the valve to
the ‘Closed’ position (lever is perpendicular to the flow of fluid), then shut
off your pump.
Unscrew the bowl of the filter to access the screen.
Remove the screen and clean as necessary. Replace when done and
reassemble the entire assembly.
Make sure the valve is turned to the ‘Open’ position before restarting your
pump.
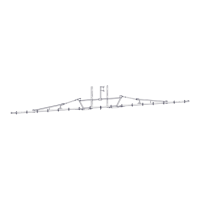
34½”
16¾”
47”
34½”
36”