21
2
2
1
ATTACH PANEL TO PRODUCT
ADJUST PANEL HEIGHT TO ALIGN THE CABINETRY GAPS
20b
22b
21b
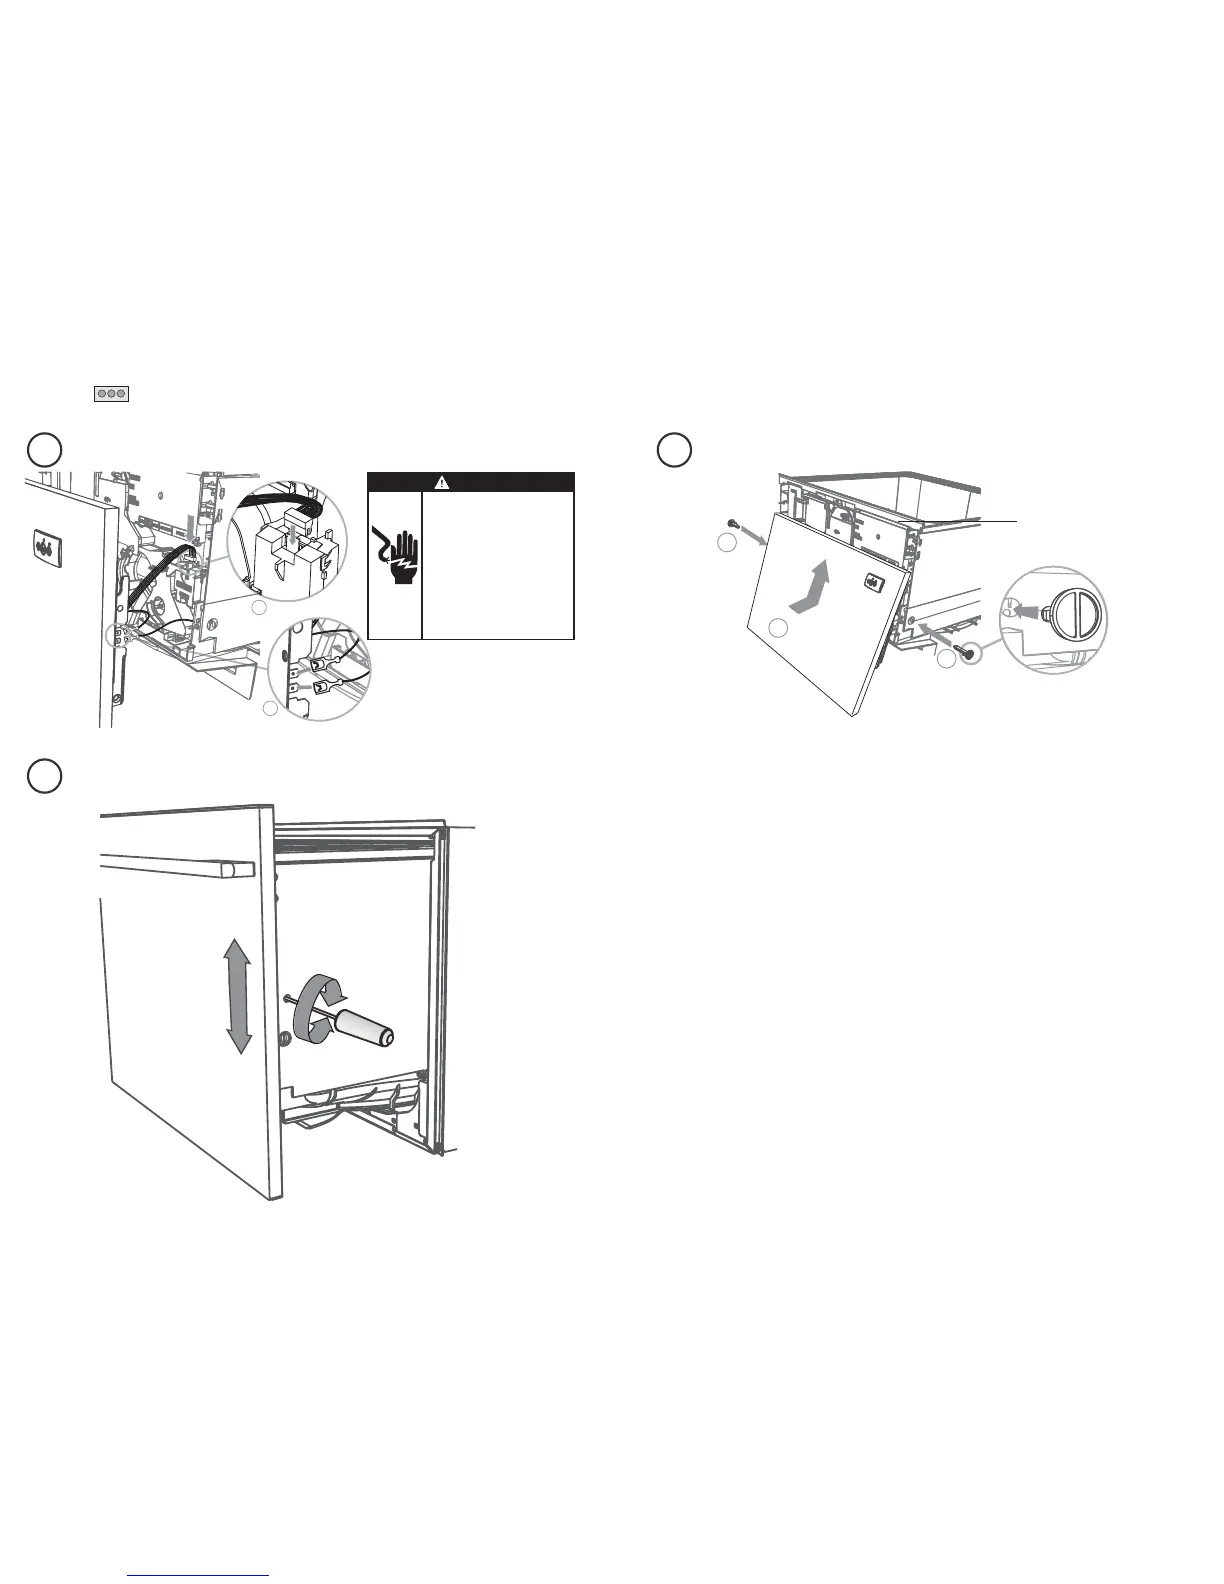
With the front panel fitted, insert an appropriately
sized Philips screwdriver into the hole above the
door pin and rotate the panel up or down to align
the gaps in your cabinetry.
Repeat on the other side if necessary.
The panel has a maximum travel of 2 mm up or
down.
Important!
Ensure that you maintain a minimum of 8 mm ventilation
gap below the panel.
+ or - 2 mm
Important!
Ensure the rubber seal
between the drawer
and panels is kept in
place.
When refitting the
door pins, ensure
they are
orientated as shown.
Push the panel in
then up to locate.
INTEGRATED MODELS WITH BADGE ONLY - INSTALLING THE FRONT PANEL & BADGE CONTROLS
REATTACH BADGE & EARTH THE PANEL
WARNING!
Electrical Shock Hazard
Connect the integrated badge
earth wire to one of the two tabs
provided on the panel bracket.
To earth the panel bracket,
connect the earth wire from the
product to the other tab.
Any custom metal component
(e.g. handle) that extends past the
rubber seal must be earthed too.
Failure to follow these warnings
may result in electrical shock,
injury or re.
 Loading...