ASSEMBLY
1. Remove all components from box.
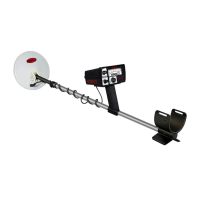
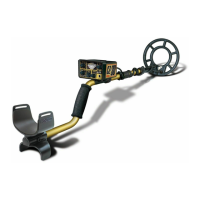
2. Attach searchcoil to lower rod by lining up the holes.
Notice that the lower rod is supplied with only one rubber washer.
It is designed to work with only one washer for maximum stability.
Push coil knob through hole and tighten knob gently.
You will tighten up the coil knob later.
3. Insert smallest rod into S-rod (S-rod holds detector body).
Turn top locking collar counter-clockwise to open up.
Push in pin on small rod.
Slide small rod into upper rod.
Click pin into hole and tighten locking collar firmly clockwise.
4. Push lower rod into small rod as follows:
Turn locking collar counterclockwise to open up.
If plastic insert tab interferes, push it down, or turn tube upside down.
Push in pin to allow rod to slide in.
Slide lower rod in.
Click pin into any hole.
5. Remove velcro strip from lower rod.
6. Wrap cable around stem as follows:
Leave some slack in cable at base of lower rod.
Secure cable at base of rod with velcro strip.
Wrap cable loosely around entire stem up to bent part of upper rod.
You will re-wrap the cable later after sizing the rods to your height.
7. Push cable into connector on back of housing.
Do not twist the cable or plug.
Turn knurled cap nut only. Do not cross thread.
8. Tighten knurled cap nut by hand to secure cable connection to housing.
Do not twist the cable or plug.
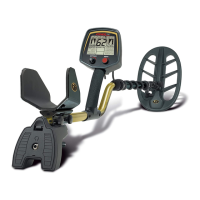
9. Adjust to your height:
Hold detector, standing up, with your arm in the armrest.
Place searchcoil flat on the ground with back edge of coil 6” in front of your
toes.
Click pin on lower rod into nearest hole.
Firmly tighten bottom locking collar to secure lower stem.
10. Attach cable to top of rod with upper Velcro strip
11. Tighten up coil knob to keep searchcoil from flopping.
12. Insert batteries.
4 batteries are all installed the same way -- positive terminals pointed upward.
After establishing a comfortable length, firmly tighten the locking collars on the rods to
prevent the tubes from rattling. Rotate the collars a full 270° to engage and lock in place. If
you are unable to rotate a full 270°, use gloves for a better grip.
If the searchcoil appears crooked with respect to the pole, loosen both locking collars and
re-adjust. Hold each of the lower poles in the counterclockwise position as you tighten the
locking collars.
 Loading...