EasyManua.ls Logo

Fisher Scientific AccuSpin Micro 17 - User Manual

Fisher Scientific AccuSpin Micro 17
79 pages
Print Icon
To Next Page IconTo Next Page
Loading...
Instructions for use
AccuSpin Micro 17 / 17R

Table of Contents

Questions and Answers

  • D
    Daniel CastilloAug 20, 2025
    What does E-24 mean on my Fisher Scientific Laboratory Equipment?
    • R
      Rachel FrancisAug 20, 2025
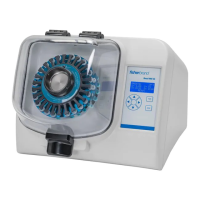
      Error code E-24 on your Fisher Scientific Laboratory Equipment indicates wrong status information from the lid-latch. Try the following: 1. Turn the centrifuge off and then on again. 2. After switching it back on, check if the display shows "Lid FAiL". 3. If the centrifuge lid has already been opened, the display will show "Close Lid"; in that case, close the lid. 4. The centrifuge will then try to open the lid to switch for starting the normal operation mode. If the error continues, contact a service representative.
  • P
    Peter AlvaradoAug 22, 2025
    What does E-31 mean on my Fisher Scientific Laboratory Equipment?
    • B
      burtonnancyAug 22, 2025
      Error code E-31 on your Fisher Scientific Laboratory Equipment indicates overtemperature in the motor. To resolve this: 1. Turn off the instrument and unplug the mains power cord. 2. Inspect and clean the venting slots, and if applicable, the filter unit of the cooled centrifuge. 3. Wait approximately 60 minutes before restarting the instrument. Make sure to stay within the maximum permissible environmental temperature. If the error persists, contact a service representative.
  • S
    Stephanie JohnsonAug 25, 2025
    Why is my Fisher Scientific Laboratory Equipment making exceptionally running noise?
    • D
      Dr. Jessica Carlson DDSAug 25, 2025
      The exceptionally running noise in your Fisher Scientific Laboratory Equipment might be due to an imbalance. Here's what you should do: 1. Immediately stop the centrifuge by pressing the "stop" key, or unplug the mains power cord in an emergency. 2. Wait for the centrifuge to come to a complete stop. 3. Check if the rotor is loaded correctly. 4. Examine for any broken tubes or damage to the rotor or motor that could be causing the noise. If you can't find and fix the problem, contact a service representative.
  • C
    Christopher MasseyAug 26, 2025
    What to do if the Fisher Scientific Laboratory Equipment centrifuge lid cannot be opened?
    • L
      Lori DodsonAug 26, 2025
      If you're having trouble opening the centrifuge lid of your Fisher Scientific Laboratory Equipment, it could be due to the lid not being correctly engaged or the lid being warped. First, check if the mains connection is working and the instrument is switched on (the display should be lit). If that doesn't work, you can use the mechanical emergency lid release to open the centrifuge lid.
  • W
    William MercerAug 28, 2025
    How to fix E-60 error on Fisher Scientific Laboratory Equipment?
    • S
      Shane BrownAug 28, 2025
      The E-60 error code on your Fisher Scientific Laboratory Equipment indicates insufficient temperature in the refrigeration unit. To address this: 1. Stop the centrifugation run. 2. Open the centrifuge lid and defrost the chamber. Never touch the chamber directly with your hands, as you may freeze up. 3. Wait about 60 minutes before restarting the instrument. Ensure you observe the maximum permissible environmental temperature. 4. If there's a strong ice sheet inside the chamber, make sure to remove all condensate after defrosting. If the error persists, contact a service representative.
  • K
    Kimberly FletcherAug 29, 2025
    What does E-29 mean on my Fisher Scientific Laboratory Equipment?
    • S
      Stephen AdkinsAug 29, 2025
      Error code E-29 on your Fisher Scientific Laboratory Equipment suggests that the motor or rotor is blocked. To solve this problem: 1. Switch the instrument off and on again using the mains switch. 2. Open the centrifuge lid. 3. Check if the rotor can turn freely. If you're unable to resolve the issue, please contact a service representative.
  • M
    Michael SmithAug 31, 2025
    What does E-33 mean on my Fisher Scientific Laboratory Equipment?
    • B
      Brian DouglasSep 1, 2025
      Error E-33 on your Fisher Scientific Laboratory Equipment indicates overpressure in the refrigeration system. Try these steps: 1. Turn the instrument off and unplug the mains power cord. 2. Inspect and clean the venting slots and the filter unit of the cooled centrifuge, if applicable. 3. Wait approximately 60 minutes before restarting the instrument, and be sure to observe the maximum permissible environmental temperature. If the error persists, contact a service representative.
  • M
    Mrs. Jennifer WyattSep 2, 2025
    What does E-14 mean on my Fisher Scientific Laboratory Equipment?
    • P
      pcoleSep 3, 2025
      The error code E-14 on your Fisher Scientific Laboratory Equipment indicates overtemperature in the centrifuge chamber. Turn the centrifuge off, wait about one minute, and then turn it back on. If the error continues, contact a service representative.
  • M
    Matthew SanchezSep 5, 2025
    What does E-22/E-23 mean on my Fisher Scientific Laboratory Equipment?
    • S
      Scott MccartySep 5, 2025
      Error codes E-22 or E-23 on your Fisher Scientific Laboratory Equipment indicates an error in speed entry. To fix this, switch the instrument off and on again. If the error continues, contact a service representative.
  • A
    Alex YoungSep 6, 2025
    What does E-15 | E-16 mean on my Fisher Scientific Laboratory Equipment?
    • K
      Karen JacksonSep 7, 2025
      Error codes E-15 or E-16 on your Fisher Scientific Laboratory Equipment indicates a temperature measurement error. To resolve this, switch the instrument off and then on again. If the error persists, contact a service representative.

Summary

For Your Safety

Safety Instructions in this Manual

Explains potential hazards to persons and damage to the centrifuge.

Warning: Hot Surfaces

Symbol denoting hot surfaces as a potential hazard.

General Danger Area

General danger area symbol and advice to read manual.

General Hints

Symbol indicating general hints and advice.

Proper Use

Guidelines for correct operation and intended use of the centrifuge.

Improper Use

Warnings against incorrect handling and potential damage.

Centrifuging Hazardous Materials

Safety precautions when centrifuging hazardous materials.

Handling the Centrifuge

Instructions for safely handling the centrifuge unit.

Before Use

Where to Install the Centrifuge

Criteria for selecting a suitable installation location.

Transport and Installation the Centrifuge

Guidelines for safely transporting and installing the centrifuge.

Centrifuge with Refrigeration Unit

Specific instructions for centrifuges with refrigeration units.

Mains Connection

Instructions for connecting the centrifuge to the power supply.

Removing the Transport Protection

Steps to remove transport protection before operation.

Description of the Instrument

Pieces Delivered

Lists the components included with the centrifuge.

Safety Systems

Details the safety features integrated into the centrifuge.

Properties

Describes the characteristics and features of the centrifuge.

Quick Run Operation

Explains the functionality of the "quick run" feature.

Accessories

Rotors for the accuSpin Micro 17

Details available rotors for the AccuSpin Micro 17.

Rotors for the accuSpin Micro 17 R

Details available rotors for the AccuSpin Micro 17R.

Adapters

Information about available adapters for the centrifuge.

Performance Characteristics for AccuSpin Micro 17

Table detailing performance specs for AccuSpin Micro 17 rotors.

Performance Characteristics for AccuSpin Micro 17 R

Table detailing performance specs for AccuSpin Micro 17R rotors.

Handling the Rotor

Rotor Temperature

Guidelines for rotor temperature usage.

Lifetime of the Rotor

Information on the service life and care of rotors.

Rotor Lid with a Spring Lock

Description of the spring-lock rotor lid mechanism.

Closing the Rotor Lid

Instructions for properly closing the rotor lid.

Operation Without Rotor Lid

Procedures for operating the centrifuge without a rotor lid.

Rotor Lid with Screw Plug

Details on using rotor lids with screw plugs.

Aerosol-tight Application

Guidelines for aerosol-tight operation and sample filling.

Aerosol Bio-containment

Procedures for ensuring aerosol containment during operation.

Operation

Loading the Rotor - Maximum Load

Instructions and warnings regarding maximum rotor load.

Filling the Centrifuge Tubes

Guidance on filling centrifuge tubes and maintaining balance.

Placing the Tubes in the Rotor

Instructions for symmetrical loading of tubes into the rotor.

Entering Parameters

How to set operating parameters like speed and RCF.

Switching from Speed to RCF Display

How to switch between speed and RCF display modes.

Selecting Speed

Steps to set the desired rotational speed.

Entering the RCF Value

Steps to set the desired relative centrifugal force (RCF).

Concerning the RCF Value

Explanation of RCF calculation and factors affecting it.

Selecting the Run Time

How to set the desired centrifugation run time.

Continuous Operation

Instructions for operating the centrifuge in continuous mode.

Setting the Temperature

How to set the desired sample temperature for cooled units.

Pretemp Function

Explanation of the pre-tempering function for unloaded rotors.

Starting the Centrifuge

Steps to initiate the centrifugation process.

Changing the Settings During the Run

How to adjust parameters while the centrifuge is running.

Stopping the Centrifuge

Procedures for stopping the centrifuge run.

Short-time Centrifugation

How to perform short centrifugation cycles.

Removing the Rotor

Steps for safely removing the rotor from the drive shaft.

Audible Alarm

Information on managing audible alarms and signals.

Turning Off the Centrifuge

Instructions for safely powering down the centrifuge.

WEEE Compliance

Information regarding Waste Electrical and Electronic Equipment compliance.

Maintenance and Care

Maintenance to be Performed by the Customer

Customer responsibilities for maintaining the centrifuge.

Cleaning

Procedures for cleaning the centrifuge and its components.

Venting Slot Cleaning

Advice on cleaning the venting slots and air filter.

Cleaning the Filter Unit

Detailed steps for cleaning the filter unit.

Disinfection

Procedures for disinfecting the centrifuge and rotor.

Disinfection with Bleaching Lye

Specific instructions for disinfection using bleaching lye.

Decontamination

Procedures for decontaminating the centrifuge.

Autoclaving

Guidelines and precautions for autoclaving components.

Troubleshooting

Mechanical Emergency Lid Release

Steps for manually opening the lid in emergencies.

Problems You Can Handle Yourself

Common issues and their self-resolving steps.

Error Codes and Symptoms

Table mapping error codes to symptoms and solutions.

Error Codes and Symptoms (Continued)

Table mapping error codes to symptoms and solutions.

Contacting Service

How to contact the service representative and what information to provide.

Technical Data

Component Parts

Lists and describes the main physical components of the centrifuge.

The Easycontrol User Interface

Details the functions and performance of the user interface.

Performance

Summarizes key performance specifications of the centrifuge.

Dimensions and Weight

Provides physical dimensions and weight of the centrifuge.

Testing Standards

Lists the testing standards and certifications the centrifuge meets.

Electrical Connections

Details electrical specifications, voltage, current, and fuses.

Appendix

Speed;RCF Diagram - Micro Liter Rotor 24 x 2 ml

Graphical representation of speed vs RCF for a specific rotor.

Speed;RCF Diagram - Micro Liter Rotor 36 x 0.5 ml

Graphical representation of speed vs RCF for a specific rotor.

Speed;RCF Diagram - Dual Rotor 18 x 2 ml; 0.5 ml

Graphical representation of speed vs RCF for a specific rotor.

Speed;RCF Diagram - PCR-Rotor 4 x 8

Graphical representation of speed vs RCF for a specific rotor.

Speed;RCF Diagram - PCR-Rotor 8 x 8

Graphical representation of speed vs RCF for a specific rotor.

Autoclaving Protocol

A log for recording autoclaving cycles.

Index

Fisher Scientific AccuSpin Micro 17 Specifications

General IconGeneral
BrandFisher Scientific
ModelAccuSpin Micro 17
CategoryLaboratory Equipment
LanguageEnglish

Related product manuals