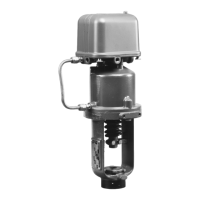
3570 Series
13
Changing to Direct Action
1. Bypass the control valve and shut off the input sig-
nal line and the supply pressure line to the positioner.
2. Remove the positioner cover by loosening the four
thumb screws on the underside of the base.
Note
An optional restrictor (see the top view
in figure 6) can be found in place of one
of the bellows mounting screws (num-
ber 1). If so, note the location of the re-
strictor and replace it in the same loca-
tion during reassembly. The restrictor
has a hex head; the mounting screws do
not.
3. Remove the four mounting screws (numbers 1 and
2), bellows, and bellows posts (number 3).
4. Invert the bellows and reinstall it in the positioner.
Secure the bellows with the four screws (numbers 1
and 2). Screw the bellows posts into the storage holes
provided in the base immediately above the cylinder
and instrument connections.
5. Refer to the adjustment procedures to check the
operation of the positioner. If the input signal range
has not been changed, adjustment of the range spring
might not be necessary.
6. Make a notation on the positioner action label (key
43, figure 11) that the action of the positioner has
been changed.
7. Replace the cover (key 39) on the positioner.
Split Range Operation
The 3570 Series valve positioners are suitable for split
range operation. In split range operation, two or more
control valves are operated by one output signal from
a single control device. When two control valves are
split ranged, one valve strokes fully with one half the
input signal range and the second valve strokes fully
with the other half of the input signal range.
Valve positioners shipped from the factory for split
range operation are constructed and adjusted accord-
ingly. If it is necessary to convert an existing positioner
to one suitable for split range operation, refer to table
4. If the application requires a selection not listed in
table 4, consult your Fisher sales office or sales repre-
sentative to determine the new parts required. For
most changes, a new range spring and possibly a new
bias spring will be required. A new range spring retain-
er might also be required for Type 3570, 3570C, 3572,
and 3573 positioners.
When corresponding with your Fisher sales office or
sales representative, supply all information possible
about the desired operating conditions and the serial
numbers of the control valve assembly. This informa-
tion will facilitate the proper selection of the required
parts.
To change an existing valve positioner to one suitable
for split range operation, refer to the range and bias
spring removal and replacement procedures in the
Maintenance section. Be certain the required new
parts are on hand before beginning any maintenance
operation.
Initial Range Spring Extension
Procedures for Type 3570P And 3570PC
Positioners
This procedure must be performed whenever the
range spring has been changed or the positioner has
been removed. Key numbers used in this procedure
are shown in figure 13 except where indicated.
1. With the cap screw (key 87) removed, hook the
small ball of the positioner cable (key 91) into the slot
of the smaller portion of the cable spool (key 96). Wind
the cable on the spool until the coils of the range
spring (key 18, figure 11) are slightly separated. Be
certain the cable is wound so that it comes off the side
of the spool opposite the access opening and that the
cable cannot cross itself on the spool.
2. Install the ball end of the actuator cable (key 92)
into the slot of the large portion of the spool that is
closer to the access opening. Wrap the cable on the
spool as many times as possible, then bring the cable
out through the bottom of the positioner extension. Be
certain the cable is wound so that it comes off the side
of the spool opposite the access opening and that the
cable cannot cross itself on the spool. Attach the cable
to the cable strap (key 93), leaving approximately a
1/32-inch (0.8 mm) gap between the cable eye and
cap screw head (key 94).
3. With the actuator piston rod completely retracted
and the range spring coils slightly separated, attach
the cable strap to the actuator feedback arm. Use the
set of cable-strap holes closest to the range spring.
Turn the spring cap (key 86) one turn counterclock-
wise and install one cap screw (key 87).
4. Adjust the range spring (key 18, figure 11) to obtain
full travel for the input signal range (span adjustment).
Refer to step 7 of the adjustment procedures. Adjust-
ment of the bias spring (zero adjustment) does not
need to be done at this time.
5. Remove the screw from the spring cap and slowly
release the torsion spring force by turning the spring
cap clockwise. Disconnect the cable strap from the
actuator and remove all range spring extension by ro-
tating the cable spool.