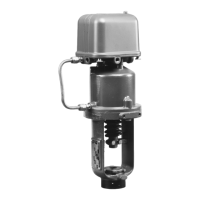
3570 Series
18
10. Check all O-rings for wear or damage.
11. Check all metal parts for damage. Do not attempt
to remove the stainless steel bushing in the relay
body. If this part is damaged, install a new relay body
(key 29A).
12. Check the clean-out wire assembly in the core
and orifice assembly (key 29S).
13. When reassembling, clean all parts and coat all
O-rings with a good quality grease that is compatible
with the elastomer O-rings. The grease should be of
the type that does not readily oxidize to form a hard
deposit. It should also resist being carried away from
the lubricated surfaces by the supply pressure.
14. When replacing the relay flange (key 29N), de-
press the nozzle and hold it down until the four flange
screws (key 29R) have been tightened. This ensures
the proper amount of slack in the two diaphragms.
15. Mount the relays in their respective positions on
the positioner pedestal, making certain that the relay
gasket (key 30) is in good condition and is in place.
16. If the positioner operation is still sluggish, a slight
adjustment of the bias spring post (see figure 3) might
be necessary. Loosen the locknut and rotate the post
in half-turn increments, checking after each half turn
for proper operation. Rotate the post no more than two
turns from the position shown in figure 3. Refer to the
adjustment procedures after rotating the post to check
the position of the post and beam assemblies.
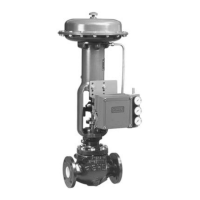
Converting a Type 3570 Valve Positioner
to a Type 3570C Valve Positioner
If desired, tire valves can be substituted for pressure
gauges. Also, locking relay nozzles can be added on
any 3570 Series positioner. This provides the
construction that is standard with the Type 3570C and
3570PC positioners.
Key numbers used in this procedure are shown in fig-
ure 11 except where indicated. When reassembling,
coat all pipe threads with a good quality pipe thread
compound.
1. Isolate the control valve from the line pressure, re-
lease pressure from both sides of the valve body, and
drain the process media from both sides of the valve.
If using a power actuator, also shut-off all pressure
lines to the power actuator, release all pressure from
the actuator. Use lock-out procedures to be sure that
the above measures stay in effect while you work on
the equipment.
2. Loosen the knurled screws (key 38) and remove
the cover (key 39).
3. Disconnect the tubing assemblies (keys 28 and 45)
from the base and from the gauges (keys 24 and 25).
Unscrew the hex nuts (key 27) from the back of the
gauges and remove the gauges (keys 24 and 25).
4. Unscrew the pressure gauge (key 54) from the
gauge adaptor (key 29U).
5. Unscrew and remove the nozzle and spring (keys
29Q and 29P) from each relay.
6. The gauge bracket (key 5) can be removed if de-
sired. To remove it, loosen the locknut (key 7) and re-
move the bias spring post and cap screw (keys 6 and
32). When replacing the bias spring post, be sure that
the bottom of the post thread is positioned as shown in
figure 3 for proper positioning of the E-ring travel
stops. This alignment can be verified visually through
the vent port.
7. Use compression plugs (key 52) to plug the holes
opened in the base when the tubing is removed.
CAUTION
Never rotate the nozzle (key 29Q) when
the locknut (key 29P) is tight, or damage
to the relay diaphragm will result. Al-
ways use a wrench on the nozzle to pre-
vent it from turning while loosening or
tightening the locknut.
8. Install the locknut and nozzle (keys 29P and 29Q)
on each relay.
9. Install the tire valve (key 26, figure 12) into the
gauge adaptor (key 29U).
10. Install the service tee and tire valve adaptor (keys
49 and 53, figure 12) into the CYLINDER connection.
Connect the pressure line that runs to the lower part of
the cylinder to the service tee.
11. Install the pipe nipple, pipe tee, and tire valve
adaptor (keys 50, 51, and 53, figure 12) into the
INSTRUMENT connection. Connect the input signal
line to the pipe tee.
12. Refer to the adjustment procedures.
Range Spring
Disassembly
Unless otherwise directed, key numbers refer to fig-
ures 11 and 12.
WARNING
The following procedure requires taking
the positioner, actuator, and control