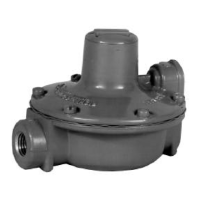
4195KA, KB, and KC Series
3–3
1.0 bar) or 6 to 30 psig (0.4 to 2.1 bar) to the remote
set point connection at the top of the controller case.
3. Remove the two machine screws (key 6) and lift off
the proportional band indicator cover (key 36).
4. Adjust the set point a minimum of 20 percent of
input span above the process pointer.
5. Adjust the proportional band for 5 percent DIRECT.
6. If necessary, connect a pressure source to the pro-
cess connection and adjust the process pointer to the
last mark on the left side of the scale. If the last scale
mark is 0 psig, a pressure source is not required.
7. The controller output pressure should be 0 psig.
8. Rotate the proportional band to 5 percent RE-
VERSE.
9. The controller output should be within 2 psig (0.14
bar) of the supply pressure.
10. If the controller output is within tolerance, adjust
the proportional band to 400 percent in the desired
action, secure the proportional band indicator cover
(key 36) with the machine screws (key 6), and go to
the startup procedure. If the controller output pressure
is not within tolerance, go to the 4195KA Series cal-
ibration procedure for recalibration.
Startup for 4195KA Series Controllers
Perform the prestartup checks and, if necessary, cali-
brate the controller prior to this procedure.
Note
When performing the startup proce-
dures, keep in mind that the initial set-
tings are guidelines. They will vary de-
pending on the actual process being
controlled.
1. Be sure the supply pressure regulator is delivering
the proper supply pressure to the controller.
2. For controllers with:
Manual set point:
Move the set point adjustment to the desired set point.
Remote set point:
a. See figure 2–5 for the location of the remote set
point connection. Connect an adjustable pressure
source to the remote set point connection.
b. Adjust the pressure source until the set point
indicator reaches the desired set point. Remember:
Increasing the remote set point pressure increases
the set point.
3. Set the proportional band adjustment to 100 per-
cent for fast processes. For slow processes, calculate
the proportional band percentage from the equation
below:
P.B.
200 Allowable Overshoot
Pressure Span
For example:
200 2psig
30 psig
13%
4. Create a load upset by momentarily changing the
set point. Check for system cycling. If the system does
not cycle, lower the proportional band setting (thus
raising the gain) and disturb the system again by
changing the set point. Continue this procedure until
the system cycles. At this point, double the proportion-
al band setting (proportional band setting ×2).
5. Check the stability of the recommended proportion-
al band setting by introducing a disturbance and moni-
toring the process.
Calibration of 4195KA Series Controllers
General Calibration Instructions
Note
If the controller has the auto/manual sta-
tion (suffix letter E), be sure the control-
ler is in the automatic mode before per-
forming calibration.
If the prestartup checks, or startup, reveal faulty con-
troller operation, perform the calibration described in
this section. These instructions are valid for either
shop or field calibration, provided that open process
loop conditions exist. Unless otherwise noted, key
numbers are found in figure 5–24.
Do not use the gauges supplied with the controller dur-
ing calibration. Monitor process pressure, supply pres-
sure, controller output pressure, and if applicable, re-
mote set point pressure with external gauges.
Process Indicator Zero and Span
Calibration
Before starting this procedure:
Provide a regulated process pressure to the con-
troller and a means of measurement external to the
controller.
Provide a means of measuring the controller out-
put pressure by connecting the controller output to a
pressure gauge (open loop conditions must exist).
Provide a regulated supply pressure to the controller.
Do not exceed the normal operating pressure in table
1–6.

 Loading...