5
DISCRIMINATION POINTS
By adjusting the TRASH REJECTION control you will be able
to reject (or “discriminate”) small pieces of metallic trash
and ground minerals while detecting valuable targets. The
lowest setting at which an object is rejected is referred to as
the object’s “discrimination point.” Discrimination points are
determined by such factors as size, shape, depth, type of metal
and ground mineralization.
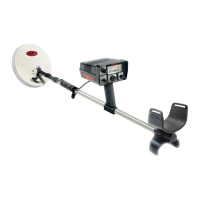
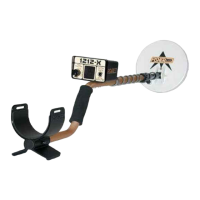
Typical 1212-X audio responses over 1 inch deep targets with
search coil sweeping 2 to 3 inches above ground.
Note that the terms “discrimination” and “trash rejection” are
used interchangeably.
1. Scatter some sample targets such as coins, pull
tabs and small pieces of foil on the ground 1 to 2
feet apart.
2. Turn the TRASH REJECTION control to zero.
3. Hold the search coil about 2 inches above and
parallel to the ground. Move it slowly over the
samples and note the sharp loud response as you
pass over each one. Keep in mind that the 1212-X
is a motion detector and responds only when the
search coil (or the target) is moving.
4. Increase the TRASH REJECTION control to a
setting of 3 and again pass over the targets.
Repeat this process at settings 4, 5, 6 and so on
to 10. You will note that as you increase the level
of trash rejection, the 1212-X will reject some
targets and continue to respond to others. You
have now determined the discrimination points for
the rejected objects. For example, the small nail
discrimination point may be at 4 and the pull tab
discrimination at 6.
5. The 1212-X will remain silent when some objects
are rejected, however, other objects may “snap,
crackle and pop” as they are rejected. This is a
perfectly normal response indicating that the
powerful discrimination circuitry is doing its job.
6. Large pieces of trash such as beer cans or jar
lids may sound like a good target no matter what
 Loading...