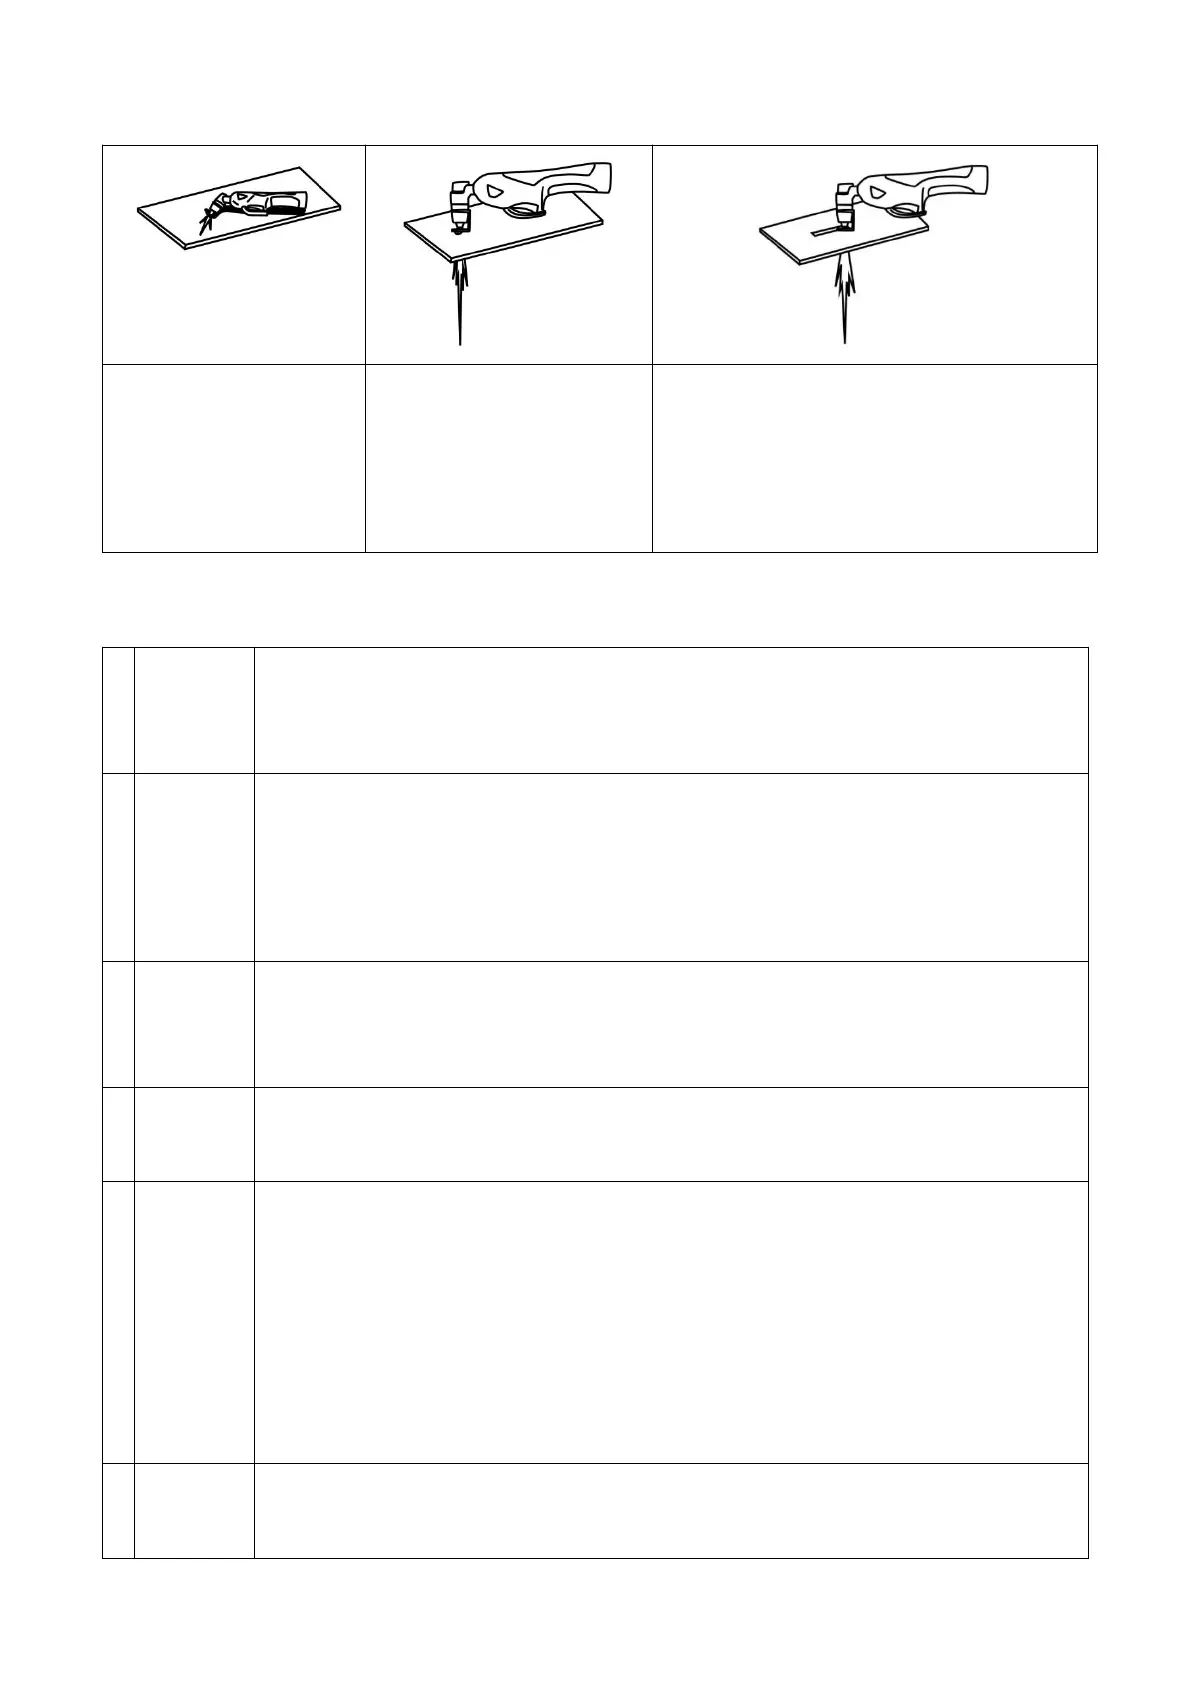
3.3.2 Piercing Cutting
Hold the torch at an angle to
the work piece, pull the trigger
to start the arc and slowly
rotate it to an upright position.
Pull the trigger to start the
arc ,The cutting arc will initiate
when the torch tip is close
enough to the work Piece. Start
cutting on the edge until the Arc
has cut completely through.
When the pierce is complete, Control the cutting
speed and adjust the angle and position of the cutting
torch to continue the cutting operation.Too fast speed
will lead to incomplete cutting, and arc blowback is
easy to damage the device. Too slow speed will lead
to excessive scum and cutting gap.
3.3.3 Cutting performance
1 Amperage Standard rule of thumb is the thicker the material the more amperage required. On thick material, set
the machine to full output and vary your travel speed. On thinner material, you need to turn down the
amperage and change to a lower-amperage tip to maintain a narrow kerf. The kerf is the width of the
cut material that is removed during cutting.
2 Speed Amperage and speed are critical to producing a good quality cut. visually follow the arc that is coming
from the bottom of the cut. The arc should exit the material at a slight angle away from the direction of
travel. If it's going straight down, that means the speed is too slow, and IT will have an unnecessary
buildup of dross or slag. If the speed is too fast, it will start spraying back onto the surface of the
materia without cutting the work piece completely. Because the arc trails at an angle, at the end of a
cut, slow your cutting speed and angle the torch in to cut through the last bit of metal.
3 Direction It is easier to pull the torch towards you than push it. The plasma stream swirls as it exits the tip, biting
one side and finishing off on the other leaving a bevelled edge and a straight edge. The bevel cut effect
is more noticeable on thicker material and needs to taken into consideration before starting your cut as
you want the straight side of the cut to be on the finished piece you keep.
4 Torch tip
height &
position
The distance and position of the plasma torch cutting tip has an affect on the quality of the cut and the
extent of the bevel of the cut. The easiest way to reduce bevel is by cutting at the proper speed and
height for the material and amperage that is being cut.
5 Tip size
and
condition
The tip orifices focus the plasma stream to the work piece. It is important to use the correct size tip for
the amperage being used,for example a tip with a 3/64" orifice is good for 0-40 amps whereas a 1/16"
orifice is better for 40-80 amps.
The low-amp tip has a smaller orifice which maintains a narrow plasma stream at lower settings for use
on thin-gauge material. Using a 25 amp tip at an 60 amp setting will blow out and distort the tip orifice
and require replacement.
Conversely, using an 80-amp tip on the lower settings will not allow you to focus the plasma stream as
well and creates a wide kerf.The condition of the tip orifice is critical to the quality of the cut result, a
worn or damaged tip orifice will produce a distorted plasma stream resulting in a poor cut quality.
6 Electrode
condition
A fixed gap is established between the electrode and the inside of the cutting tip. Electrons arc across
the gap, ionizing and super heating the air creating the plasma stream. The electrode contains an
insert in the end made of a highly conductive material called hafnium. This insert erodes with use and