How to level the build plate
1. Tighten the three leveling nuts under the build platform until you cannot tighten them any more.
2. Select the PlateLeveling.x3g on the control panel, and tap [OK] to start leveling.
Then tap [OK] for page-turning to read the leveling instructions.
3. The build plate and nozzle will start to move. Wait for them to stop, then adjust the corresponding knob
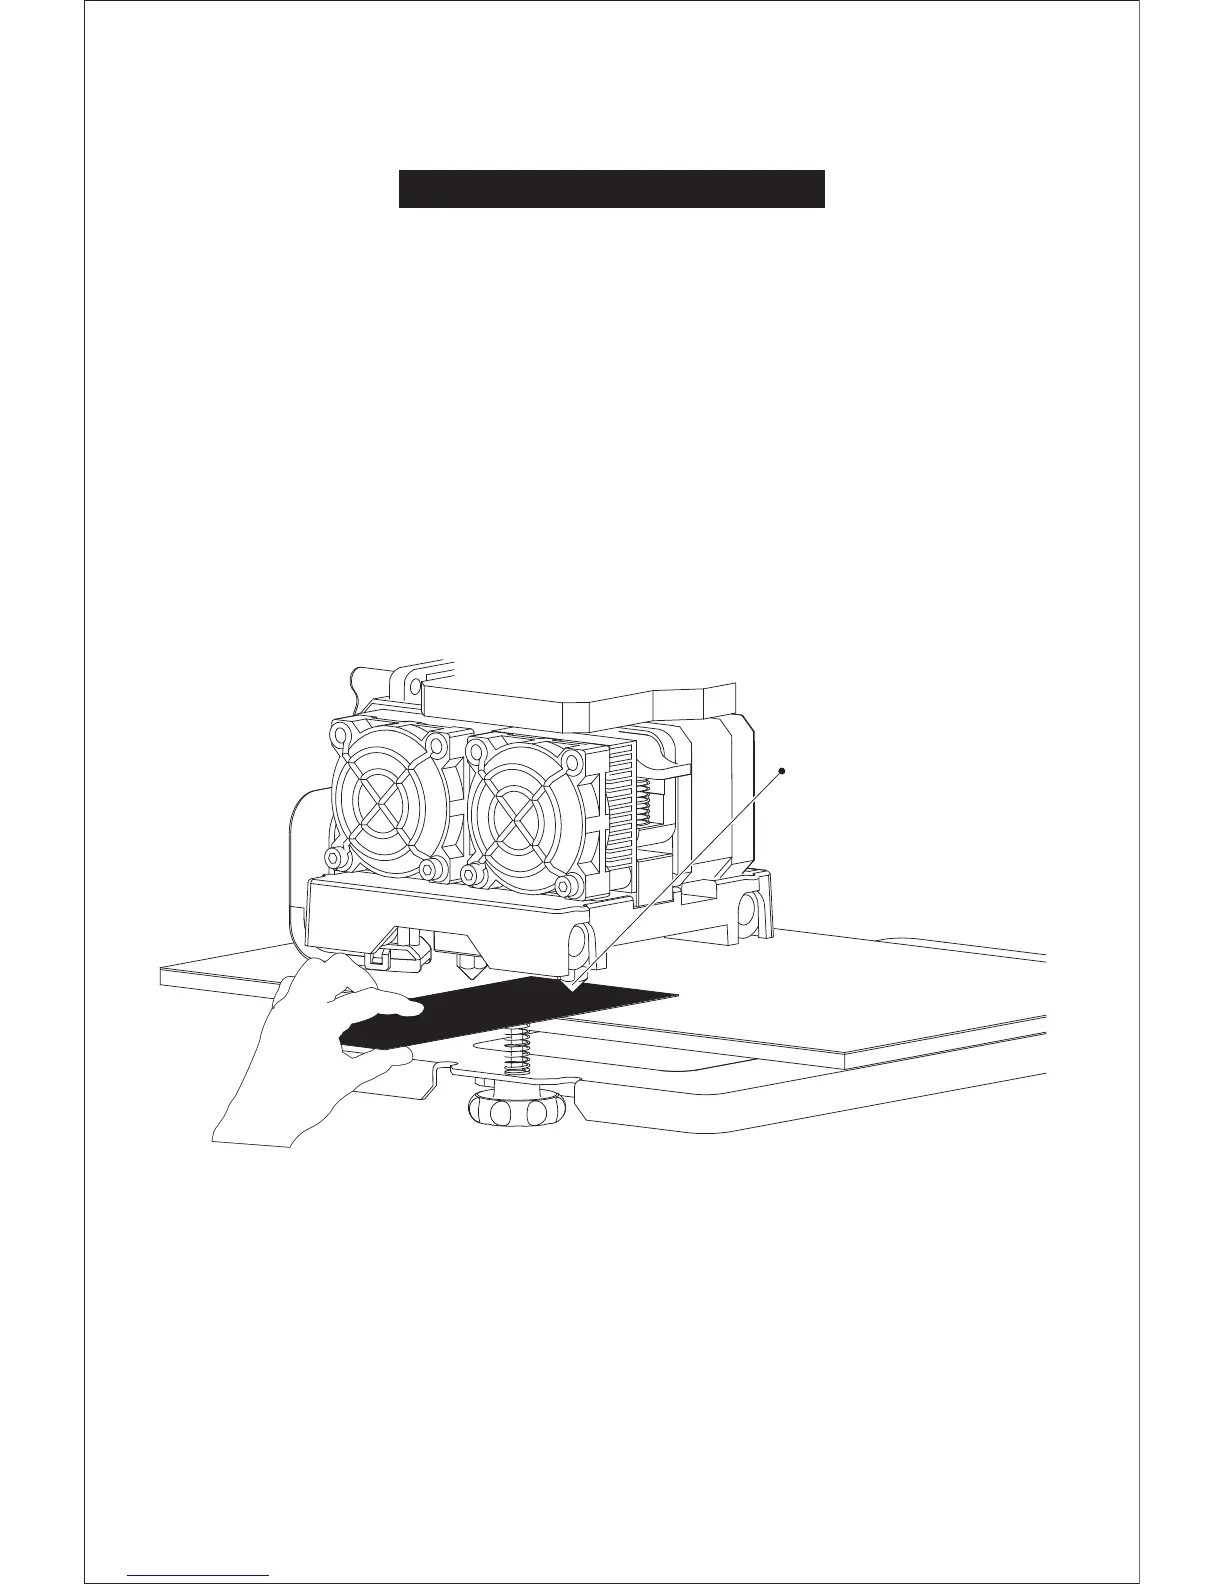
under the right nozzle first using the leveling card.
4. The leveling card should slide between the nozzle and build plate with some friction/resistance.
If the card slides through easily, the nozzle and build plate are too far apart. Rotate the knob clockwise to
decrease the distance between them. If the card cannot slide through, rotate the knob anticlockwise.
5. After leveling the first point, tap [OK] to continue to the next point.
6. Adjust all three knobs as outlined above. Then, check that the nozzle is also correctly placed when it is
at the center of the build plate, using the leveling card. That's it!
Start the adjustment process with
the right nozzle, then use the distance
between it right nozzle and build
plate as a reference.
12