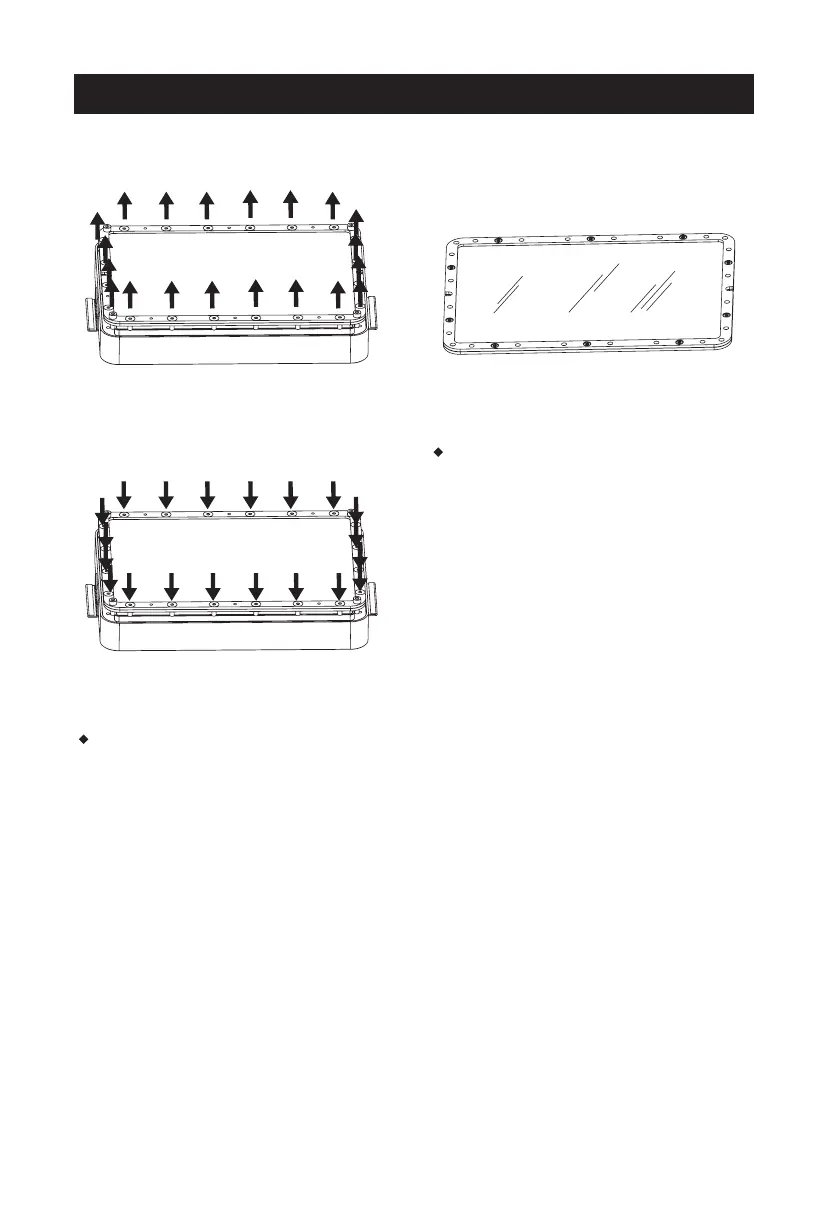
Replace the FEP film in the resin box
1. Loose the screws at the bottom of the
resin box to remove the film fixing frame
and remove the overused FEP film.
2. Align the FEP film with the screw holes
and clamp it between the two fixing
frames; then tighten the screws.
Note: There are upper and lower sides
of the frame; please verify the correct
side through the screw holes.
Please refer to the following steps when install or replace the FEP film.
3. Re-install the film fixing frame to the bottom of the resin box and tighten the
screws to make the FEP film tense. Then pour the water or resin into the resin
box to check if there is leakage. Replace the FEP film and re-install it if there is.
Note: please take care of the FEP film in the above steps to avoid damage and dirt.
11