11
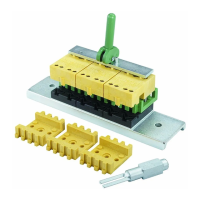
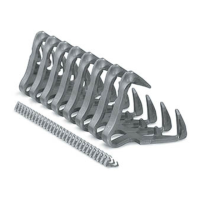
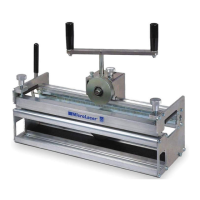
1. From top side of belt, install end two teeth on both belt edges halfway in.
2. Flip belt over and install fastener teeth on bottom side of belt halfway in
across entire splice width.
3. Flip belt back over and nish installing remaining teeth on top side of belt.
4. Repeat on bottom side of belt.
5. Use a hardened steel plate and nal set the lacing.
Be sure to use a soft piece of wood under the fastener when rst applying lacing. This
allows the teeth to fully penetrate the belt.
Troubleshooting
Lacing Teeth Do Not Fully Penetrate Belt and Clinch Over
1.
Lacing should be ush with belt surface.
2. Points should slightly penetrate opposite side of belt.
3. Loops of lacing should not be crushed and will easily
accept the hinge pin.
1
3
Ensure the following installation procedures have been followed. NOTE: Steps 1-4 are
performed using the soft piece of wood as a backing plate.
Be sure to use gauge pin and clips when applying Alligator Lacing. This will ensure a
uniform loop across the entire width.
Hinge Pin is Difcult to Insert
Loops may have been crushed with direct hammer blows. Use caution when installing
fasteners and do not hit the loops.
Failure to follow proper lacing installation sequence as described above in Steps 1-5 can
cause points on non-bar side of lacing to wander and not penetrate correctly. This can
cause a distortion in the loop area, making pin insertion very difcult.
2
ALLIGATOR
®
LACING
Identifying a Properly
Installed Alligator
®
Lacing
Splice