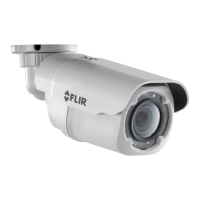
GET TO KNOW YOUR FLIR FX
1
3
4
2
5
6
7
8
9
10
12
13
14
15
11
1. Latch: Lock or unlock camera
inside mount. Both latches
must be firmly locked to ensure
weatherproof rating of the mount.
2. Camera: You can remove the
camera to use on its own or with
one of the other accessories. See
FLIR.COM/FX for instructions.
3. Accessory Connector: Slide
the camera all the way right to
remove it from the mount or all
the way left to connect it.
4. Outdoor Night Vision LEDs: See
further in the dark.
5. Lens Cover: Keep the lens cover
clean using a slightly damp cloth.
Don’t use chemical cleaners as
they may damage the lens cover.
6. Microphone: Record sound and
communicate.
7. Speaker: Communicate via 2-way
intercom.
8. Adjustment Ring: Loosen to adjust
the horizontal position of the camera.
9. Vertical Adjustment Screw: Loosen
to adjust the vertical position of the
camera.
10. Sunshade: Protects your camera from
sun glare. To remove, straighten the
camera arm and slide the sunshade
backwards.
11. QR Code: Scan during setup using the
FLIR FX app.
12. Twist Adjustment Screw: Loosen to
twist the camera head around the
stand.
13. Temperature Sensor.
14. Mounting Holes: Mount the camera to
the wall or ceiling.
15. Power Cable: Run the power cable
through the cable notch on the stand
or through the wall.
CAUTION: Make sure the power connector
and power outlets are protected from the
elements when installing.
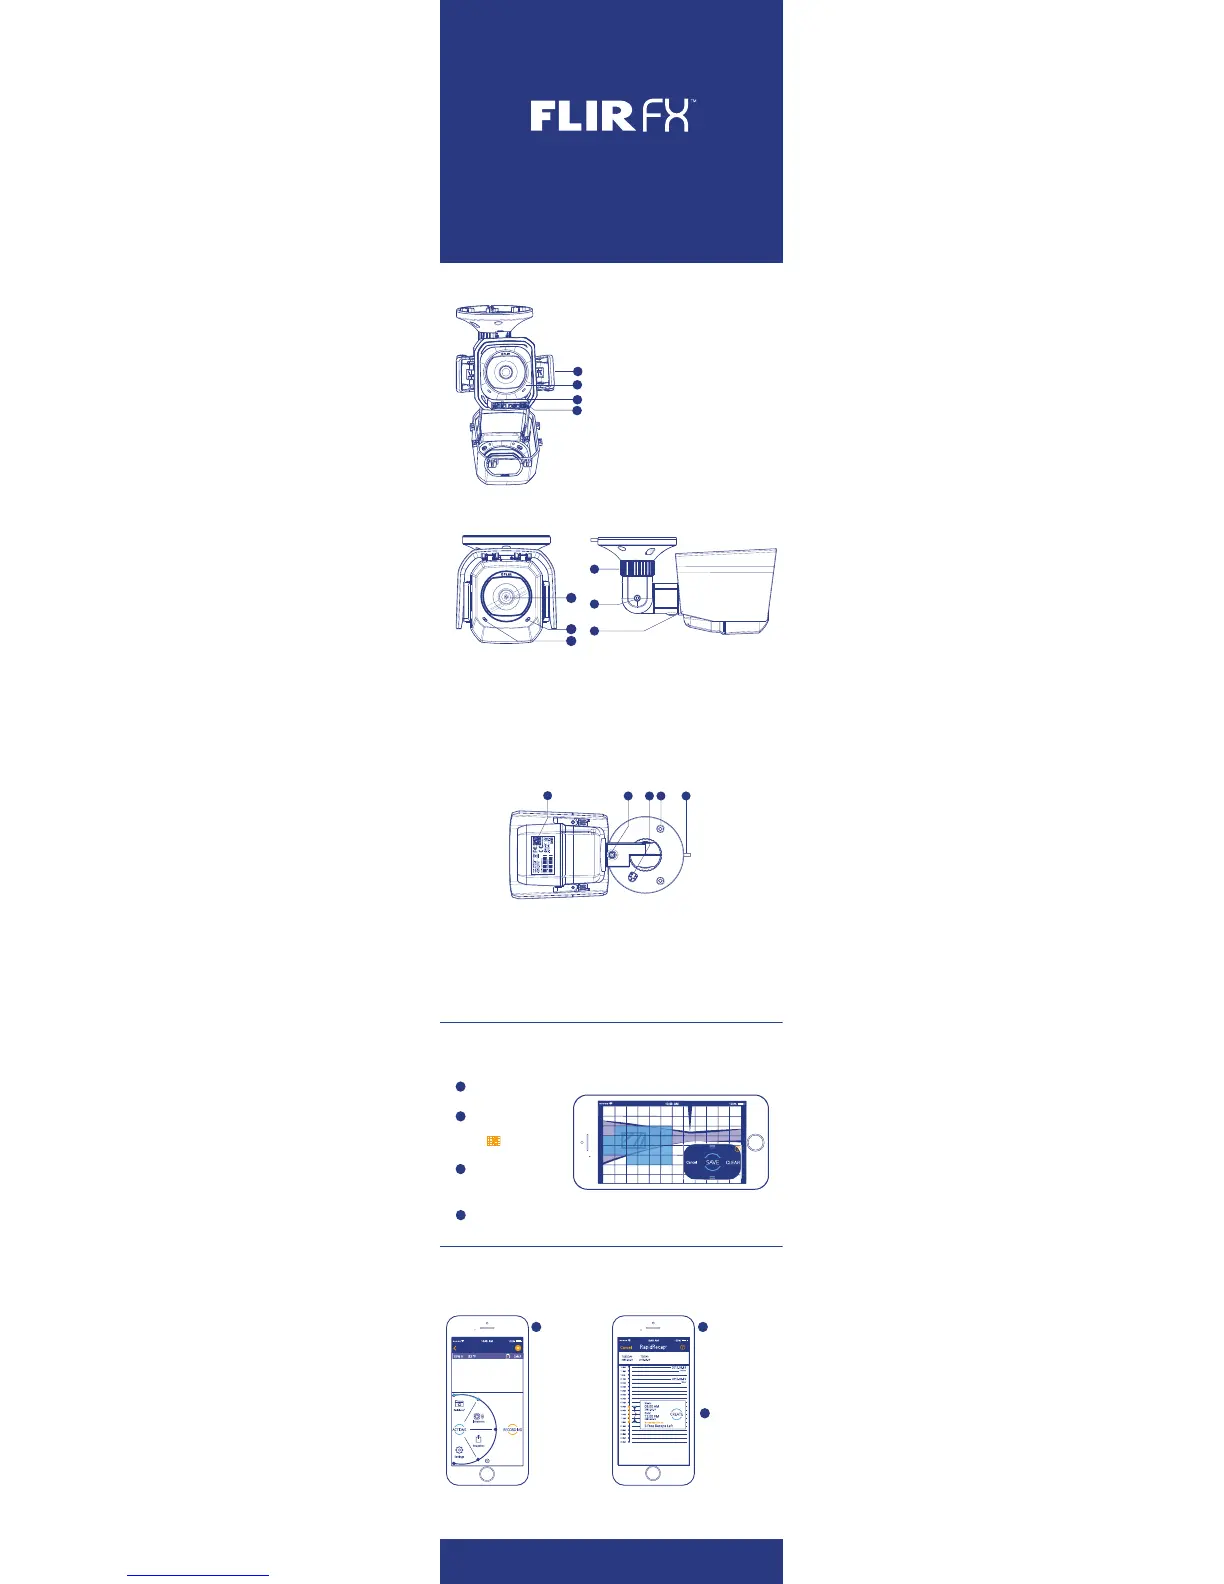
SMARTZONE™
RAPIDRECAP™
1
2
Tap the Actions
button and then tap
RapidRecap.
Select the start and
end time for your
RapidRecap.
• Select the day
at the top of the
screen
•

 Loading...