Operation
7
7.11.2 Change settings
Follow this procedure:
1. In the bottom bar, tap the Imaging Control.
2. Tap the IR Scale icon. The scale will appear on the left side of the screen, with the
high and low temperatures labeled.
3. To adjust the color mapping, press and hold the bar and slide it up or down. You can
also tap the measurements and then manually type in your selected limits.
7.12 Lock Span
7.12.1 General
The Lock Span function locks the temperature range of colors in the display to the scene
you are currently looking at. This can be useful when you, for example, want to compare
the temperature of two objects: lock the span when looking at one of the objects, and
then move the focus to the other object to see any differences in color.
7.12.2 Change settings
Follow this procedure:
1. In the bottom bar, tap the Imaging Control.
2. To hold the temperature range of the scene, tap the Lock Span icon.
3. To return to auto-scaling of the scene, tap the Lock Span icon again.
7.13 Selfie Mode
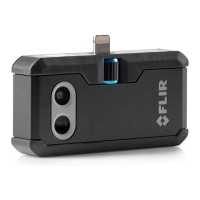
It is possible to use the FLIR ONE camera in Selfie Mode.
7.13.1 Change settings
Follow this procedure:
1. In the bottom bar, tap the Imaging Control.
2. Tap the Selfie Mode icon.
3. On the phone, change the position of the FLIR ONE camera so that it is facing you.
7.14 Measuring
7.14.1 General
You can place a spot or an area on the screen that measures the surface temperature of
any object in the scene. Up to three spots, three rectangles, and three circles can be
used at the same time in the Live image view.
The accuracy depends on many factors, including the distance from the object, the ambi-
ent temperature, and the emissivity of the material being observed. Users are encour-
aged to learn more about the science of thermography from
www.infraredtraining.com.
7.14.2 Add a spot meter or an area of interest
Follow this procedure:
1. In the top bar, tap the Spot Meter icon. A list of Spots, Rectangles, and Circles
appears.
2. Tap the plus sign.
3. In the Live image view:
• Tap and hold the spot or area to move it around the screen.
• Pinch to adjust the size of the areas.
#T810375; r. AA/51295/51295; en-US
13

 Loading...