Flitescooter assembly
Fitting the Flitescooter bladder to the core requires proper technique
as the fitment between the two are tight for maximum strength. We
recommend doing this process with two people, at least the first few times.
1 Place the rigid core (Flitebox cavity side up) on a flat, smooth surface
to avoid scratching the carbon finish on the core.
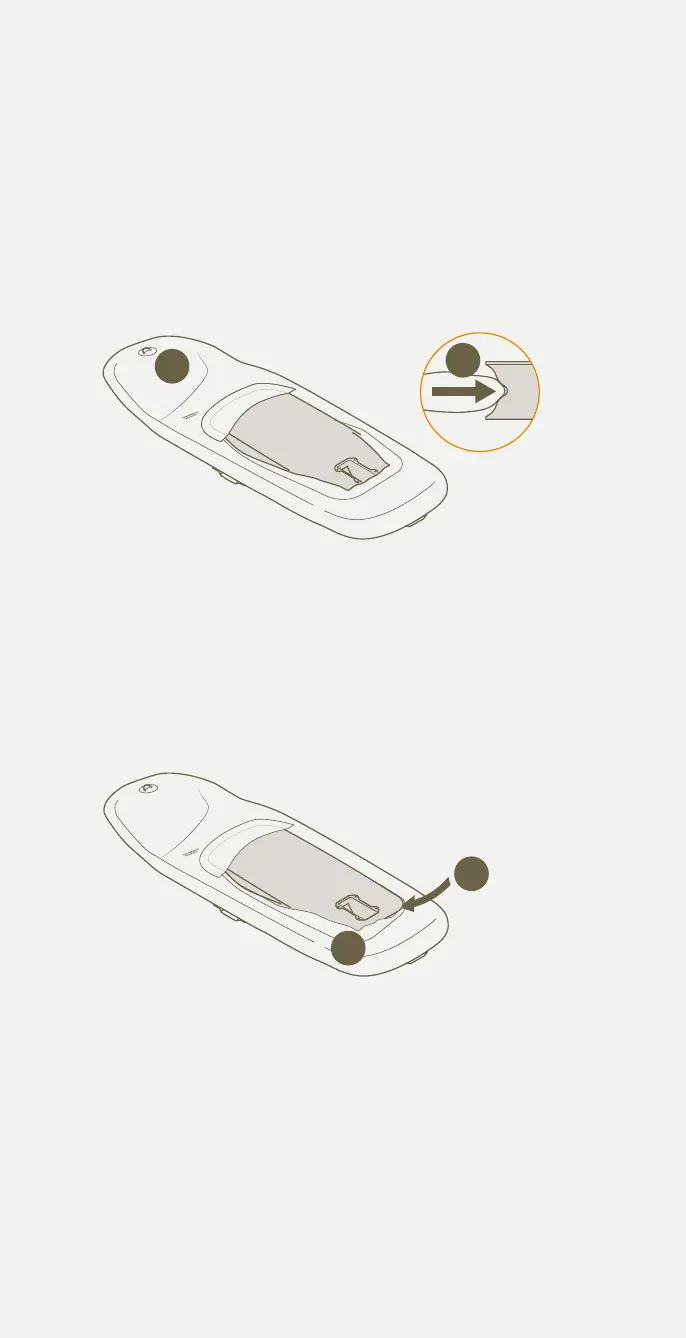
2 Unroll Flitescooter bladder face down.
3 Slide bladder onto core from front end first, maintaining the bladder
flap above the core.
4 Ensure bladder is well tucked into the recess along the front edge of
the core.
5 Carefully stretch bladder over one rear corner first.
NOTE THAT THE REAR UNDERSIDE EDGES OF THE CORE ARE
DELIBERATELY SHORTER THAN THE TOP FACE TO MAKE FITMENT OF
THE BLADDER EASIER. WARM MILD SOAPY WATER SOLUTION MAY BE
APPLIED TO THE FLITESCOOTER BLADDER TO ASSIST WITH FITMENT
AND EASE OF ALIGNMENT. RINSE OFF SOAP SOLUTION WITH FRESH
WATER AFTER FITMENT IS COMPLETE.
6 To stretch bladder over the other rear corner, you will likely need two
people. While one person pulls on the bladder, the other person can
tap the bladder down with the palm of their hand to get it over the
core and into place. If you don’t have a second person to assist with
fitting the bladder, you could carefully place your foot in the Flitebox
cavity to get leverage for stretching it over the final rear corner.
7 Be careful that the bladder is positioned evenly and not creased or
caught. Check bladder is seated correctly around the core before
carefully flipping the Flitescooter over.
DO NOT USE ANY OBJECTS TO GET LEVERAGE FOR FITTING THE
FINAL REAR CORNER AS IT COULD DAMAGE THE CORE. PLACE ON
A SMOOTH, SOFT SURFACE TO AVOID SCRATCHING THE CARBON
FINISH ON THE CORE.
5
6
3
4
OLD UPDATES
5
6
3
4
OLD UPDATES
5
6
3
4
OLD UPDATES
5
6
3
4
OLD UPDATES
5
6
20
 Loading...