Connect the eFoil to Flitescooter
1 Place the inflated Flitescooter upside down on a clear surface.
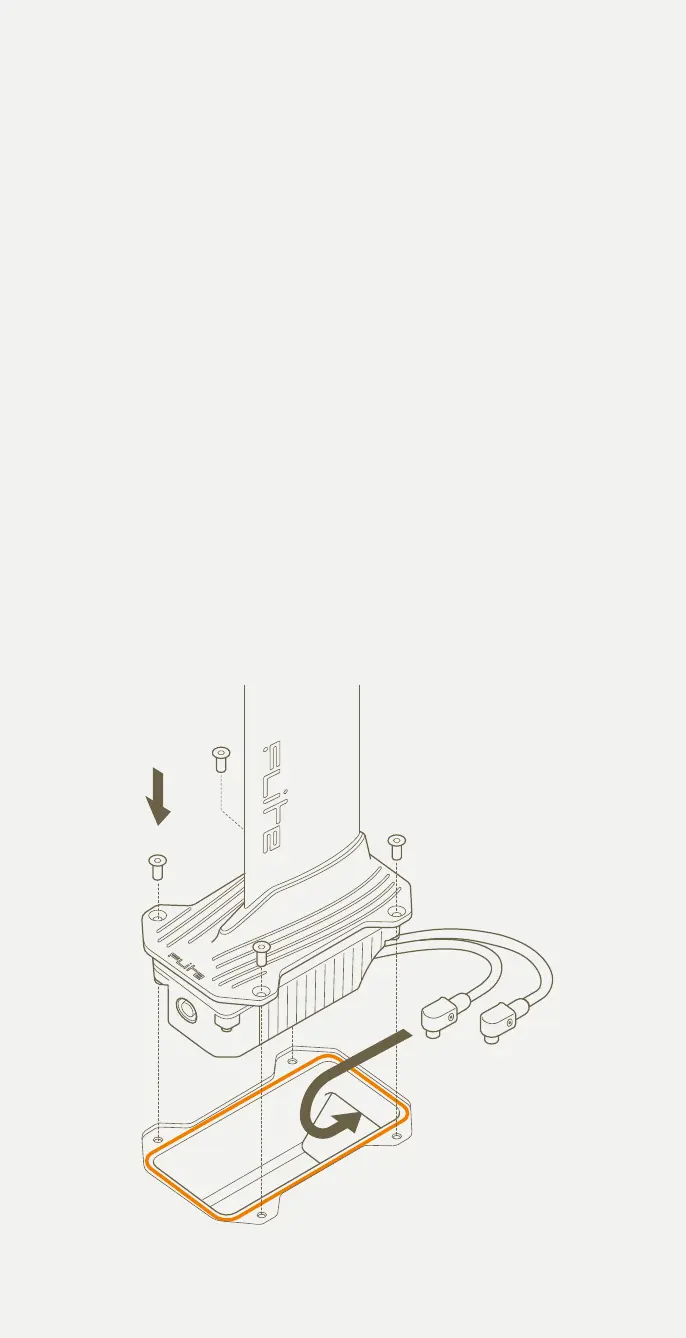
Locate the Flitebox cavity on the bottom of the board and ensure
the 4 retaining screws are removed.
2 Check to ensure the orange o-ring is inserted, properly seated in the
Flitebox cavity o-ring groove, clean and free of sand, grit or water.
3 Carefully lift the eFoil from its bag and place the Flitebox into the
cavity. While doing this ensure the power cables feed through into
the Flitescooter cavity.
4 Ensure the Flitebox is properly seated in the cavity and flush with the
board surface.
5 Add a thin layer of Tef-Gel to the 4 x 20mm stainless steel hex
fasteners. Tighten them in a cross pattern, first using your fingers
to ensure the threads are properly engaged, and then using the
supplied hex key. Medium force (a torque of 6 Nm) needs to be
applied when using the long arm of the hex key to ensure the
fasteners are tight.
6 When properly tightened, the eFoil should be secured and the o-ring
compressed. Failure to properly tighten the fasteners or fit the o-ring
will result in a board leak.
7 Be careful not to over-tighten the fasteners as this could result in
stripped threads or damaged fasteners.
22
 Loading...