Installing Flite Jet
Your Flitescooter is supplied with Flite Jet, the recommended propulsion
unit for safety and stability. We recommend connecting the eFoil to the
Flitescooter first for safer and easier installation of Flite Jet.
1 Connect the eFoil to the Flitescooter.
2 Check the fuselage thread is clean and free of sand, grit or water.
3 Check the Flite Jet thread is clean and free of sand, grit or water.
Wipe clean if necessary.
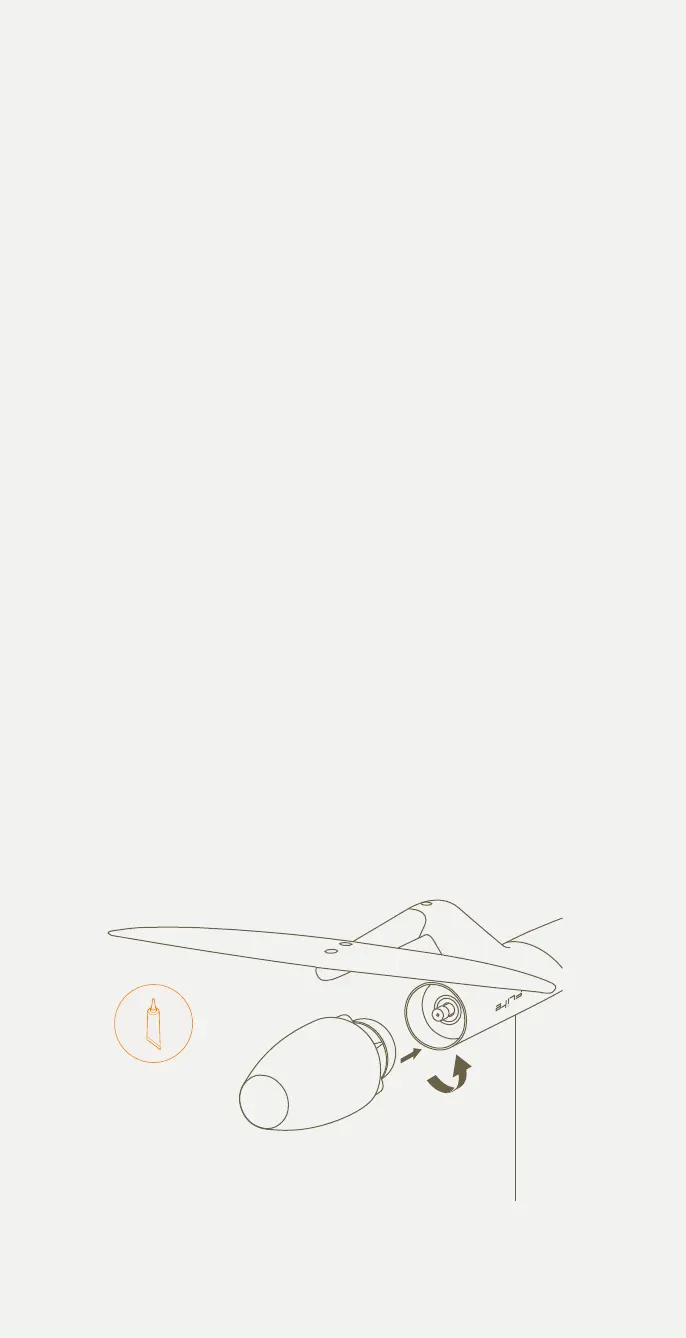
4 Apply a small amount of Tef-Gel to the thread of Flite Jet.
5 The Dual Drive system uses a reverse thread. Install Flite Jet by
rotating ANTI-CLOCKWISE until there is no gap between the jet and
fuselage. This should be just finger tight.
6 If there is any resistance during installation, remove the Flite Jet
completely to check for sand and grit. Try again without using
excessive force. Rotate until the gap is closed.
7 Pair the Flite Controller and check that 'Jet' is displayed on the
Speed / Gear screen. Jet mode adjusts the virtual gears for a better
experience when using Flitescooter.
Add a thin layer of Tef-Gel periodically to the threads of the Flite Jet
module. For troubleshooting tips, you can visit the Support page on our
website.
Fliteboard's Dual Drive system allows you to swap between Flite Jet and
the Flite Propeller module with a Pro Tail Cover quickly, without using tools.
Please be aware that swapping to Flite Propeller has inherent risks and may
be prohibited by local regulations. Where permitted, we recommend that
Flite Propeller always be used with the Prop Guard.
TEF-GEL
23
 Loading...