Connect the fuselage tail
Turning on Flitescooter
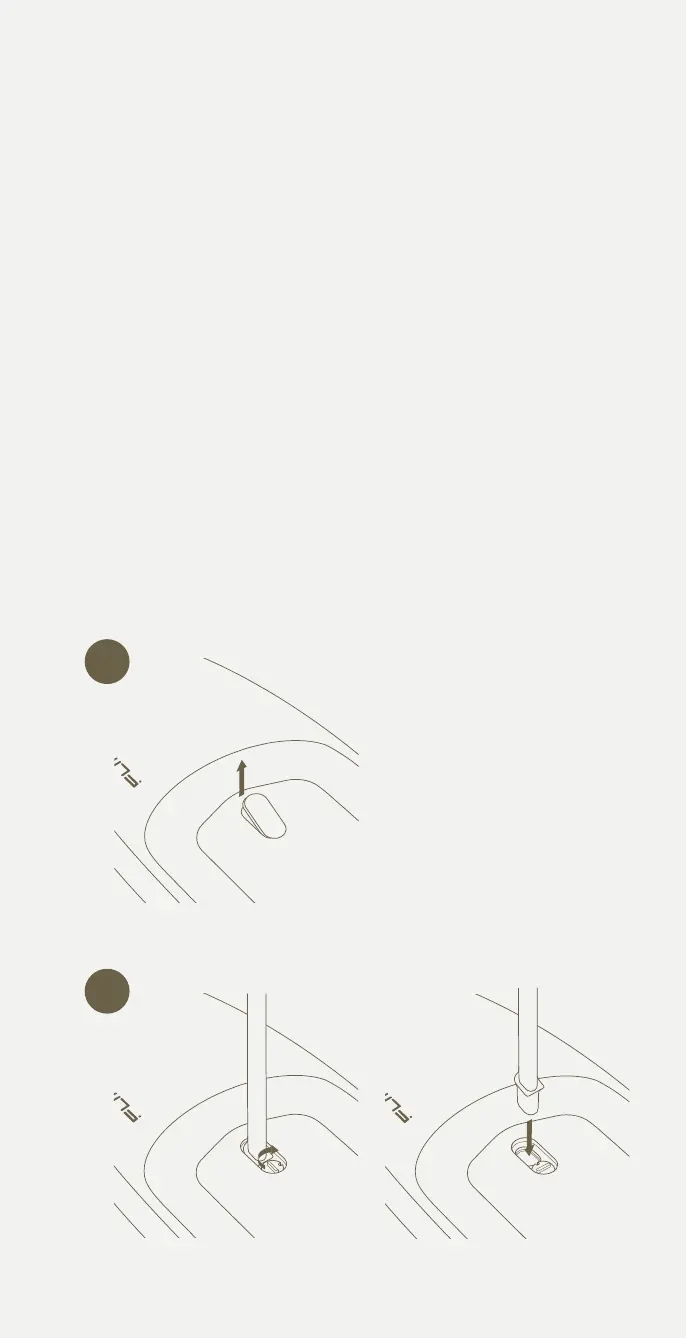
Place the inated Flitescooter
on a clear surface. Locate the
handlebar cap and remove
by gently pulling up
Turn the handlebar lock
counterclockwise so that the
opening lines
up with the handlebar cavity.
Insert the handlebars into the
handlebar cavity. Turn the
handlebar
lock clockwise until it stops.
This will keep the handlebars
locked into
place.
Flitescootering for the rst time
Arming the motor
Connect the front wing
Connect the stabliser
Connect the handlebars to Flitescooter
Flitescooter's excellent buoyancy allows you to step on from a dock or
pontoon. If you are starting in the water, do step 2 and 3 from the shore,
then float your board with the eFoil facing up to just over waist deep. From
there, you can flip your Flitescooter and insert the handlebars.
1 Ensure the eFoil is paired to Flite Controller before going in the water.
2 Locate the handlebar cap and remove by gently pulling up.
3 Turn the handlebars upside down and place the Flite Controller wrist
strap over the bottom of the handlebars. Carefully slide the wrist
strap to the very top by holding onto Flite Controller.
4 With your other hand, lift the latch on the back of the handlebars.
Place Flite Controller into the cradle of the handlebars and close the
rear latch.
5 Turn the handlebar lock counterclockwise so that the opening lines
up with the handlebar cavity.
6 Check the handlebar cavity is free of sand and grit.
7 Insert the handlebars into the handlebar cavity. Turn the handlebar
lock clockwise until it stops. This will keep the handlebars locked
into place.
Connect the fuselage tail
Turning on Flitescooter
Place the inated Flitescooter
on a clear surface. Locate the
handlebar cap and remove
by gently pulling up
Turn the handlebar lock
counterclockwise so that the
opening lines
up with the handlebar cavity.
Insert the handlebars into the
handlebar cavity. Turn the
handlebar
lock clockwise until it stops.
This will keep the handlebars
locked into
place.
Flitescootering for the rst time
Arming the motor
Connect the front wing
Connect the stabliser
2
7
39
 Loading...