10
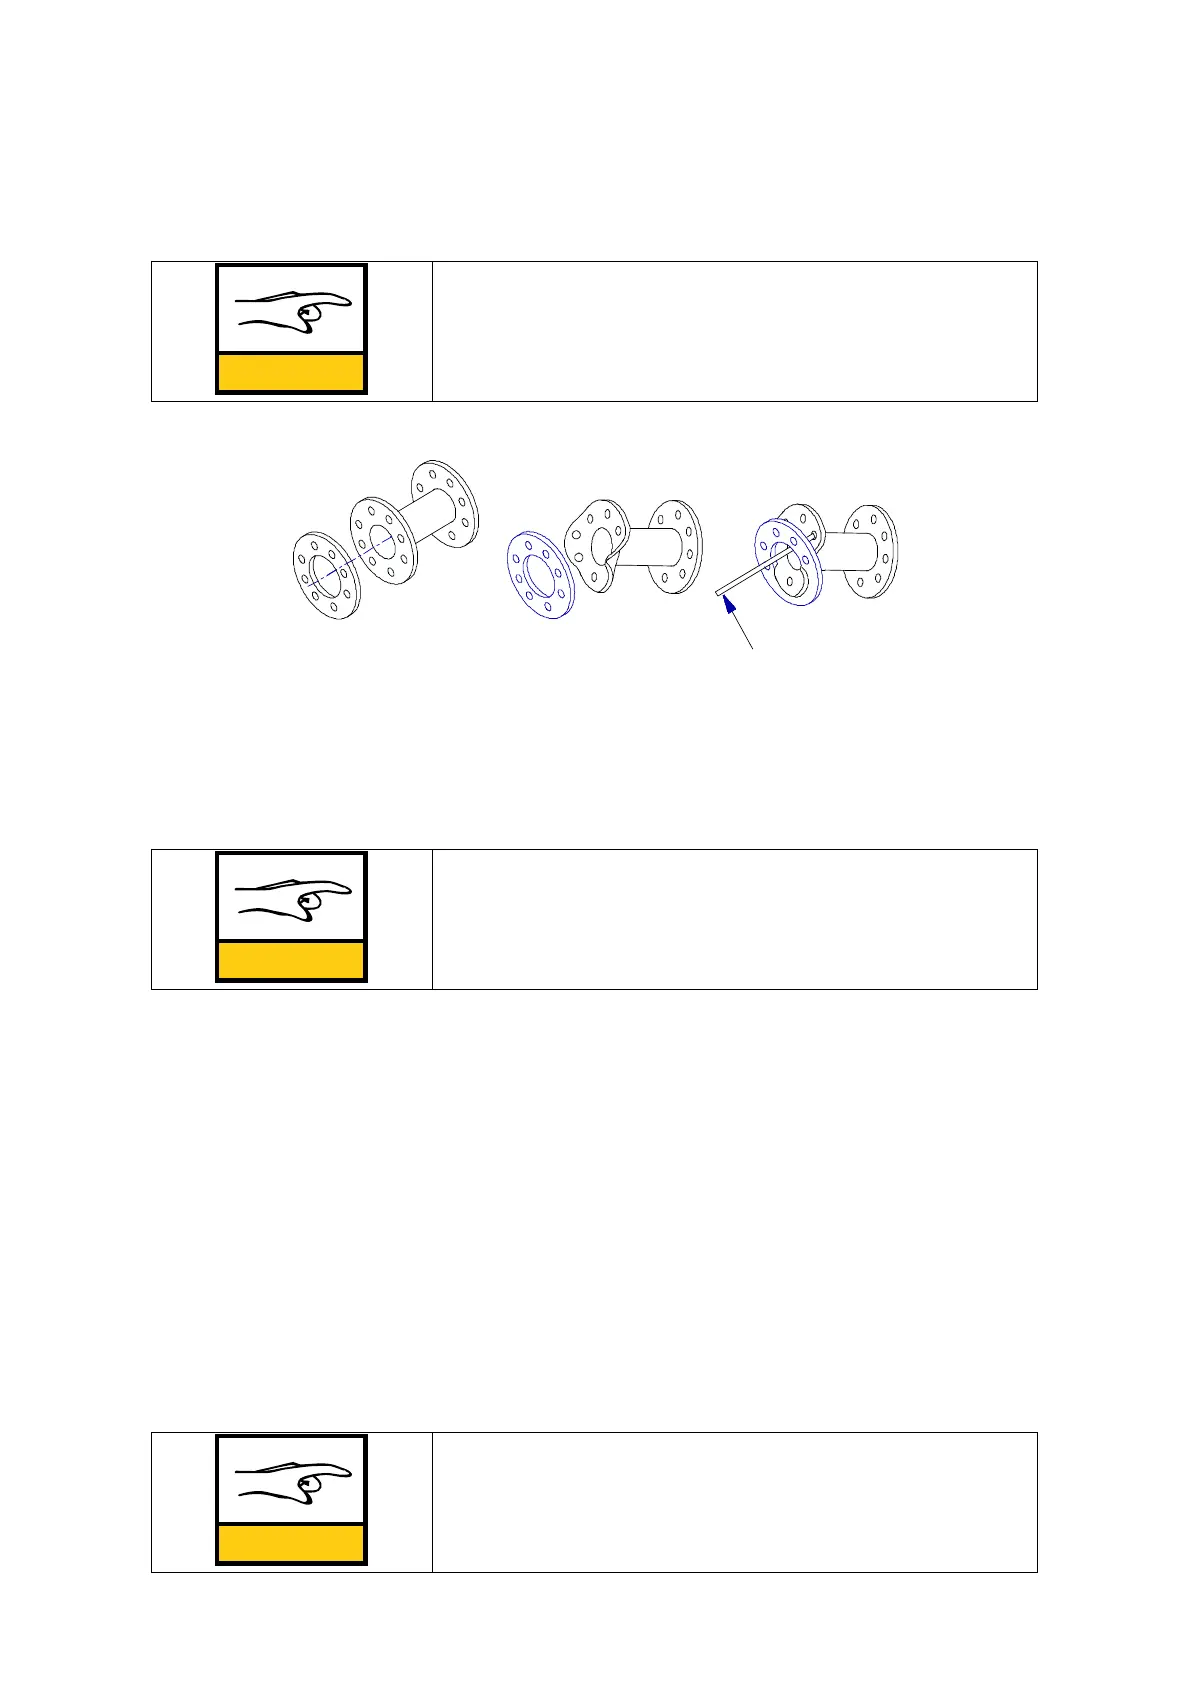
Put in the new sleeve by pressing the rubber flange on the opposite sides together,
pushing its edge as far as possible through the steel flange and wrenching the rest of the
sleeve through the flange e.g. with a pry bar / bending iron (see Fig. 9).
NOTE
The rubber flange of the sleeve allows bending. Do not
damage the sleeve with a sharp tool.
Fig. 9.
After putting in the new sleeve, fix the opening tags to the pinch bars. The excessive
length of the tags can be cut away. Adjust the pinch bars before installing to the
pipeline.
NOTE
At sleeve change, it is always important to check and
adjust the position of the pinch bars. See 6.3.
6.2.2
Changing valve sleeve with enclosed model valve PVE
See appendix B. (Part numbers refer to drawing number 410006 in appendix A). Open the
valve and detach it from the pipeline. Open the bolts (6.) between the valve body halves
and detach the lower part of the body. If the valve has opening tags, detach them (16.)
from upper (2.) and lower pinch bars (3.), 8 pcs screws (Fig.8). Take out the damaged
sleeve and put in a new one. If the sleeve is stiff, detach the lower pinch bar. Remember
to fix the opening tags if applicable. Check the body sealing (15.) between the body
halves and the condition of the bushings (4.). A worn sealing and/or worn bushings may
cause leakage to the environment in the event of a sleeve breakage. Assemble the valve
and adjust the pinch bars before installing the valve to the pipeline.
NOTE
At sleeve change, it is always important to check and
adjust the position of the pinch bars. See 6.3.