FlowAct Diaphragm Linear Actuator FCD VLENIMFACTA4 10/16
32
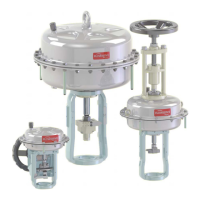
Actuator with Stroke Limitation
Spring-to-close or -open
Disassembly instruction of the stroke limitation
subassembly
NOTICE
Limit disassembly only to necessary compo-
nents.
1. Fix the actuator on the assembly table, if this is not
already happened.
2. Loosen the hex nut (379) counter-clockwise.
3. Remove the plain washer (376), cover (381) and the
pipe section (387).
4. Unlock the lock nuts (350, 2x) counter-clockwise.
5. Loosen the lock nut (256) counter-clockwise.
NOTICE
Use a rounded chisel and a hammer.
6. Lift off the stroke limitation assembly (333 - 389).
7. Unlock the lock nuts (350, 2x) counter-clockwise.
8. Store all stroke limitation-parts safely, lose no parts.
9. For disassemble the actuator subassembly see pages
24 - 25.
Reassembly instruction of the stroke limitation
subassembly
10. Lubricate the threads of the actuator and stroke limita-
tion-parts with an appropriate lubricant.
11. Mount the lock nuts (350, 2x) clockwise.
12. Place the stroke limitation assembly (333 - 389) and
the lock nut (256) onto the actuator.
13. Mount and tighten the lock nut (256) clockwise.
NOTICE
Use a rounded chisel and a hammer.
14. Mount the lock nuts (350, 2x) clockwise.
15. Connect the actuator with the air supply. Control the
air supply until the desired upper and lower stroke po-
sition is approached. Position the lock nuts (350) at
the end positions and secure them.
16. Place the pipe section (387) onto the flange (389).
17. Place the flange (381) onto the pipe section (387).
18. Mount the washer (376) and hex nuts (379) and finger
tighten.
19. Reassemble the yoke and coupling parts, perform
three full strokes then check on the stroke indicator
whether the desired positions are achieved.
20. Log the maintenance interval and the work performed.
21. The actuator subassembly is ready to be mounted on
the valve and the accessories attached.