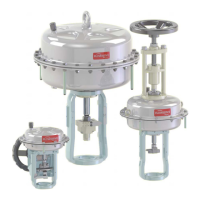
FlowAct Diaphragm Linear Actuator FCD VLENIMFACTA4 10/16
36
Item #
Part
WW EU
201 5.9 Yoke
213 5.7 Stroke Scale
214 5.20 Socket Head Screw
216 5.6 Stroke Indicator
240 5.5 Socket Head Screw (2x)
249 5.3 Actuator Coupling
256 5.11 Actuator Locknut
271 6.50 O-Ring
278 6.51 O-Ring
344 5.4 Lock Nut
345 5.1 Valve Coupling
1)
420 5.8 Hex Bolt
1)
Depending on the valve series (see page 7).
Table 24: Actuator parts
Actuator
278
271
256
240
344
249
345
216
214
201
213
420
Figure 21: Actuator parts
Actuator with IAS-yoke
Spring-to-close or -open
Disassembly instruction of the yoke
NOTICE
Limit disassembly only to necessary compo-
nents.
1. Fix the actuator on the assembly table, if this is not
already happened (see also pages 14 - 15).
2. Remove the socket head screw (214) and the stroke
indicator (216).
3. Unlock the lock nut (344) counter-clockwise.
4. Loosen the actuator coupling (249) and lock nut (344)
clockwise.
5. We recommend you not to remove the actuator from
the yoke. If this is indispensable mark the position,
loosen the actuator locknut (256) clockwise and lift off
the actuator and O-ring (271).
NOTICE
Use a rounded chisel and a hammer.
6. Store all coupling and yoke-parts safely, lose no parts.
7. For disassemble the attachments see pages 26 - 33
and for actuator subassembly see pages 18 - 25.
Reassembly instruction of the yoke
8. Lubricate the threads of the actuator and stroke cou-
pling-parts with an appropriate lubricant.
9. If necessary mount new O-rings (278, 271) and the ac-
tuator onto the yoke (201) put in line with the mark and
tighten the actuator locknut (256) counter-clockwise.
The vent plug shall be at a right angle to the yoke legs.
NOTICE
Use a rounded chisel and a hammer.
10. Screw in the lock nut (344) and the actuator coupling
(249) - screw-in depth once thread diameter - counter-
clockwise and fix it. Aligning the coupling parallel to
the yoke.
11. Further reassembling steps are only possible with the
valve (see page 39).