FlowAct Diaphragm Linear Actuator FCD VLENIMFACTA4 10/16
52
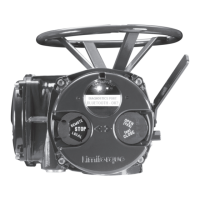
Actuator with Handwheel - central
Spring-to-open
Disassembly instruction of the handwheel subas-
sembly
NOTICE
Limit disassembly only to necessary compo-
nents.
1. Fix the actuator on the assembly table, if this is not
already happened.
2. Disassemble the coupling parts (see page 54).
3. Loosen the hex socket set screw (370) counter-clock-
wise.
NOTICE
The handwheel must be in the neu-
tral position.
4. Remove the handwheel (372).
WARNING
Crushing hazard ! The
actuator stem is under
spring load. Never disconnect the air supply during
next steps, the stem will retract very quickly.
5. Connect the air supply to the actuator and move the
actuator stem into extended position.
6. Loosen the slotted set screw (405) and unscrew the
stem end stop (350) counter-clockwise.
7. Disconnect the air supply, the actuator stem will move
into retracted position.
8. Loosen the slotted set screws (405, 3x) counter-clock-
wise and push the cover tube (352) down.
9. Loosen the lock nut (256) clockwise and lift off the
actuator.
NOTICE
Use a rounded chisel and a hammer.
10. Unlock the hex nut (353) counter-clockwise.
11. Unscrew the stem extension unit (221) clockwise.
12. Store all handwheel-parts safely, lose no parts.
13. For disassemble the actuator subassembly see pages
42 - 49.
Reassembly instruction of the handwheel subas-
sembly
NOTICE
Always replace parts showing wear with
new parts.
14. Lubricate the threads of the actuator and handwheel-
parts with an appropriate lubricant.
15. Mount the lock nut (353) counter-clockwise onto the
actuator stem.
16. Mount the stem extension (221) counter-clockwise
onto the actuator stem in such a way that the correct
thread screwing depths are given, lock the lock nut
(353) clockwise.
17. Arrange the lock nut (256) onto the cover tube (352).
18. Carefully place the actuator assembly onto the hand-
wheel.
NOTICE
The handwheel must be in the neu-
tral position.
19. Mount and tighten the lock nut (256) counter-clock-
wise.
NOTICE
Use a rounded chisel and a hammer.
20. Push the cover tube(352) upwards until it stops and
lock the slotted set screws (405, 3x) clockwise.
WARNING
Crushing hazard ! The
actuator stem is under
spring load. Never disconnect the air supply during
next steps, the stem will retract very quickly.
21. Connect the air supply to the actuator and move the
actuator stem into extended position.
22. Mount the stem end stop (350) and lock the slotted set
screw (405) clockwise.
23. Disconnect the air supply, the actuator stem will move
into retracted position.
24. Place the handwheel (372) onto the transmission shaft
of the bevel gear and secure it with the hex socket set