9
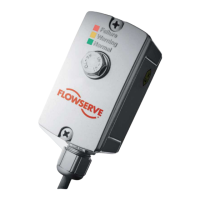
Battery Removal: To replace battery, remove the eight (8) (PH-13) screws that hold the
electronic assembly to the meter assembly. Remove the electronic housing, one battery will be
found on the back side. Remove and dispose of used battery.
Battery Replacement: Install the new battery into the batter holder. Note the polarity marking,
(+) and (-), shown for the battery. Place the gasket and electronic assembly onto the meter
assembly. Re-install the eight (8) screws to secure the electronic assembly to the meter
assembly.
Meter Chamber Removal
! CAUTION !
EXPOSURE TO CHEMICALS CAN CAUSE BODILY HARM. BEFORE DIS-ASSEMBLING,
THOROUGHLY FLUSH THE METER WITH WATER. ALWAYS WEAR GLOVES AND
PROPER EYE PROTECTION WHILE WORKING WITH CHEMICALS.
! CAUTION !
ENSURE THAT THE METER IS NOT UNDER PRESSURE BEFORE CONTINUING.
Remove the eight (8) (PH-13) screws to remove electronic assembly (S10-11 COMPLETE).
Remove the four (4) (PH-03) screws that secure the meter plate (S10-02N) to the fluid housing
(S10-05N). Remove the meter plate and O-ring (S10-03). The meter chamber can now be
removed for cleaning or replacement.
Meter Assembly Procedure
Ensure that the bottom O-ring (S10-04) is in place. Insert the meter chamber into the fluid
housing (S10-05N). Place O-ring (S10-03) around the bottom of meter plate (S10-02N) and
place on top of the fluid housing. Secure with four (4), short screws (PH-03). Torque the
screws to 25-28 inch-pounds. Install the gasket (S10-06) and the electronic assembly (S10-
01N-ASSY-R1) using the eight (8), long screws (PH-13). Torque to 25-28 inch-pounds.