FlowCam® 8000 Series Dynamic Imaging Particle Analyzer
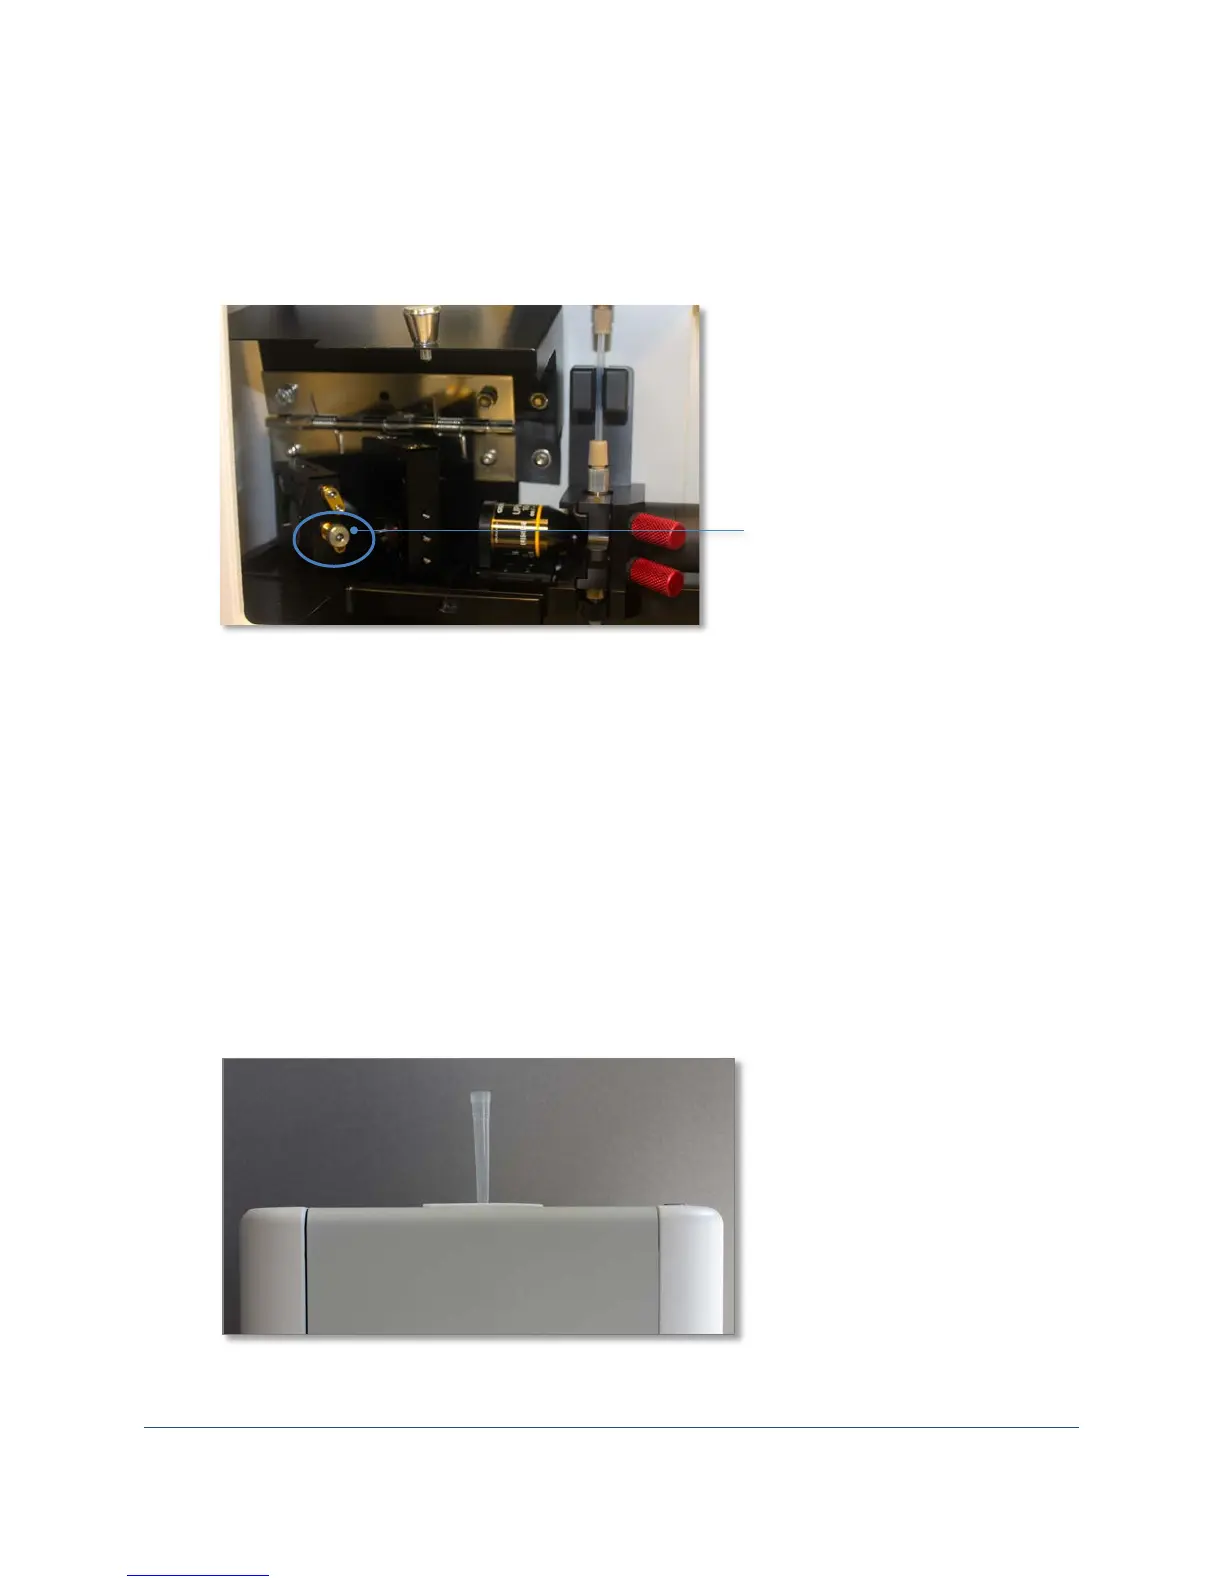
2. If necessary, align the flow cell to the correct position using the positioning knob located to the
left of the flow cell assembly in the interior of the analyzer. The flow cell can be moved left and
right.
Note: The red lines need to be positioned within the gray lines, which represent the walls of the
flow cell. Align the red indicator lines as close as possible within the flow cell.
3. Click the Autofocus button. The Autofocus Assistant opens. Click Next and and follow the
onscreen prompts.
4. Confirm that you have the correct objective lens, flow cell and syringe installed, and click Next.
5. Select the desired autofocus algorithm option (Best Bead Count or Best Focus Image) and click
Next.
Note: Select the algorithm depending upon whether you are running uniform materials for
primarily counting, or varied particles for image quality. The stage assembly orients itself
depending upon the selection after the routine is completed.
6. Place a pipette tip into the sample introduction port on the top of the analyzer and add at least
0.5 mL of focusing sample. Click Next. The pump draws the sample into the flow cell and the
analyzer begins the autofocus process.
Important: Apply some pressure to ensure the tip is securely in the port to prevent air from
being drawn into the system.
7. When the autofocus process finishes, a message appears indicating success. Click Start Flush to
flush the solution from the system. The pump continues until you click Stop.
Flow cell positioning knob
 Loading...